10 Useful WordPress Loop Hacks
The loop is a very important aspect of WordPress blogs. In fact, the loop is what allows you to get posts from your WordPress database and print them on the screen. A set of useful and user-friendly functions, the loop is incredibly powerful. With it, you can get a single post, a list of posts ordered by date, title or category, a list of posts written by a specific author and much more.
In this article, we’ll show you 10 useful things you can do with the WordPress loop to make your blog even more powerful than it is right now.
1. Get Posts Published Between Two Dates

Image source: Shutterstock
The problem.
The loop and the query_posts() WordPress function allow you to easily retrieve a list of posts published in a specific week or month. Unfortunately, getting posts published between, for example, March 17 and May 3 isn’t that easy. Let’s solve this problem.
The solution. Simply paste the following code wherever in your theme you’d like to display the list of posts published between two dates. Don’t forget to replace the dates in the example with yours.
<?php function filter_where($where = ’) {
        $where .= " AND post_date >= '2009-03-17' AND post_date <= '2009-05-03'";
    return $where;
  }
add_filter('posts_where', 'filter_where');
query_posts($query_string);
while (have_posts()) :
      the_post();
      the_content();
endwhile;

?>
Code explanation.
To achieve this hack, I first create a function named filter_where(), which contains an SQL “WHERE” condition. Then, before starting the loop, the filter_where() function is hooked into WordPress’ post_where() function.
As a result, the “WHERE” clause contained in the filter_where() function is added to the end of the SQL query contained in the post_where() function, which means that the loop will return posts published only between the two dates specified in the filter_where() function.
Source
2. Use More Than One Loop On A Page, Without Printing Duplicate Posts

The problem. Most modern themes and all “magazine” themes display at least two loops on the blog’s home page; these can be used, for example, for a “featured posts” section. While using two loops is very easy to do, preventing duplicate posts from displaying is not… until, that is, you learn this easy method of preventing them.
The solution.
Let’s start with the first loop. Nothing hard here: we’re just going to get the eight most recent posts using the
showpostsparameter. Open the index.php file, and paste the following code to output your “featured” posts:<?php query_posts('showposts=8'); $ids = array(); while (have_posts()) : the_post(); $ids[] = get_the_ID(); the_title(); the_content(); endwhile; ?>Once that’s done, it’s time to apply our second loop and get all posts, excepted the ones we have already outputted in the first loop:
<?php
query_posts(array('post__not_in' => $ids));
while (have_posts()) : the_post();
the_title();
the_content();
endwhile;
?>
Save your index.php file and admire the results!
Code explanation.
The first loop starts with the very useful query_posts() function, which allows you to specify a wide range of parameters to be used by the loop. The showposts parameter allows you to get the specified number of posts. Just before the loop starts, I create a PHP array named $ids, which will receive all IDs of the posts returned by this loop.
Like the first one, the second loop uses the query_posts() function with the post__not_in parameter. This parameter allows you to specify a list of posts that you don’t want to be displayed, in the form of a PHP array. As you probably saw, I passed the $ids array to this parameter so that any posts returned by the first loop would be returned again by the second loop.
3. Insert Ads After The First Post
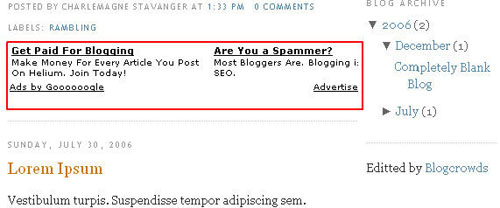
The problem. Advertising is a good way to monetize your blog. But to get advertisers, your ads must receive clicks by your visitors. Many bloggers display ads on the blog sidebar, footer or header, which isn’t always great with click-through rates. To obtain more clicks on your ads and make your advertisers happy, inserting them after the first post is a good idea. Let’s see how to do this in the WordPress loop.
The solution. Simply use the following loop instead of your current loop. Don’t forget to insert your ad code on line 6:
<?php if (have_posts()) : ?>
<?php $count = 0; ?>
<?php while (have_posts()) : the_post(); ?>
<?php $count++; ?>
  <?php if ($count == 2) : ?>
          //Paste your ad code here
          <h2><a href="<?php the_permalink(); ?>"><?php the_title(); ?></a></h2>
          <?php the_excerpt(); ?>
   <?php else : ?>
          <h2><a href="<?php the_permalink(); ?>"><?php the_title(); ?></a></h2>
          <?php the_excerpt(); ?>
  <?php endif; ?>
<?php endwhile; ?>
<?php endif; ?>
Code explanation.
Since the early days of programming, integer variables have been a common operation to use as a counter. This is exactly what I’ve done here: just before the loop starts, a $count variable is created. This variable increases by an increment of 1 with each result returned by the loop.
Then, you just have to add an if structure (line 5) and see if $count is equal to 2. If it is, it means that the first post has already been returned and we can display the ads.
Source
4. Get Posts With A Specific Custom Field And Specific Value
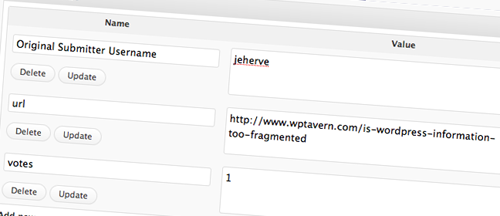
The problem. Because of the popularity of WordPress’ custom fields, you will often want to be able to output a list of posts with a specific custom field and specific value. While so simple for advanced WordPress users, beginners continue to ask me about this on my blogs. So, here’s the correct and easy way to achieve this.
The solution.
Not hard at all. We only have to use the query_posts() function with the meta_key and meta_value parameters:
<?php query_posts('meta_key=review_type&meta_value=movie');  ?>
<?php if (have_posts()) : ?>
<?php while (have_posts()) : the_post(); ?>
Code explanation.
Definitely nothing hard here. To get only posts with a specific custom field and specific value, you have to use the query_posts() function with the meta_key and meta_value parameters. The meta_key value is the name of the desired custom field, and meta_value is the desired value.
Source
- How to Only Show Posts With a Specific Custom Field
- Easily get posts with a specific custom field/value on your WordPress blog
5. List Upcoming Posts

The problem. Thanks to the “schedule post” option, our favorite blogging platform allows us to write a post and schedule it to be published later. To make sure your readers come back to your blog or subscribe to your RSS feed, listing your upcoming posts is a good idea.
The solution.
<?php query_posts('showposts=10&post_status=future'); ?>
<?php if ( have_posts() ) : while ( have_posts() ) : the_post(); ?>
    <h2><?php the_title(); ?></h2>
    <span class="datetime"><?php the_time('j. F Y'); ?></span></p>
<?php endwhile;
else: ?><p>No future events scheduled.</p>
<?php endif; ?>
Code explanation.
To achieve this, I used the query_posts() function with an interesting parameter called post_status. The post_status parameter allows you to get posts according to their published status (“published,” “draft” or, like in this example, “future”). Because I also added the showposts=10 parameter, this code will not return more than 10 upcoming posts.
Source
6. Display Posts Published One Year Ago
The problem. Many blogs have so much content and some very good older posts that should not be ignored. But most visitors end up seeing only the freshest content.
The solution. If your blog is relatively old, why not showcase posts that were published over a year ago? Doing this is simple. Just insert the following code in your blog sidebar or single.php file.
<?php
$current_day = date('j');
$last_year = date('Y')-1;
query_posts('day='.$current_day.'&year='.$last_year);
if (have_posts()):
    while (have_posts()) : the_post();
       the_title();
       the_excerpt();
    endwhile;
endif;
?>
Code explanation.
The first thing was to get today’s number, which we did on line 2, using the PHP date() function. Then, we had to get last year’s number, which we easily did by taking date(‘Y’) (which returns the current year) and subtracting 1, giving us last year’s number.
Once that’s done, we only have to pass the $current_day and $last_year variables to the day and year parameters of the query_posts WordPress function.
As an aside, if for some reason you want only today’s posts, just delete line 3 and replace line 4 with the following:
query_posts('day='.$current_day);Source
7. Use The Loop To Create An “Archive” Page Template
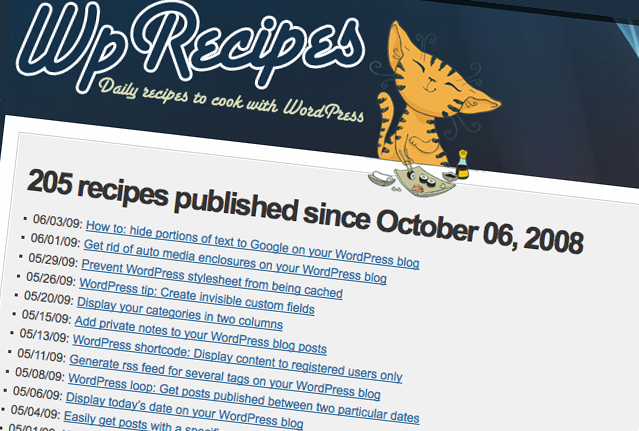
The problem. As noted in the previous hack, a common problem on blogs is that it is hard for readers to find content published a while ago.
To help my readers finding what they’re looking for, I created a WordPress page template that displays a list of all posts ever published on my blog. You can see a live demo of this hack on WpRecipes.
The solution. If you don’t know what a page template is or how to use one on your blog, you should first read this quick post to get started.
<?php
/*
Template Name: Archives
*/
?>

<?php get_header(); ?>

  <h2><?php $numposts = $wpdb->get_var("SELECT COUNT(*) FROM $wpdb->posts WHERE post_status = 'publish'");
if (0 < $numposts) $numposts = number_format($numposts); ?>
<h2><?php echo $numposts.' recipes published since October 06, 2008'; ?>
  </h2>

  <ul id="archive-list">
    <?php
    $myposts = get_posts('numberposts=-1&');
    foreach($myposts as $post) : ?>
      <li><?php the_time('m/d/y') ?>: <a href="<?php the_permalink(); ?>"><?php the_title(); ?></a></li>
    <?php endforeach; ?>
  </ul>

<?php get_sidebar(); ?>
<?php get_footer(); ?>
Code explanation. The first thing to do is create a “page template.” A page template is created by adding the following lines to the top of the file:
<?php
/*
Template Name: Archives
*/
?>
An interesting part of this code is the post counter (line 8). This is done by creating a PHP variable named $numposts and using the $wpdb object to get the result from the SQL query sent to WordPress database.
Once that’s done, we simply have to display the $numposts variable, and the total number of posts on your blog will be printed on the screen.
Now, let’s have a closer look at the loop used in this code. As you probably saw, this code doesn’t use the classic loop but rather uses the get_posts() function. get_posts() is a simple tag for creating multiple loops. We first take all posts from the engine and for each of these posts we present the date, the link and the title of the post. Simple and effective.
Source
8. Create Your Own WordPress Loops Using The WP_Query Object
The problem. The classic WordPress loop, which is used in most hacks in this post, is both useful and user-friendly. However, particularly when using a lot of custom loops (for example, in complex “magazine” layouts), you risk problems with resetting, offsetting, invalid conditional tags and other annoyances.
The solution.
The solution is to use the WP_Query object and create your very own loop:
<?php
$myPosts = new WP_Query();
$myPosts->query('showposts=5');

while ($myPosts->have_posts()) : $myPosts->the_post(); ?>
   the_title();
   the_content();
endwhile;

?>
Code explanation. The code above displays your five most recent posts. Here is what this code does in detail:
- On line 2, I created a new
WP_Queryobject, named$myPosts. - On line 3, I executed a query using the
showpostsparameter to get only the five most recent posts. - On line 5, our custom loop starts.
- On line 6 and 7, we simply print some basic post information (title and post content)
- On line 8, our custom loop ends.
If you want to display more or less than five posts, simply change the value of the showposts parameter on line 3.
Source
9. Get Only The Latest Sticky Posts
The problem. Introduced in WordPress 2.7, sticky posts are a very cool feature of our favorite blogging platform. A lot of WordPress users ask how to get only sticky posts in the loop.
The solution. To display your five most recent sticky posts, just paste the following code anywhere in your theme files. If you want to display more or less sticky posts, just change the 5 to the desired value on line 4.
<?php
$sticky = get_option('sticky_posts');
rsort( $sticky );
$sticky = array_slice( $sticky, 0, 5);
query_posts( array( 'post__in' => $sticky, 'caller_get_posts' => 1 ) );

if (have_posts()) :
    while (have_posts()) : the_post();
        the_title();
        the_excerpt();
    endwhile;
endif;

?>
Code explanation.
The first thing was to get all sticky posts (line 2). Then, we re-ordered them, displaying the most recent ones at the top, using the PHP rsort() function (line 3). On line 4, we got the five most recent sticky posts. As mentioned, you can change the amount of posts retrieved by changing 5 to any other value.
Once that’s done, we use the query_posts() function to control the WordPress loop. Using the post__in parameter, we can make sure that the retrieved posts are contained in an array of values. This array is indeed our $sticky variable. Then, we just set up a basic loop and display the desired information from the post on the screen.
Sources
10. Create A Loop Of Images

The problem. Nowadays, most blogs display post excerpts on the home page along with an image. How about being even more original and providing readers with a nice “gallery” page, listing however many of your recent posts, and displaying each post’s lead image? Of course, we can easily achieve this with custom fields; but believe it or not, custom fields aren’t necessary.
The solution. To create our loop of images, we first need a PHP function that can grab the first image from each post and return its URL. To do this, paste the following function in your functions.php file. Don’t forget to define a default image on line 10.
function catch_that_image() {
  global $post, $posts;
  $first_img = ’;
  ob_start();
  ob_end_clean();
  $output = preg_match_all('/<img.+src=['"]([^'"]+)['"].*>/i', $post->post_content, $matches);
  $first_img = $matches [1] [0];

  if(empty($first_img)){ //Defines a default image
    $first_img = "/images/default.jpg";
  }
  return $first_img;
}
Once you’ve saved the functions.php file, you are now ready to display your image loop.
<?php
if (have_posts()) :
    while (have_posts()) : the_post(); ?>
        <a href="<?php the_permalink();?>" title="<?php the_title(); ?>" class="img-loop">
        <img src="https://www.smashingmagazine.com/wp-content/uploads/images/wordpress-loop-hacks/<?php echo catch_that_image() ?>" alt="<?php the_title(); ?>" />
        </a>
    endwhile;
endif;
?>
Code explanation.
The first part of this code is the catch_that_image() function that we inclued in our functions.php file. Basically, this function parses the post’s content using the $post and $posts global variables as well as a PHP regular expression. If no image is found (i.e. the post doesn’t have one), the default image URL is returned. Otherwise, the function returns the URL of the first image in the post.
The second part of the code is the loop itself, and there’s absolutely nothing hard about it. In fact, it is just a basic loop with no text content is displayed. Instead, the first image from the post is displayed, using the catch_that_image() function.
Sources
- Retreive First Image From Post
- How to: Get the first image from the post and display it
Related posts
You may be interested in the following related posts:
- 100 Amazing Free WordPress Themes For 2009
- Custom Field Hacks For WordPress
- 10 Exceptional WordPress Hacks
- 15 Useful Twitter Hacks and Plugins For WordPress
- Mastering WordPress Shortcuts


 SurveyJS: White-Label Survey Solution for Your JS App
 Agent Ready is the new Headless


