PNG Optimization Guide: More Clever Techniques
This post is a second part of the article Clever PNG Optimization Techniques that we posted last week. As a web designer you might be already familiar with the PNG image format which offers a full-featured transparency. It’s a lossless, robust, very good replacement of the elder GIF image format. As a Photoshop (or any other image editor) user you might think that there is not that many options for PNG optimization, especially for truecolor PNG’s (PNG-24 in Photoshop), which doesn’t have any. Some of you may even think that this format is “unoptimizable”. Well, in this post we’ll try to debunk this myth.
This post describes some techniques that may help you optimize your PNG-images. These techniques are derived from laborious hours spent on studying how exactly the PNG encoder saves data. We’ll talk about grayscale, how to use fewer colors for optimization and also about reducing detail to minmize the file size.
You may want to take a look at the following related articles:
Grayscale
Photoshop can’t save grayscale PNGs, so you would have to use OptiPNG after saving black-and-white images, like this:
optipng -o5 bw-image.png
Grayscale images takes much less space than RGBs, because each pixel described with only one byte, not three:

PNG-24 (Photoshop → true-color), 8167 bytes.

PNG-24 (Photoshop + OptiPNG → grayscale), 6132 bytes
Setting the Grayscale color mode (Image → Mode → Grayscale) for images prior to saving them in PNG is very important, especially for semi-transparent images (see Dirty transparency method for more information).
Fewer Colors
This is an alternative to the Posterization method of reducing colors in an image. Posterization can dramatically change the colors in your image, which is unacceptable if you have to blend the image into the background of your website. This method gives you more control over color but is limited to 256 colors.
The method is basically to extract image data from the semi-transparent image (i.e. remove transparency), convert it to an indexed color and apply the original mask. Reducing the amount of colors will make image data stream packing by the PNG compressor more effective. Let’s see how it works.
1. Open the original image in Photoshop and duplicate it (Image → Duplicate).
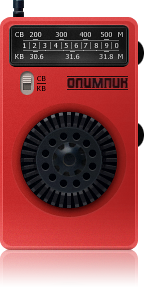
63 KB
2. Remove transparency from the duplicated image (Filter → Photo Wiz → Remove Transparency):
3. Set the image mode to Indexed Color (Image → Mode → Indexed Color). In the new dialog window, enter the following settings:
- Colors: 190,
- Dither: Diffusion,
- Amount: 80%.
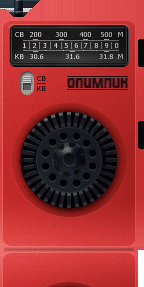
4. Set the image mode back to RGB and copy the image layer to the original file. Align the copied layer with the referenced one and apply its mask. Now save it to PNG-24:

51 KB
As you can see, these easy steps have saved us 11 KB of the original image without any noticeable effect on image quality. But this method has another advantage: running OptiPNG on these images often saves even more bytes. In this example, the image’s size was reduced by 36%, from 51 KB to 33 KB. Instead of converting the image to Indexed Color mode, you can save it for the Web and apply the Influence mask to save extra bytes.
Please note that this method is not the same as PNG-8 with palette transparency in Fireworks. In most cases fewer colors will give you more than 256 colors, so you will have to save the image in PNG-24, not PNG-8. Remember, solid red and 50%-transparent red are two different colors.
Reducing Detail
This technique is useful for optimizing shadows, reflections, glows, etc. The idea is to reduce detail in areas of the image that are barely visible. As you will recall from the Dirty transparency method, each pixel of a true-color image with transparency is described in four bytes: RGBA. The last one controls pixel transparency. For pixels whose Alpha value is too low (i.e. pixels that are barely visible), you can replace the RGB data for better image compression. Let’s try that.
1. Open iPod retro in Photoshop, again.

63 KB
2. As you can see, the radio has a reflection below it, which is a good candidate for optimization. Ctrl + click or ⌘ + click on the image thumbnail in the Layers palette to create a selection. Go to the Channels palette and create a new channel from the selection:

- 3. We have to localize only those pixels that are barely visible. Invert the channel (Image → Adjustments → Invert) and open the Threshold dialog (Image → Adjustments → Invert). Setting the Threshold Level to 170 is good enough:
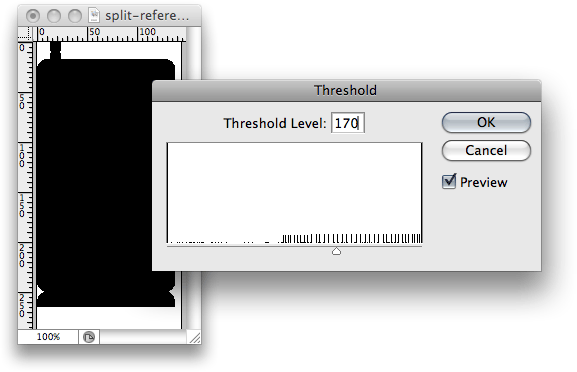
4. We’ve got the mask that includes barely visible pixels only. Ctrl + click or ⌘ + click on the channel in the palette to create a selection. Go back to the Layers palette, select the image layer and open Filter → Noise → Median. This filter will smooth out pixels in the selection, making them more conducive to compression. Set the Radius value to 5:
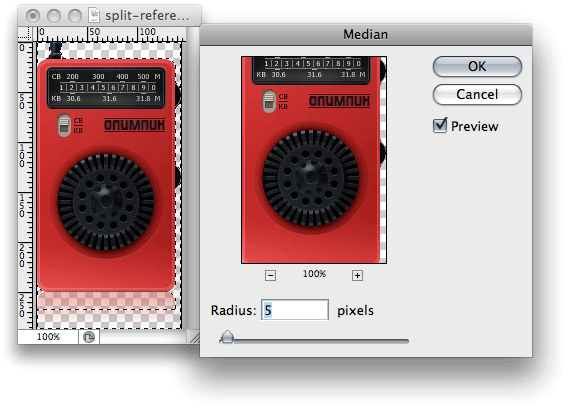
Now save this image “for the Web” in PNG-24 and see how its size has been reduced from 63 KB to 59 KB. You can vary the threshold level and median radius to compress more or preserve more details.
More Tips For PNG Use And Optimization
1. Each optimization must begin with a thorough image analysis. Choose the best technique for each image or combine techniques to achieve better results.
2. Be creative. Use these techniques as a starting point for your own methods customized to your particular images.
3. Many people think that PNG-8 is always better than PNG-24 for low-color images. It’s not. In some cases, PNG-24 may give you better results:

PNG-8, 833 bytes

PNG-24, 369 bytes
In this example, there is an overhead in PNG-8: 3 bytes were used to describe the pixels in the color palette, and 1 byte to describe the pixel color in the image data stream, while PNG-24 took up only 3 bytes for each pixel. So, if you’re saving low-color images in PNG without transparency, test whether PNG-8 or PNG-24 gives you the smaller file.
4. If you are using an older version of Photoshop (prior CS3), you may find that PNG images in the image editor look different from ones in a Web browser. This is because of the gAMA chunk that is saved in the PNG file, which controls image gamma. You can safely remove it with tools such as TweakPNG (Windows only) or smush.it.
5. A “special” PNG image type allows you to save a semi-transparent image as an indexed-color PNG-8. This image type isn’t available in Photoshop (Fireworks has it), but you can prepare the image in Photoshop and then convert it with OptiPNG.
OptiPNG will convert truecolor images to 8-bit palette by default if your image contains less than 256 colors. To do this, you can apply “Less colors” and “Lowering details” techniques and “guess” number of colors. But it may be very time consuming. There’s a tool called PNGNQ which can convert truecolor image to 256 palette, but you won’t have enough control over resulting image.
You will have to reduce the total amount of different colors, including semi-transparent ones, to 256 or fewer. This format is “special” because of how it displays in IE6:
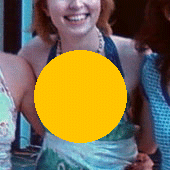
IE6
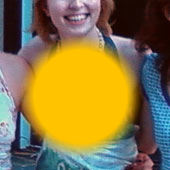
Other browsers
As you can see, IE6 displays only the opaque pixels. The good thing is that you can include such images with the regular tag or as background images (i.e. without using the resource-greedy AlphaImageLoader CSS filter), making for graceful degradation.
6. Don’t use the “Save As” dialog to save PNG images for the Web; use the “Save for Web” dialog instead. By default, Photoshop saves an image preview as additional info in the file, making the file a few times larger than it needs to be.
PNG Optimization In Real Life
A screencast demonstrating how most of these techniques work in real life:
Advanced PNG Optimization from Sergey Chikuyonok on Vimeo.
And here is the result. You can also download source PSD to try it yourself.


 Agent Ready is the new Headless
 SurveyJS: White-Label Survey Solution for Your JS App


