Organizing Brainstorming Workshops: A Designer’s Guide
When you think about the word “brainstorming”, what do you imagine? Maybe a crowd of people who you used to call colleagues, outshouting each other, assaulting the whiteboard, and nearly throwing punches to win control over the projector? Fortunately, brainstorming has a bright side: It’s a civilized process of generating ideas together. At least this is how it appears in the books on creativity. So, can we make it real?
I have already tried the three methodologies presented in this article with friends of mine, so there is no theorizing. After reaching the end of this article, I hope that you’ll be able to organize brainstorming sessions with your colleagues and clients, and co-create something valuable. For instance, ideas about a new mobile application or a design conference agenda.
Building Diverse Design Teams
What is diversity and what does it have to do with design? It’s important to understand that design is not only critical to solving problems on the product and experience level, but also relevant on a bigger scale to close social divides and to create inclusive communities. Read a related article →
Universal Principles
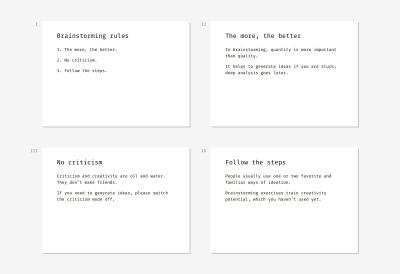
Don’t be surprised to notice all brainstorming techniques have much in common. Although “rituals” vary, the essence is the same. Participants look at the subject from different sides and come up with ideas. They write their thoughts down and then make sorting or prioritizing. I know, sounds easy as pie, doesn’t it? But here’s the thing. Without the rules of the game, brainstorming won’t work. It all boils down to just three crucial principles:
- The more, the better.
Brainstorming aims at the quantity, which later turns into quality. The more ideas a team generates the wider choice it gains. It’s normal when two or more participants say the same thing. It’s normal if some ideas are funny. A facilitator’s task is encouraging people to share what is hidden in their mind. - No criticism.
The goal of brainstorming is to generate a pool of ideas. All ideas are welcome. A boss has no right to silence a subordinate. An analyst shouldn’t make fun of a colleague’s “fantastic” vision. A designer shouldn’t challenge the usability of a teammates’ suggestion. - Follow the steps.
Only a goal-oriented and time-bound activity is productive, whereas uncontrolled bursts of creativity, as a rule, fail. To make a miracle happen, organize the best conditions for it.
Here are the universal slides you can use as an introduction to any brainstorming technique.
Now when the principles are clear, you are to decide who’s going to participate. The quick answer is diversity. Invite as many different experts as possible including business owners, analysts, marketers, developers, salespeople, potential or real users. All participants should be related to the subject or be interested in it. Otherwise, they’ll fantasize about the topic they’ve never dealt with and don’t want to.
One more thing before we proceed with the three techniques (Six Thinking Hats, Walt Disney’s Creative Strategy, and SCAMPER). When can a designer or other specialist use brainstorming? Here are two typical cases:
- There is a niche for a new product, service or feature but the team doesn’t have a concept of what it might be.
- An existing product or service is not as successful as expected. The team generally understands the reasons but has no ideas on how to fix it.
1. Six Thinking Hats
The first technique I’d like to present is known as “Six Thinking Hats”. It was invented in 1985 by Edward de Bono, a Maltese physician, psychologist, and consultant. Here’s a quick overview:
| Complexity | Normal |
| Subject | A process, a service, a product, a feature, anything. For example, one of the topics at our session was the improvement of the designers' office infrastructure. Another team brainstormed about how to improve the functionality of the Sketch app. |
| Duration | 1–1.5 hours |
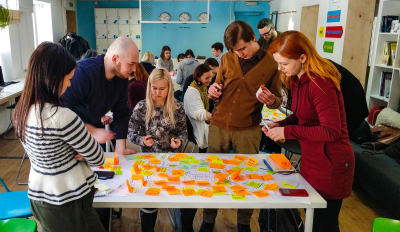
| Facilitation | One facilitator for a group of 5–8 members. If there are more people, better divide them into smaller groups and involve assistants. We split our design crew of over 20 people into three workgroups, which were working simultaneously on their topics. |
Materials
- Slides with step-by-step instructions.
- A standalone timer or laptop with an online timer in the fullscreen mode.
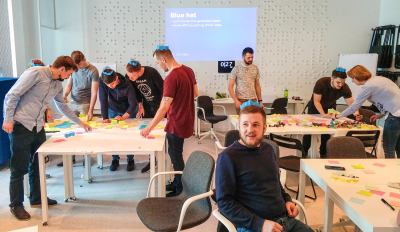
- 6 colored paper hats or any recognizable hat symbols for each participant. The colors are blue, yellow, green, white, red, and black. For example, we used crowns instead of hats, and it was fun.
- Sticky notes of 6 colors: blue, yellow, green, white, red, and brown or any other dark tint for representing black. 1–2 packs of each color per team of 5–8 people would be enough.
- A whiteboard or a flip-chart or a large sheet of paper on a table or wall.
- Black marker pens for each participant (markers should be whiteboard-safe if you choose this kind of surface).
Process
Start a brainstorming session with a five-minute intro. What will participants do? Why is it important? What will the outcome be? What’s next? It’s time to explain the steps. In my case, we described the whole process beforehand to ensure people get the concept of “thinking hats.” De Bono’s “hat” represents a certain way of perceiving reality. Different people are used to “wearing” one favorite “hat” most of the time, which limits creativity and breeds stereotypes.
For example, risk analysts are used to finding weaknesses and threats. That’s why such a phenomenon as gut feeling usually doesn’t ring them a bell.
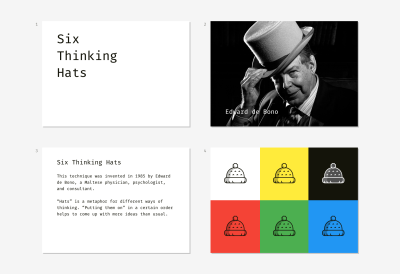
Trying on “hats” is a metaphor that helps people to start thinking differently with ease. Below is an example of the slides that explain what each “hat” means. Our goal was to make people feel prepared, relaxed, and not afraid of the procedure complexity.
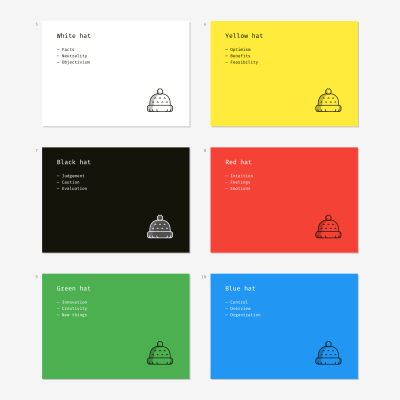
The blue “hat” is an odd one out. It has an auxiliary role and embodies the process of brainstorming itself. It starts the session and finishes it. White, yellow, black, red, and green “hats” represent different ways to interpret reality.
For example, the red one symbolizes intuitive and emotional perception. When the black “hat” is on, participants wake up their inner “project manager” and look at the subject through the concepts of budgets, schedule, cost, and revenue.
There are various schemas of “hats” depending on the goal. We wanted to try all the “hats” and chose a universal, all-purpose order:
| Blue | Preparation |
| White | Collecting available and missing data |
| Red | Listening to emotions and unproven thoughts |
| Yellow | Noticing what is good right now |
| Green | Thinking about improvements and innovations |
| Black | Analyzing risks and resources |
| Blue | Summarizing |
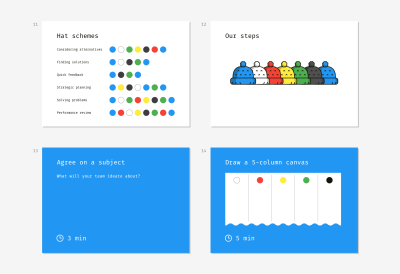
Now the exercise itself. Each slide is a cheat sheet with a task and prompts. When a new step starts and a proper slide appears on the screen, a facilitator starts the timer. Some steps have an extended duration; other steps require less time. For instance, it’s easy to agree on a topic formulation and draw a canvas but writing down ideas is a more time-consuming activity.
When participants see a “hat” slide (except the blue one), they are to generate ideas, write them on sticky notes and put the notes on the whiteboard, flip-chart or paper sheet. For example, the yellow “hat” is displayed on the screen. People put on yellow paper hats and think about the benefits and nice features the subject has now and why it may be useful or attractive. They concisely write these thoughts on the sticky notes of a corresponding color (for the black “hat” — any dark color can be used so that you don’t need to buy special white markers). All the sticky notes of the same color should be put in the corresponding column of the canvas.
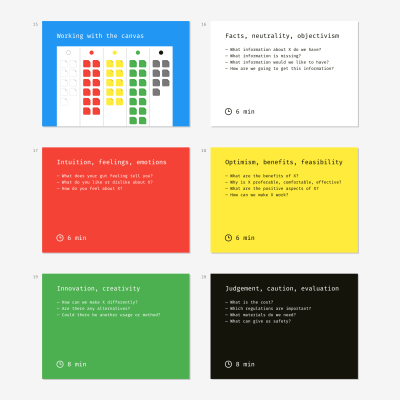
The last step doesn’t follow the original technique. We thought it would be pointless to stick dozens of colored notes and call it a day. We added the Affinity sorting part aimed at summarizing ideas and making the moment of their implementation a bit closer. The teams had to find notes about similar things, group them into clusters and give a name to each cluster.
For example, in the topic “Improvement of the designers’ office infrastructure,” my colleagues created such clusters as “Chair ergonomics,” “Floor and walls,” “Hardware upgrade.”
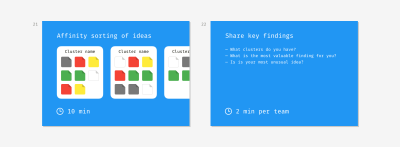
We finished the session with the mini-presentations of findings. A representative from each team listed the clusters they came up with and shared the most exciting observation or impression.
Walt Disney’s Creative Strategy
Walt Disney’s creative method was discovered and modeled by Robert Dilts, a neuro-linguistic programming expert, in 1994. Here’s an overview:
| Complexity | Easy |
| Subject | Anything, especially projects you’ve been postponing for a long time or dreams you cannot start fulfilling for unknown reasons. For example, one of the topics I dealt with was “Improvement of the designer-client communication process.” |
| Duration | 1 hour |
| Facilitation | One facilitator for a group of 5–8 members. When we conducted an educational workshop on brainstorming, my co-trainers and I had four teams of six members working simultaneously in the room. |
Materials
- Slides with step-by-step instructions.
- A standalone timer or laptop with an online timer in the fullscreen mode.
- Standard or large yellow sticky notes (1–2 packs per team of 5–8 people).
- Small red sticky notes (1–2 packs per team).
- The tiniest sticky stripes or sticky dots for voting (1 pack per team).
- A whiteboard or a flip-chart or a large sheet of paper on a table or wall.
- Black marker pens for each participant (markers should be whiteboard-safe if you choose this kind of surface).
Process
This technique is called after the original thinking manner of Walt Disney, a famous animator and film producer. Disney didn’t use any “technique”; his creative process was intuitive yet productive. Robert Dilts, a neuro-linguistic programming expert, discovered this creative knowhow much later based on the memories of Disney’s colleagues. Although original Dilts’s concept is designed for personal use, we managed to turn it into a group format.
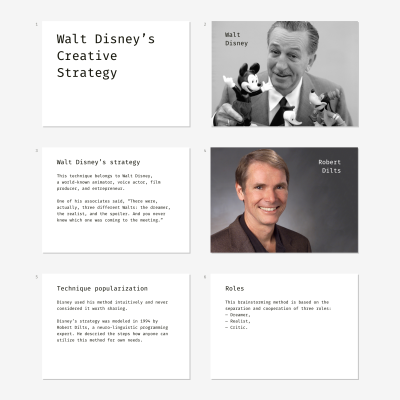
Disney’s strategy works owing to the strict separation of three roles — the dreamer, the realist, and the critic. People are used to mixing these roles while thinking about the future, and that’s why they often fail. “Let’s do X. But it’s so expensive. And risky… Maybe later,” this is how an average person dreams. As a result, innovative ideas get buried in doubts and fears.
In this kind of brainstorming, the facilitator’s goal is to prevent participants from mixing the roles and nipping creative ideas in the bud. We helped the team to get into the mood and extract pure roles through open questions on the slides and introductory explanations.
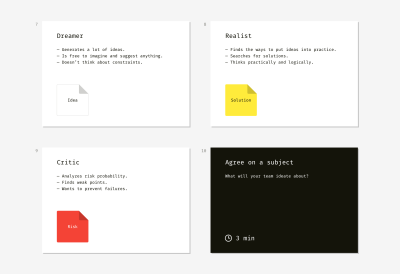
For example, here is my intro to the first role:
“The dreamer is not restrained by limitations or rules of the real world. The dreamer generates as many ideas as possible and doesn’t think about the obstacles on the way of their implementation. S/he imagines the most fun, easy, simple, and pleasant ways of solving a problem. The dreamer is unaware of criticism, planning, and rationalism altogether.”
As a result, participants should have a bunch of encircled ideas.
When participants come up with the cloud of ideas, they proceed to the next step. It’s important to explain to them what the second role means. I started with the following words:
“The realist is the dreamer’s best friend. The realist is the manager who can convert a vague idea into a step-by-step plan and find necessary resources. The realist has no idea about criticism. He or she tries to find some real-world implementation for dreamer’s ideas, namely who, when, and how can make an idea true.”
Brainstormers write down possible solutions on sticky notes and put them on the corresponding idea circles. Of course, some of the ideas can have no solution, whereas others may be achieved in many ways.
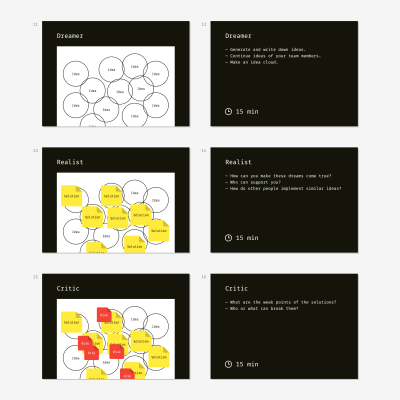
The third role is the trickiest one because people tend to think this is the guy who drags dreamer’s and realist’s work through the mud. Fortunately, this is not true.
I started my explanation:
“The critic is the dreamer’s and realist’s best friend. This person analyses risks and cares about the safety of proposed solutions. The critic doesn’t touch bare ideas but works with solutions only. The critic’s goal is to help and foresee potential issues in advance.”
The team defines risks and writes them down on smaller red notes. A solution can have no risks or several risks.
After that’s done, team members start voting for the ideas they consider worth further working on. They make a decision based on the value of an idea, the availability of solutions, and the severity of connected risks. Ideas without solutions couldn’t be voted for since they had no connection with reality.
During my workshops, each participant had three voting dots. They could distribute them in different ways, e.g. by sticking the dots to three different ideas or supporting one favorite idea with all of the dots they had.
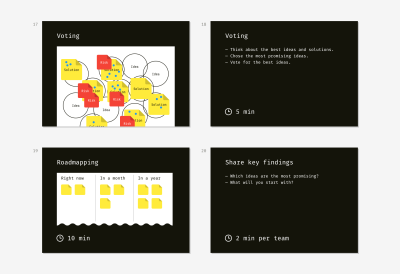
The final activity is roadmapping. The team takes the ideas that gained the most support (typically, 6–10) and arrange them on a timeline depending on the implementation effort. If an idea is easy to put into practice, it goes to the column “Now.” If an idea is complex and requires a lot of preparation or favorable conditions, it’s farther on the timeline.
Of course, there should be time for sharing the main findings. Teams present their timelines with shortlisted ideas and tell about the tendencies they have observed during the exercise.
SCAMPER
This technique was proposed in 1953 by Alex Osborn, best known for co-founding and leading BBDO, a worldwide advertising agency network. A quick overview:
| Complexity | Normal to difficult |
| Subject | Ideally, technical or tangible things, although the author and evangelists of this method say it’s applicable for anything. From my experience, SCAMPER works less effective with abstract objects. For example, the team barely coped with the topic “Improve communication between a designer and client,” but it worked great for “Invent the best application for digital prototyping.” |
| Duration | Up to 2 hours |
| Facilitation | One facilitator for a group of 5–8 members |

Materials
- Slides with step-by-step instructions.
- A standalone timer or laptop with an online timer in the fullscreen mode.
- Standard yellow sticky notes (7 packs per team of 5–8 people).
- A whiteboard or a flip-chart or a large sheet of paper on a table or wall.
- Black marker pens for each participant (markers should be whiteboard-safe if you choose this kind of surface).
- Optionally: Thinkpak cards by Michael Michalko (1 pack per team).
Process
This brainstorming method employs various ways to modify an object. It’s aimed at activating the inventory thinking and helps to optimize an existing product or create a brand new thing.
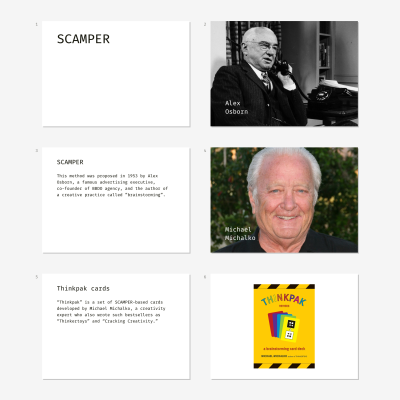
Each letter in the acronym represents a certain transformation you can apply to the subject of brainstorming.
| S | Substitute |
| C | Combine |
| A | Adapt |
| M | Modify |
| P | Put to other uses |
| E | Eliminate |
| R | Rearrange/Reverse |
It’s necessary to illustrate each step with an example and ask participants to generate a couple of ideas themselves for the sake of training. As a result, you’ll be sure they won’t get stuck.
We explained the mechanism by giving sample ideas for improving such an ordinary object as a ballpoint pen.
- Substitute the ink with something edible.
- Combine the body and the grip so that they are one piece.
- Adapt a knife for “writing” on wood like a pen.
- Modify the body so that it becomes flexible — for wearing as a bracelet.
- Use a pen as a hairpin or arrow for darts.
- Eliminate the clip and use a magnet instead.
- Reverse the clip. As a result, the nib will be oriented up, and the pen won’t spill in a pocket.
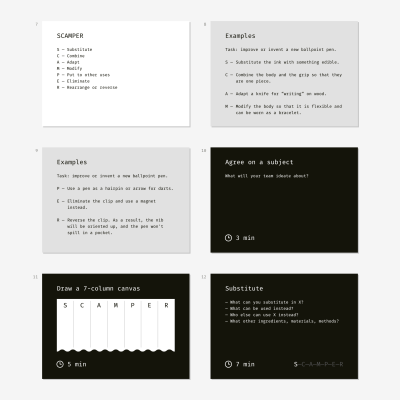
After the audience doesn’t have questions left, you can start. First of all, team members agree on the subject formulation. Then they draw a canvas on a whiteboard or large paper sheet.
Once a team sees one of the SCAMPER letters on the screen, they start generating ideas using the corresponding method: substitute, combine, adapt, modify, and so on. They write the ideas down and stick the notes into corresponding canvas columns.
The questions on the slides remind what each step means and help to get in a creative mood. Time limitation helps to concentrate and not to dive into discussions.
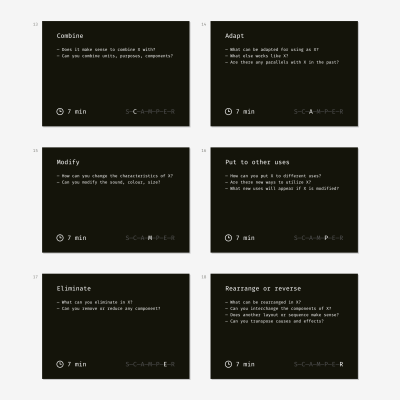
Affinity sorting — the last step — is our designers’ contribution to the original technique. It pushes the team to start implementation. Otherwise, people quickly forget all valuable findings and return to the usual state of things. Just imagine how discouraging it will be if the results of a two-hour ideation session are put on the back burner.
Thinkpak Cards
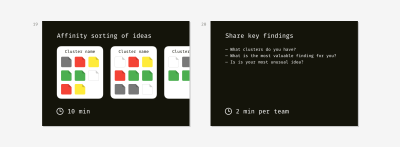
It’s a set of brainstorming cards created by Michael Michalko. Thinkpak makes a session more exciting through gamification. Each card represents a certain letter from SCAMPER. Participants shuffle the pack, take cards in turn and come up with corresponding ideas about an object. It’s fun to compete in the number of ideas each participant generates for a given card within a limited time, for instance, three or five minutes.
My friends and I have tried brainstorming both with and without a Thinkpak; it works both ways. Cards are great for training inventory thinking. If your team has never participated in brainstorming sessions, it’ll be great to play the cards first and then switch to a business subject.
Lessons Learned
- Dry run.
People often become disappointed in brainstorming if the first session they participate in fails. Some people I worked with have a prejudice towards creativity and consider it the waste of time or something not proven scientifically. Fortunately, we tried all the techniques internally — in the design team. As a result, all the actual brainstorming sessions went well. Moreover, our confidence helped others to believe in the power of brainstorming exercises. - Relevant topic and audience.
Brainstorming can fail if you invite people who don’t have a relevant background or the power and willing to change anything. Once I asked a team of design juniors to ideate about improving the process of selling design services to clients. They lacked the experience and couldn’t generate plenty of ideas. Fortunately, it was a training session, and we easily changed the topic. - Documenting outcomes.
So, the session is over. Participants go home or return to their workplaces. Almost surely the next morning they will recall not a single thing. I recommend creating a wrap-up document with photos and digitized canvases. The quicker you write and share it, the higher the chances will be that the ideas are actually implemented.
Other Resources
- “Six Thinking Hats,” Edward de Bono
- “Walt Disney: Strategies Of Genius,” Robert Dilts
- “Walt Disney: Planning Strategy (Storyboarding),” Robert Dilts
- “The Secret Of Walt Disney’s Creativity,” Mark McGuinness
- “Scamper: Creative Games And Activities For Imagination Development,” Bob Eberle
- “Thinkertoys: A Handbook Of Creative-Thinking Techniques,” Michael Michalko
Further Reading
- Lessons Learned After Selling My Startup
- The Art Of Looking Back: A Critical Reflection For Individual Contributors
- Connecting With Users: Applying Principles Of Communication To UX Research
- Designing Web Design Documentation


 SurveyJS: White-Label Survey Solution for Your JS App
 Agent Ready is the new Headless


