How To Build An Endless Runner Game In Virtual Reality (Part 3)
And so our journey continues. In this final part of my series on how to build an endless runner VR game, I’ll show you how you can synchronize the game state between two devices which will move you one step closer to building a multiplayer game. I’ll specifically introduce MirrorVR which is responsible for handling the mediating server in client-to-client communication.
Note: This game can be played with or without a VR headset. You can view a demo of the final product at ergo-3.glitch.me.
To get started, you will need the following.
- Internet access (specifically to glitch.com);
- A Glitch project completed from part 2 of this tutorial. You can start from the part 2 finished product by navigating to https://glitch.com/edit/#!/ergo-2 and clicking “Remix to edit”;
- A virtual reality headset (optional, recommended). (I use Google Cardboard, which is offered at $15 a piece.)
Step 1: Display Score
The game as-is functions at a bare minimum, where the player is given a challenge: avoid the obstacles. However, outside of object collisions, the game does not provide feedback to the player regarding progress in the game. To remedy this, you will implement the score display in this step. The score will be large text object placed in our virtual reality world, as opposed to an interface glued to the user’s field of view.
In virtual reality generally, the user interface is best integrated into the world rather than stuck to the user’s head.
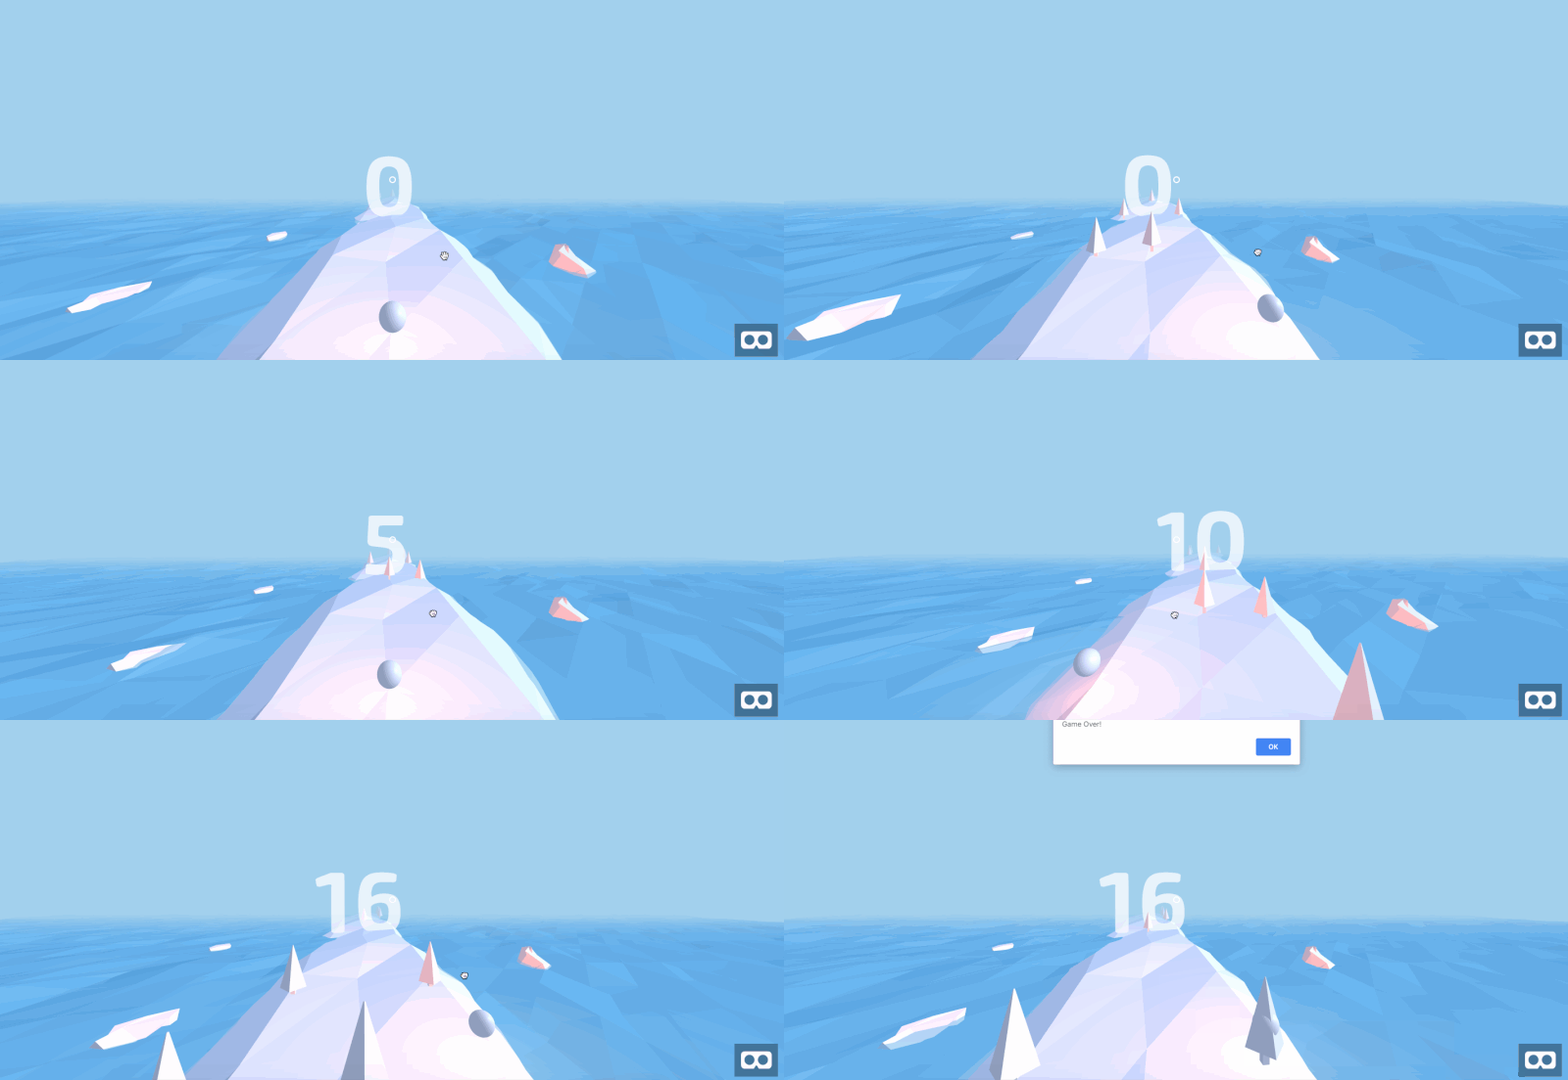
Start by adding the object to index.html. Add a text mixin, which will be reused for other text elements:
<a-assets>
  ...
  <a-mixin id="text" text="
     font:exo2bold;
     anchor:center;
     align:center;"></a-mixin>
  ...
</a-assets>
Next, add a text element to the platform, right before the player:
<!-- Score -->
<a-text id="score" value="" mixin="text" height="40" width="40" position="0 1.2 -3" opacity="0.75"></a-text>

<!-- Player -->
...
This adds a text entity to the virtual reality scene. The text is not currently visible, because its value is set to empty. However, you will now populate the text entity dynamically, using JavaScript. Navigate to assets/ergo.js. After the collisions section, add a score section, and define a number of global variables:
score: the current game score.countedTrees: IDs of all trees that are included in the score. (This is because collision tests may trigger multiple times for the same tree.)scoreDisplay: reference to the DOM object, corresponding to a text object in the virtual reality world.
/*********
 * SCORE *
 *********/

var score;
var countedTrees;
var scoreDisplay;
Next, define a setup function to initialize our global variables. In the same vein, define a teardown function.
...
var scoreDisplay;

function setupScore() {
  score = 0;
  countedTrees = new Set();
  scoreDisplay = document.getElementById('score');
}

function teardownScore() {
  scoreDisplay.setAttribute('value', '');
}
In the Game section, update gameOver, startGame, and window.onload to include score setup and teardown.
/********
 * GAME *
 ********/

function gameOver() {
    ...
    teardownScore();
}

function startGame() {
    ...
    setupScore();
    addTreesRandomlyLoop();
}

window.onload = function() {
    setupScore();
    ...
}
Define a function that increments the score for a particular tree. This function will check against countedTrees to ensure that the tree is not double counted.
function addScoreForTree(tree_id) {
  if (countedTrees.has(tree_id)) return;
  score += 1;
  countedTrees.add(tree_id);
}
Additionally, add a utility to update the score display using the global variable.
function updateScoreDisplay() {
  scoreDisplay.setAttribute('value', score);
}
Update the collision testing accordingly in order to invoke this score-incrementing function whenever an obstacle has passed the player. Still in assets/ergo.js, navigate to the collisions section. Add the following check and update.
AFRAME.registerComponent('player', {
  tick: function() {
    document.querySelectorAll('.tree').forEach(function(tree) {
      ...
      if (position.z > POSITION_Z_LINE_END) {
        addScoreForTree(tree_id);
        updateScoreDisplay();
      }
    })
  }
})
Finally, update the score display as soon as the game starts. Navigate to the Game section, and add updateScoreDisplay(); to startGame:
function startGame() {
  ...
  setupScore();
  updateScoreDisplay();
  ...
}
Ensure that assets/ergo.js and index.html match the corresponding source code files. Then, navigate to your preview. You should see the following:

This concludes the score display. Next, we will add proper start and Game Over menus, so that the player can replay the game as desired.
Step 2: Add Start Menu
Now that the user can keep track of the progress, you will add finishing touches to complete the game experience. In this step, you will add a Start menu and a Game Over menu, letting the user start and restart games.
Let’s begin with the Start menu where the player clicks a “Start” button to begin the game. For the second half of this step, you will add a Game Over menu, with a “Restart” button:
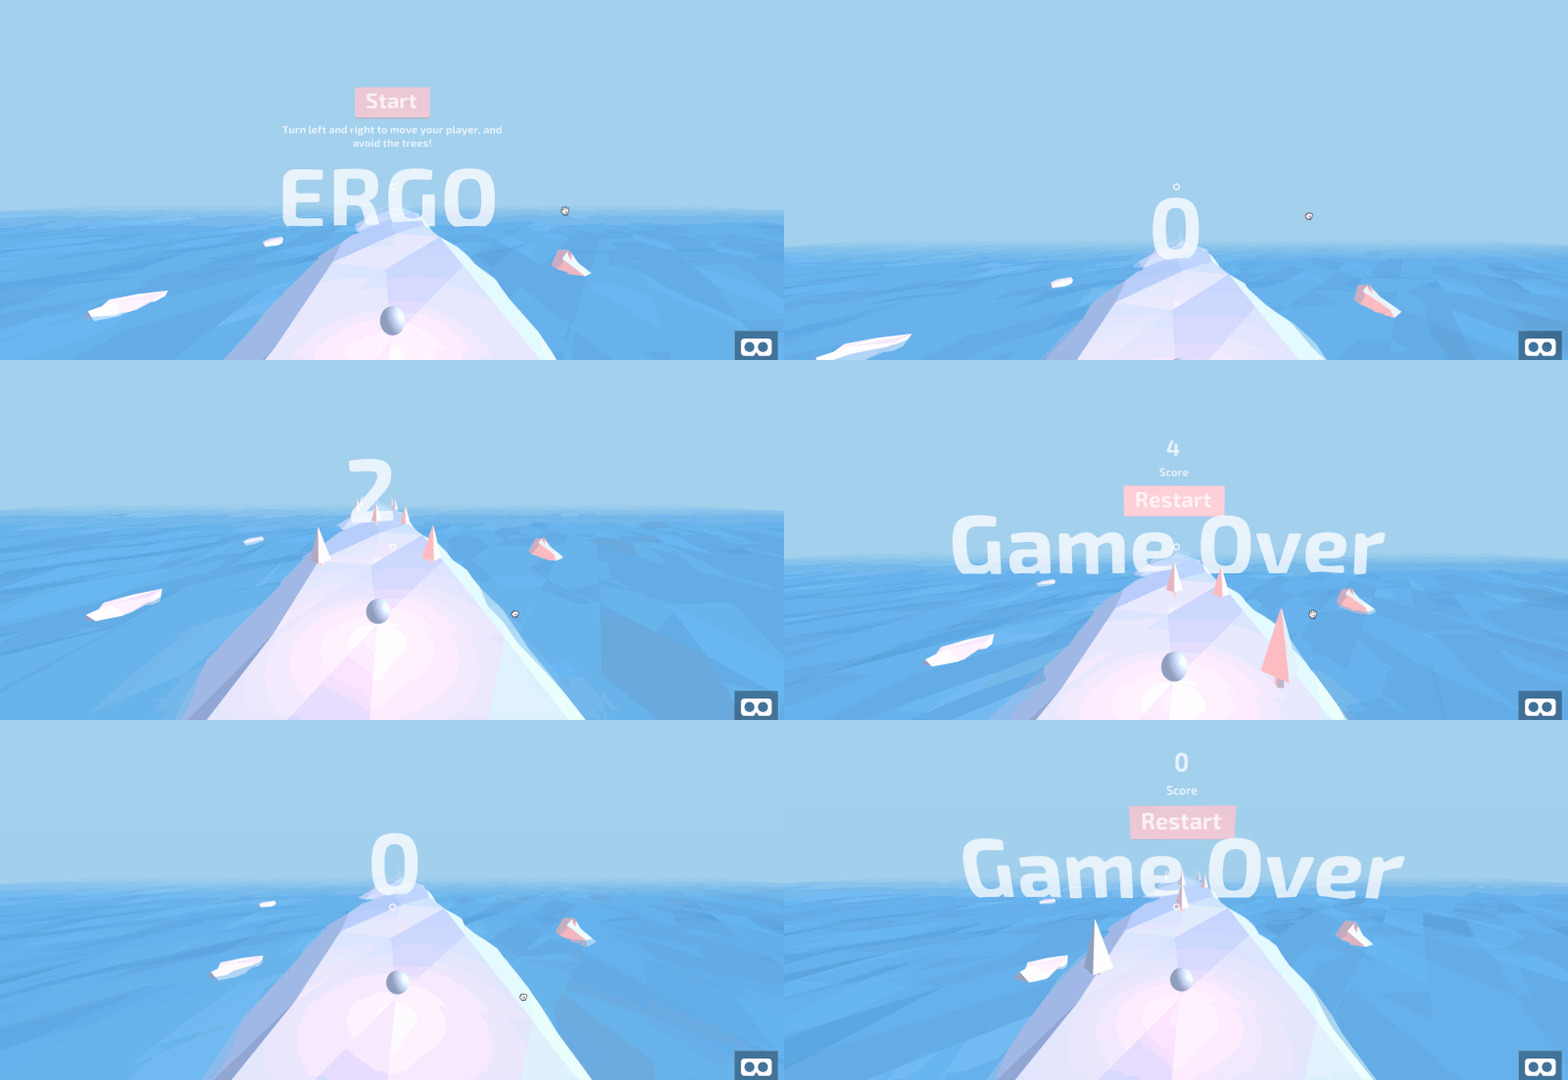
Navigate to index.html in your editor. Then, find the Mixins section. Here, append the title mixin, which defines styles for particularly large text. We use the same font as before, align text to the center, and define a size appropriate for the type of text. (Note below that anchor is where a text object is anchored to its position.)
<a-assets>
   ...
   <a-mixin id="title" text="
       font:exo2bold;
       height:40;
       width:40;
       opacity:0.75;
       anchor:center;
       align:center;"></a-mixin>
</a-assets>
Next, add a second mixin for secondary headings. This text is slightly smaller but is otherwise identical to the title.
<a-assets>
   ...
   <a-mixin id="heading" text="
       font:exo2bold;
       height:10;
       width:10;
       opacity:0.75;
       anchor:center;
       align:center;"></a-mixin>
</a-assets>
For the third and final mixin, define properties for descriptive text — even smaller than secondary headings.
<a-assets>
   ...
   <a-mixin id="copy" text="
       font:exo2bold;
       height:5;
       width:5;
       opacity:0.75;
       anchor:center;
       align:center;"></a-mixin>
</a-assets>
With all text styles defined, you will now define the in-world text objects. Add a new Menus section beneath the Score section, with an empty container for the Start menu:
<!-- Score -->
...

<!-- Menus -->
<a-entity id="menu-container">
  <a-entity id="start-menu" position="0 1.1 -3">
  </a-entity>
</a-entity>
Inside the start menu container, define the title and a container for all non-title text:
...
  <a-entity id="start-menu" ...>
    <a-entity id="start-copy" position="0 1 0">
    </a-entity>
    <a-text value="ERGO" mixin="title"></a-text>
  </a-entity>
</a-entity>
Inside the container for non-title text, add instructions for playing the game:
<a-entity id="start-copy"...>
  <a-text value="Turn left and right to move your player, and avoid the trees!" mixin="copy"></a-text>
</a-entity>
To complete the Start menu, add a button that reads “Start”:
<a-entity id="start-copy"...>
  ...
  <a-text value="Start" position="0 0.75 0" mixin="heading"></a-text>
  <a-box id="start-button" position="0 0.65 -0.05" width="1.5" height="0.6" depth="0.1"></a-box>
</a-entity>
Double-check that your Start menu HTML code matches the following:
<!-- Menus -->
<a-entity id="menu-container">
  <a-entity id="start-menu" position="0 1.1 -3">
    <a-entity id="start-copy" position="0 1 0">
      <a-text value="Turn left and right to move your player, and avoid the trees!" mixin="copy"></a-text>
      <a-text value="Start" position="0 0.75 0" mixin="heading"></a-text>
      <a-box id="start-button" position="0 0.65 -0.05" width="1.5" height="0.6" depth="0.1"></a-box>
    </a-entity>
    <a-text value="ERGO" mixin="title"></a-text>
  </a-entity>
</a-entity>
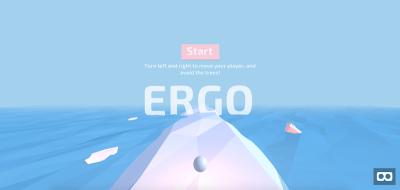
Navigate to your preview, and you will see the following Start menu:
Still in the Menus section (directly beneath the start menu), add the game-over menu using the same mixins:
<!-- Menus -->
<a-entity id="menu-container">
  ...
  <a-entity id="game-over" position="0 1.1 -3">
    <a-text value="?" mixin="heading" id="game-score" position="0 1.7 0"></a-text>
    <a-text value="Score" mixin="copy" position="0 1.2 0"></a-text>
    <a-entity id="game-over-copy">
      <a-text value="Restart" mixin="heading" position="0 0.7 0"></a-text>
      <a-box id="restart-button" position="0 0.6 -0.05" width="2" height="0.6" depth="0.1"></a-box>
    </a-entity>
    <a-text value="Game Over" mixin="title"></a-text>
  </a-entity>
</a-entity>
Navigate to your JavaScript file, assets/ergo.js. Create a new Menus section before the Game section. Additionally, define three empty functions: setupAllMenus, hideAllMenus, and showGameOverMenu.
/********
 * MENU *
 ********/

function setupAllMenus() {
}

function hideAllMenus() {
}

function showGameOverMenu() {
}

/********
 * GAME *
 ********/
Next, update the Game section in three places. In gameOver, show the Game Over menu:
function gameOver() {
    ...
    showGameOverMenu();
}
```

In `startGame`, hide all menus:

```
function startGame() {
    ...
    hideAllMenus();
}
Next, in window.onload, remove the direct invocation to startGame and instead call setupAllMenus. Update your listener to match the following:
window.onload = function() {
  setupAllMenus();
  setupScore();
  setupTrees();
}
Navigate back to the Menu section. Save references to various DOM objects:
/********
 * MENU *
 ********/

var menuStart;
var menuGameOver;
var menuContainer;
var isGameRunning = false;
var startButton;
var restartButton;

function setupAllMenus() {
  menuStart     = document.getElementById('start-menu');
  menuGameOver  = document.getElementById('game-over');
  menuContainer = document.getElementById('menu-container');
  startButton   = document.getElementById('start-button');
  restartButton = document.getElementById('restart-button');
}
Next, bind both the “Start” and “Restart” buttons to startGame:
function setupAllMenus() {
  ...
  startButton.addEventListener('click', startGame);
  restartButton.addEventListener('click', startGame);
}
Define showStartMenu and invoke it from setupAllMenus:
function setupAllMenus() {
  ...
  showStartMenu();
}

function hideAllMenus() {
}

function showGameOverMenu() {
}

function showStartMenu() {
}
To populate the three empty functions, you will need a few helper functions. Define the following two functions, which accepts a DOM element representing an A-Frame VR entity and shows or hides it. Define both functions above showAllMenus:
...
var restartButton;

function hideEntity(el) {
  el.setAttribute('visible', false);
}

function showEntity(el) {
  el.setAttribute('visible', true);
}

function showAllMenus() {
...
First populate hideAllMenus. You will remove the objects from sight, then remove click listeners for both menus:
function hideAllMenus() {
  hideEntity(menuContainer);
  startButton.classList.remove('clickable');
  restartButton.classList.remove('clickable');
}
Second, populate showGameOverMenu. Here, restore the container for both menus, as well as the Game Over menu and the ‘Restart’ button’s click listener. However, remove the ‘Start’ button’s click listener, and hide the ‘Start’ menu.
function showGameOverMenu() {
  showEntity(menuContainer);
  hideEntity(menuStart);
  showEntity(menuGameOver);
  startButton.classList.remove('clickable');
  restartButton.classList.add('clickable');
}
Third, populate showStartMenu. Here, reverse all changes that the showGameOverMenu effected.
function showStartMenu() {
  showEntity(menuContainer);
  hideEntity(menuGameOver);
  showEntity(menuStart);
  startButton.classList.add('clickable');
  restartButton.classList.remove('clickable');
}
Double-check that your code matches the corresponding source files. Then, navigate to your preview, and you will observe the following behavior:
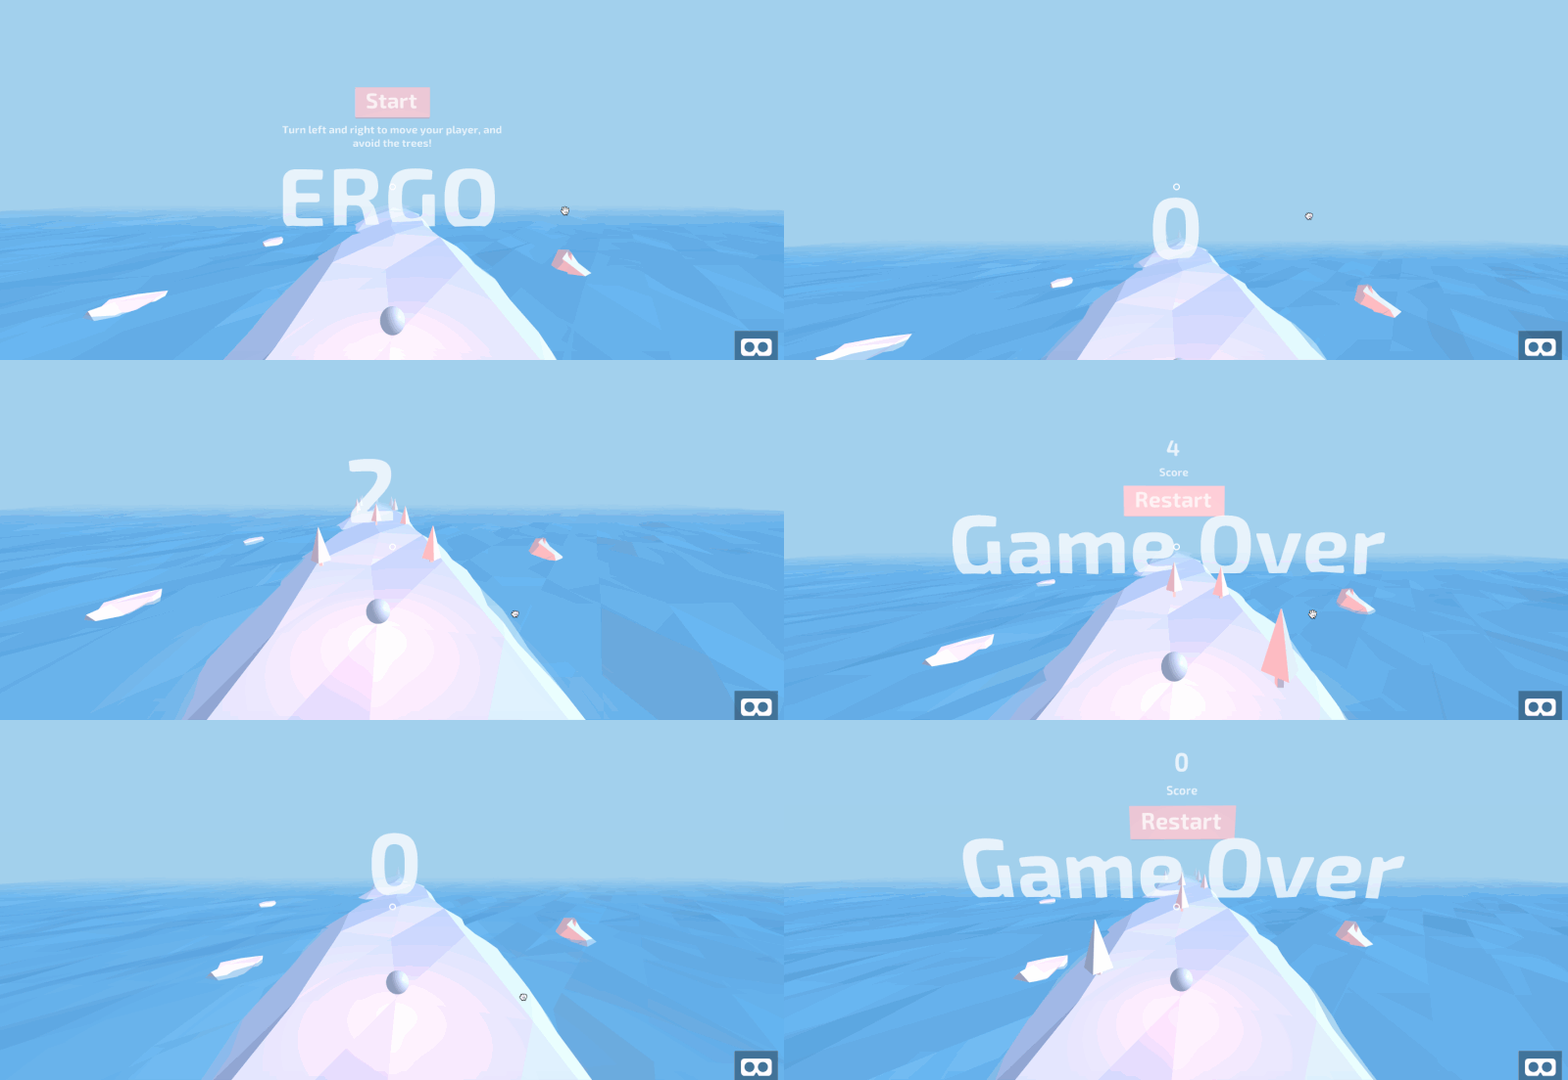
This concludes the Start and Game Over menus.
Congratulations! You now have a fully functioning game with a proper start and proper end. However, we have one more step left in this tutorial: We need to synchronize the game state between different player devices. This will move us one step closer towards multiplayer games.
Step 3: Synchronizing Game State With MirrorVR
In a previous tutorial, you learned how to send real-time information across sockets, to facilitate one-way communication between a server and a client. In this step, you will build on top of a fully-fledged product of that tutorial, MirrorVR, which handles the mediating server in client-to-client communication.
Navigate to index.html. Here, we will load MirrorVR and add a component to the camera, indicating that it should mirror a mobile device’s view where applicable. Import the socket.io dependency and MirrorVR 0.2.3.
<script src="https://cdnjs.cloudflare.com/ajax/libs/socket.io/2.1.1/socket.io.js"></script>
<script src="https://cdn.jsdelivr.net/gh/alvinwan/mirrorvr@0.2.2/dist/mirrorvr.min.js"></script>
Next, add a component, camera-listener, to the camera:
<a-camera camera-listener ...>
Navigate to assets/ergo.js. In this step, the mobile device will send commands, and the desktop device will only mirror the mobile device.
To facilitate this, you need a utility to distinguish between desktop and mobile devices. At the end of your file, add a mobileCheck function after shuffle:
/**
 * Checks for mobile and tablet platforms.
 */
function mobileCheck() {
  var check = false;
  (function(a){if(/(android|bb\d+|meego).+mobile|avantgo|bada\/|blackberry|blazer|compal|elaine|fennec|hiptop|iemobile|ip(hone|od)|iris|kindle|lge |maemo|midp|mmp|mobile.+firefox|netfront|opera m(ob|in)i|palm( os)?|phone|p(ixi|re)\/|plucker|pocket|psp|series(4|6)0|symbian|treo|up\.(browser|link)|vodafone|wap|windows ce|xda|xiino|android|ipad|playbook|silk/i.test(a)||/1207|6310|6590|3gso|4thp|50[1-6]i|770s|802s|a wa|abac|ac(er|oo|s\-)|ai(ko|rn)|al(av|ca|co)|amoi|an(ex|ny|yw)|aptu|ar(ch|go)|as(te|us)|attw|au(di|\-m|r |s )|avan|be(ck|ll|nq)|bi(lb|rd)|bl(ac|az)|br(e|v)w|bumb|bw\-(n|u)|c55\/|capi|ccwa|cdm\-|cell|chtm|cldc|cmd\-|co(mp|nd)|craw|da(it|ll|ng)|dbte|dc\-s|devi|dica|dmob|do(c|p)o|ds(12|\-d)|el(49|ai)|em(l2|ul)|er(ic|k0)|esl8|ez([4-7]0|os|wa|ze)|fetc|fly(\-|_)|g1 u|g560|gene|gf\-5|g\-mo|go(\.w|od)|gr(ad|un)|haie|hcit|hd\-(m|p|t)|hei\-|hi(pt|ta)|hp( i|ip)|hs\-c|ht(c(\-| |_|a|g|p|s|t)|tp)|hu(aw|tc)|i\-(20|go|ma)|i230|iac( |\-|\/)|ibro|idea|ig01|ikom|im1k|inno|ipaq|iris|ja(t|v)a|jbro|jemu|jigs|kddi|keji|kgt( |\/)|klon|kpt |kwc\-|kyo(c|k)|le(no|xi)|lg( g|\/(k|l|u)|50|54|\-[a-w])|libw|lynx|m1\-w|m3ga|m50\/|ma(te|ui|xo)|mc(01|21|ca)|m\-cr|me(rc|ri)|mi(o8|oa|ts)|mmef|mo(01|02|bi|de|do|t(\-| |o|v)|zz)|mt(50|p1|v )|mwbp|mywa|n10[0-2]|n20[2-3]|n30(0|2)|n50(0|2|5)|n7(0(0|1)|10)|ne((c|m)\-|on|tf|wf|wg|wt)|nok(6|i)|nzph|o2im|op(ti|wv)|oran|owg1|p800|pan(a|d|t)|pdxg|pg(13|\-([1-8]|c))|phil|pire|pl(ay|uc)|pn\-2|po(ck|rt|se)|prox|psio|pt\-g|qa\-a|qc(07|12|21|32|60|\-[2-7]|i\-)|qtek|r380|r600|raks|rim9|ro(ve|zo)|s55\/|sa(ge|ma|mm|ms|ny|va)|sc(01|h\-|oo|p\-)|sdk\/|se(c(\-|0|1)|47|mc|nd|ri)|sgh\-|shar|sie(\-|m)|sk\-0|sl(45|id)|sm(al|ar|b3|it|t5)|so(ft|ny)|sp(01|h\-|v\-|v )|sy(01|mb)|t2(18|50)|t6(00|10|18)|ta(gt|lk)|tcl\-|tdg\-|tel(i|m)|tim\-|t\-mo|to(pl|sh)|ts(70|m\-|m3|m5)|tx\-9|up(\.b|g1|si)|utst|v400|v750|veri|vi(rg|te)|vk(40|5[0-3]|\-v)|vm40|voda|vulc|vx(52|53|60|61|70|80|81|83|85|98)|w3c(\-| )|webc|whit|wi(g |nc|nw)|wmlb|wonu|x700|yas\-|your|zeto|zte\-/i.test(a.substr(0,4))) check = true;})(navigator.userAgent||navigator.vendor||window.opera);
  return check;
};
First, we will synchronize the game start. In startGame, of the Game section, add a mirrorVR notification at the end.
function startGame() {
  ...
  if (mobileCheck()) {
    mirrorVR.notify('startGame', {})
  }
}
The mobile client now sends notifications about a game starting. You will now implement the desktop’s response.
In the window load listener, invoke a setupMirrorVR function:
window.onload = function() {
  ...
  setupMirrorVR();
}
Define a new section above the Game section for the MirrorVR setup:
/************
 * MirrorVR *
 ************/

function setupMirrorVR() {
  mirrorVR.init();
}
Next, add keyword arguments to the initialization function for mirrorVR. Specifically, we will define the handler for game start notifications. We will additionally specify a room ID; this ensures that anyone loading your application is immediately synchronized.
function setupMirrorVR() {
  mirrorVR.init({
    roomId: 'ergo',
    state: {
      startGame: {
        onNotify: function(data) {
          hideAllMenus();
          setupScore();
          updateScoreDisplay();
        }
      },
    }
  });
}
Repeat the same synchronization process for Game Over. In gameOver in the Game section, add a check for mobile devices and send a notification accordingly:
function gameOver() {
  ...
  if (mobileCheck()) {
    mirrorVR.notify('gameOver', {});
  }
}
Navigate to the MirrorVR section and update the keyword arguments with a gameOver listener:
function setupMirrorVR() {
  mirrorVR.init({
    state: {
      startGame: {...
      },
      gameOver: {
        onNotify: function(data) {
          gameOver();
        }
      },
    }
  })
}
Next, repeat the same synchronization process for the addition of trees. Navigate to addTreesRandomly in the Trees section. Keep track of which lanes receive new trees. Then, directly before the return directive, and send a notification accordingly:
function addTreesRandomly(...) {
  ...
  var numberOfTreesAdded ...
  var position_indices = [];
  trees.forEach(function (tree) {
    if (...) {
      ...
      position_indices.push(tree.position_index);
    }
  });

  if (mobileCheck()) {
    mirrorVR.notify('addTrees', position_indices);
  }
  return ...
}
Navigate to the MirrorVR section, and update the keyword arguments to mirrorVR.init with a new listener for trees:
function setupMirrorVR() {
  mirrorVR.init({
    state: {
      ...
      gameOver: {...
      },
      addTrees: {
        onNotify: function(position_indices) {
          position_indices.forEach(addTreeTo)
        }
      },
    }
  })
}
Finally, we synchronize the game score. In updateScoreDisplay from the Score section, send a notification when applicable:
function updateScoreDisplay() {
  ...
  if (mobileCheck()) {
    mirrorVR.notify('score', score);
  }
}
Update the mirrorVR initialization for the last time, with a listener for score changes:
function setupMirrorVR() {
  mirrorVR.init({
    state: {
      addTrees: {
      },
      score: {
        onNotify: function(data) {
          score = data;
          updateScoreDisplay();
        }
      }
    }
  });
}
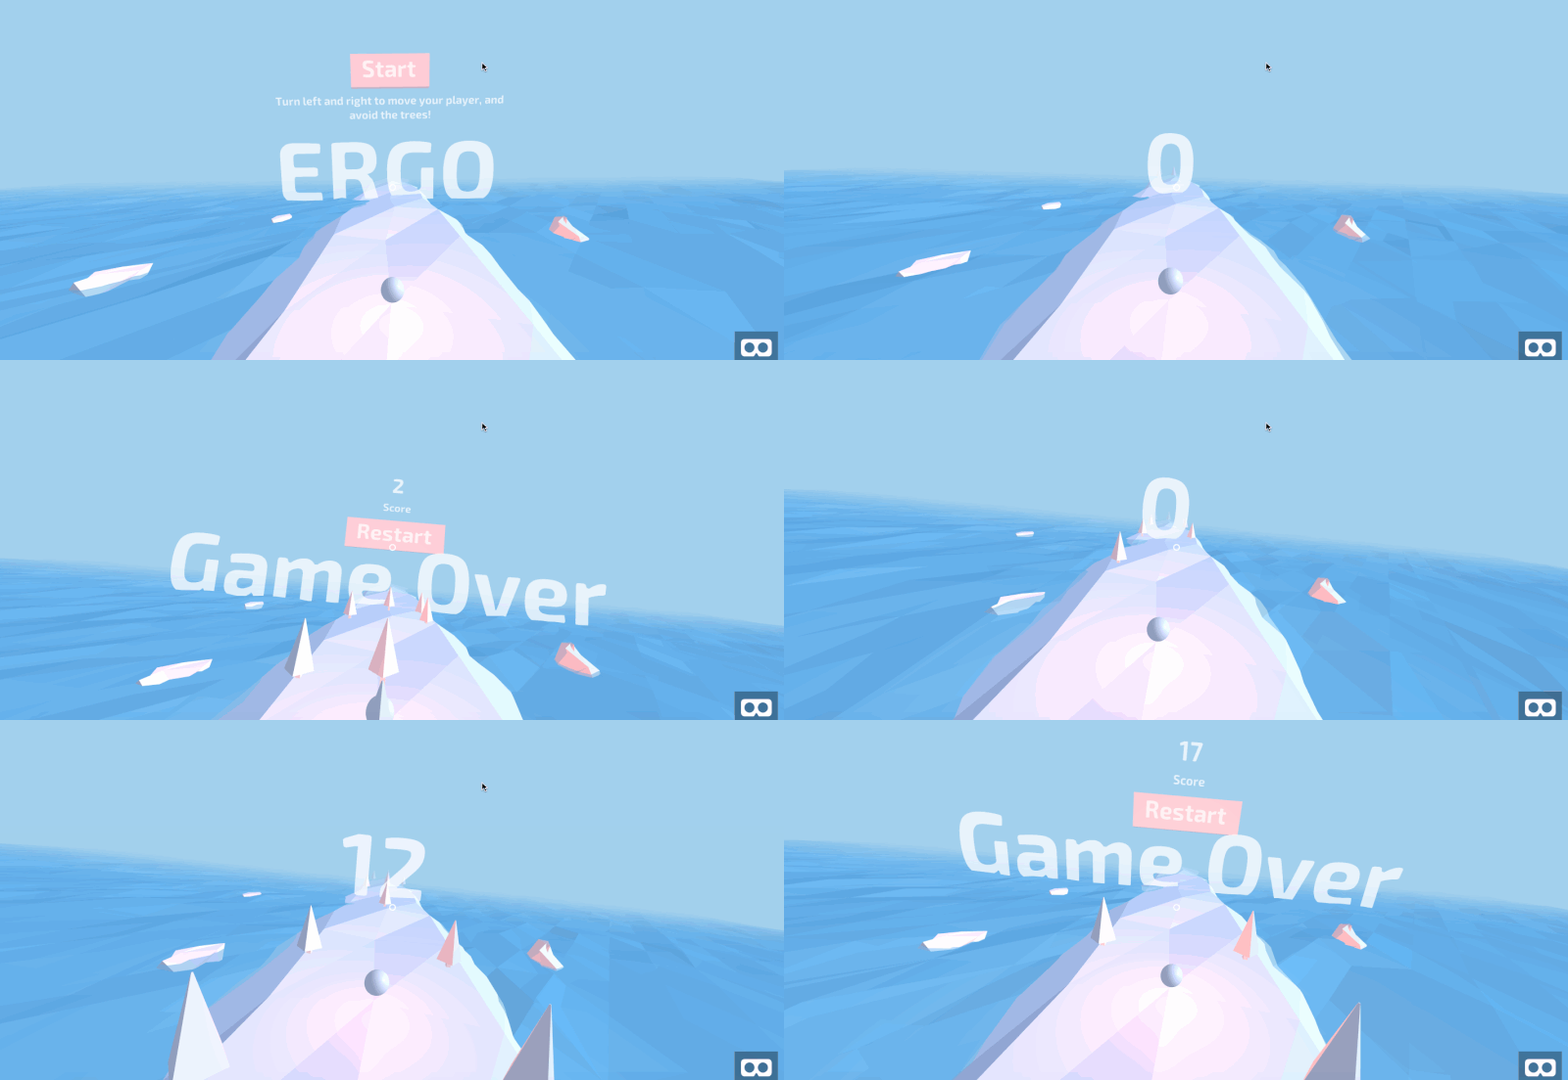
Double-check that your code matches the appropriate source code files for this step. Then, navigate to your desktop preview. Additionally, open up the same URL on your mobile device. As soon as your mobile device loads the webpage, your desktop should immediately start mirroring the mobile device’s game.
Here is a demo. Notice that the desktop cursor is not moving, indicating the mobile device is controlling the desktop preview.
This concludes your augmented project with mirrorVR.
This third step introduced a few basic game state synchronization steps; to make this more robust, you could add more sanity checks and more points of synchronization.
Conclusion
In this tutorial, you added finishing touches to your endless runner game and implemented real-time synchronization of a desktop client with a mobile client, effectively mirroring the mobile device’s screen on your desktop. This concludes the series on building an endless runner game in virtual reality. Along with A-Frame VR techniques, you’ve picked up 3D modeling, client-to-client communication, and other widely applicable concepts.
Next steps can include:
- More Advanced Modeling
This means more realistic 3D models, potentially created in a third-party software and imported. For example, (MagicaVoxel) makes creating voxel art simple, and (Blender) is a complete 3D modeling solution. - More Complexity
More complex games, such as a real-time strategy game, could leverage a third-party engine for increased efficiency. This may mean sidestepping A-Frame and webVR entirely, instead publishing a compiled (Unity3d) game.
Other avenues include multiplayer support and richer graphics. With the conclusion of this tutorial series, you now have a framework to explore further.
Further Reading
- Designing Emotional Interfaces Of The Future
- Modern Technology And The Future Of Language Translation
- Using AI For Neurodiversity And Building Inclusive Tools
- Penpot’s CSS Grid Layout: Designing With Superpowers


 Agent Ready is the new Headless

 SurveyJS: White-Label Survey Solution for Your JS App

