How To Create, Edit And Animate SVGs All In One Place With SVGator 3.0
This article has been kindly supported by our dear friends at SVGator who are passionate about designing and producing unique, high-quality, and unforgettable animations. Thank you!
SVGator is evolving and it’s evolving a lot. Three years ago, we published a comprehensive introduction to the basic use of SVGator. At that time it was an app meant solely for animating SVG files created in other apps. Two years ago, we introduced you to a new version of SVGator and its improved animation capabilities. This time, we are introducing a new major version of SVGator that offers a matured, complete environment for drawing from scratch and animating SVG graphics.
Note: Some of the SVGator’s features covered in this tutorial are paid. On the free plan, you can create and export an unlimited number of SVG graphics. You can also use basic animation features and export 3 animations per month. Advanced animation features are available under a paid plan, starting at 11 USD/month.
In this article, we will follow a process of creating a custom SVG loader, from drawing it from scratch and applying various visual effects, through creating different types of animations, to exporting your file and preparing it for use on the web.
We begin by creating a new blank file and changing its background color.
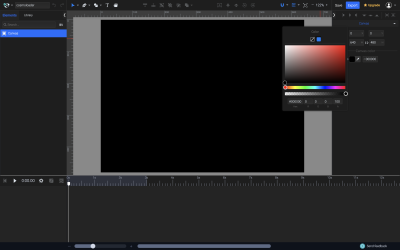
From here, we can start drawing the illustration we are going to animate later. SVGator allows you to draw all the standard SVG shapes such as ellipses, rectangles and polygons as well as use a Pen and Pencil tools to draw your own. You can also use boolean functions to combine shapes with one another.
To make it easier for me to create the desired shape, I started by drawing a circle as a guide in the center of the canvas. Fortunately, SVGator makes it dead simple to align and measure elements, thanks to a smart system of guides and snapping functions. You can also use grids and rulers for better precision and fidelity.
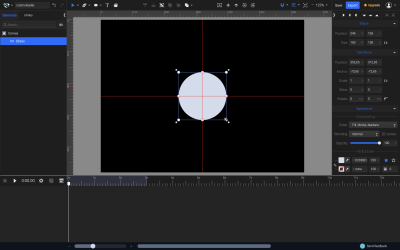
Next, using a Pen Tool, we draw the first blob roughly following the shape of the circle underneath. The Pencil Tool would also do well for that purpose. What is really cool about this one is that SVGator’s Pencil Tool usually creates shapes with much fewer node points than comparable tools in other apps, which makes the result not only look smoother but also be much lighter on file size.
Creating and editing shapes in SVGator might feel a bit different than in other vector tools but once you’ve got used to it, it’s truly a breeze. It’s also important to note that all the drawing features of SVGator are completely free so you can use it as your SVG-creating software as much as you want for no cost.
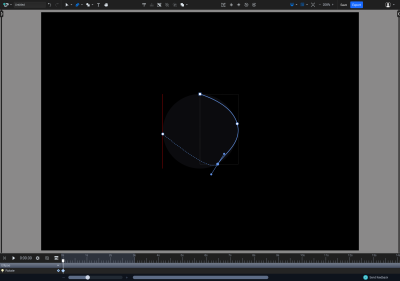
With a first blob ready, it’s time to style it a bit. Here, we’re stumbling upon one of the biggest competitive advantages of the app. Other popular vector graphics applications that allow you to export SVG files usually have to leverage their features to fit a plethora of formats and use cases. At the same time, apps focused primarily on user interfaces, cater mostly for what’s possible with HTML and CSS properties, rarely giving much love to SVG-specific features such as stroke markers or filters.
SVGator, being solely aimed at creating SVG files, takes full advantage of what this format, in particular, has to offer. This includes options specific to how SVG handles strokes, fills, gradient elements (have you heard about the spreadMethod attribute of SVG gradients?), filters (such as blur, shadow or sepia), and many others.
It also allows you to style (your fills, strokes, effects, and so on) with confidence that the final result will be as expected, as all these features have been created especially for SVG files.
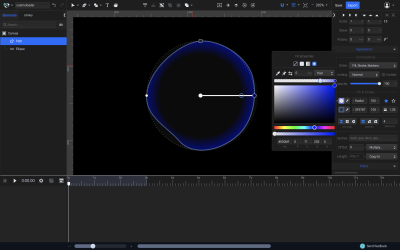
In our case, a single gradient fill and a gradient stroke will do. I also applied a light blur filter on the element as a final touch. Notice that as SVGator uses native SVG filters instead of CSS, it allows you to control the blur properties for both axes separately. In this case, I only applied an x-axis blur.
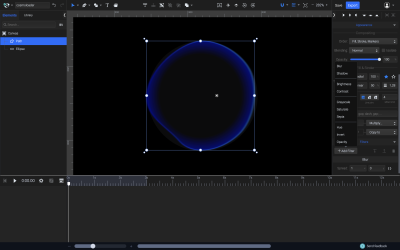
Next, we can duplicate the blob and use the Pen Tool again to create two more different blobs. The way Pen Tool works makes it really easy to modify the shape without losing the smooth, continuous line of it.
As a final element of the illustration, we add a few randomly placed glowing dots. They are no more than circles with a gradient fill applied.
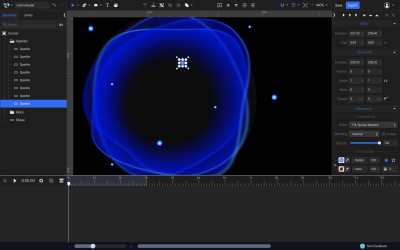
Our loader in its initial state is ready. Now, it’s time for the most fun part: animation!
It doesn’t really matter which element of the illustration we will animate first. In my case, I started with animating the sparkles. By adding a Position animator to each element, we can create complex path animations. Path animations allow us to make an element follow a path of any shape over time. In our case, will make the sparkles circulate around the canvas to create an impression of flying around the center elements of the illustration. We can also use Scale and Opacity Animators to make the sparkle seem to wander further and closer from the viewer and strengthen an illusion of movement in 3-dimensional space.
Note: If you’d like to learn more about creating path animations I would recommend watching this tutorial: “Motion Path Animation — Animate Any Object Along a Custom Path.”
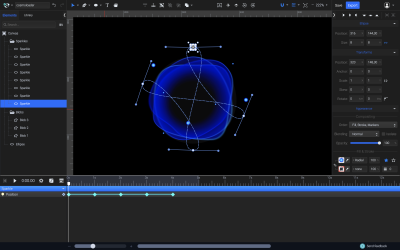
To animate the blobs, a Morph animator can be used. It allows us to modify a shape in time and create smooth transitions between those states. To achieve a nice, clean transition between two shapes, we add a keyframe to the Morph animator’s timeline and modify the shape with a Pen Tool — just like we did when we drew the additional blobs.
If you’d like to learn more about creating morph animations, this tutorial not only will introduce you to the basics but also take it to a whole new level: “Advanced Morph Animation Tutorial.”
An important part of each and every animation is its timing function. For sparkles, I mostly used Ease In Out timing functions. That allows the dots to slow down when they reach a narrow turn of the orbit and speed up on straight stretches, helping the movement to look closer to what it would seem in such a perspective of multi-dimensional space.
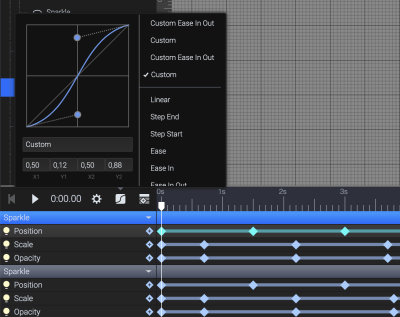
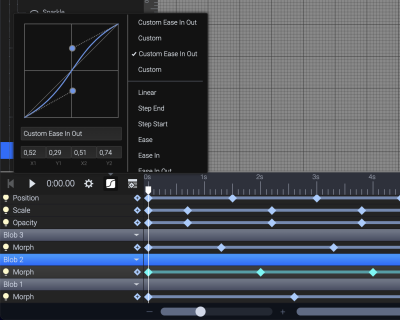
For blobs, I also used an Ease In Out function. You can notice that both timing functions are different from how Ease In Out functions look like by default. I “sharpened” them up a bit using the bezier curve interface. This allowed me to make the movements look smooth and natural, without sudden turns and hiccups but also without too visible slowdowns.
After a few more minor adjustments, the file is ready to be exported. The new version of SVGator combines the preview functionality with exporting functionalities. Thanks to that you can have a real-time browser preview of your animations while you are also testing and changing the export settings.
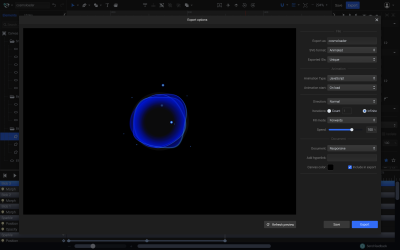
In our case, we want the animation to act as an infinite loop. You can also control the behavior of the graphic, to show on load or upon user’s action such as click or scroll.
The exported file perfectly matches the animation we created within the app and is ready to use on the web.
See the Pen SVGator Loader by Mikołaj.
I hope you enjoyed this article and that it will inspire you to create the most amazing things with SVG in your work!
Where next? Below you can find a few useful resources to continue your journey with SVG and SVGator:
- SVGator tutorials
A series of short video tutorials to help you get started with SVGator. - SVGator Help Centre
Answers to the most common questions about SVGator, its features, and membership plans. - Unleash The Power Of Path Animations With SVGator
An extensive introduction to path animations and how to create them with SVGator.
Further Reading
- 50 Georgeous Nature Wallpapers
- 73 Creative Wallpapers – Best of
- How To Build And Launch Powerful Responsive Websites With Editor X
- Meet Penpot, An Open-Source Design Platform Made For Designers And Developers Alike

