How To Develop A Text Editor For The Web
I work for Readymag, which makes a browser-based design tool that helps people create websites, portfolios, and all kinds of online publications, without coding. Many widgets are available in our tool, and the text widget is one of the most widely used.
The text widget is a text-entry field where the user can style text using a range of controls in the editor. Each control applies a CSS property to the text. From the user’s side, it looks like an ordinary field for entering text, but a huge number of complex processes are hidden behind its apparent simplicity.
In this article, I’ll explain the challenges my company faced and the solutions we used to create a text widget in our application. I’ll also dive into how we implemented it and what we learned along the way — and how typing on the web works in general.
Editing Text On The Web
There are several ways to implement text-input fields on the web. We could use a simple text field, or a multi-line textarea element, or the contenteditable attribute to make an input editable, or document.designMode = on. How are they different?

The input and textarea elements are ideal for adding text to a page, but they don’t provide a rich text-formatting experience. For this, we can use the contenteditable attribute to make almost any element editable and enable the use of text styles.
See the Pen “Text Inputs” by Ilya Medvedev.
If you need to edit the entire page at once, you can use document.designMode. This mode allows any element within a given document to be edited, even an iframe.
We opted for the contenteditable attribute, which includes all of the necessary text-editing capabilities. With this attribute, any text on the page becomes editable, which is very important if we want to enable people to style text with CSS. For example, users could then style selected sections or the entire text directly.
Text Styles And Font Properties
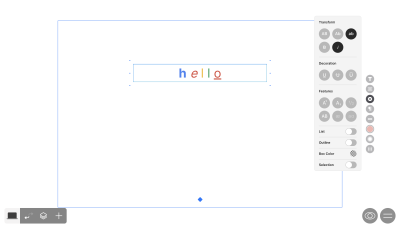
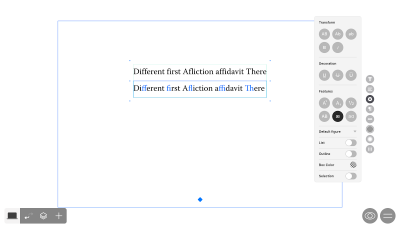
We enable users to style text in any way they wish by providing access to all options that CSS provides out of the box. In addition to the well-known properties, such as font, style, color, and decoration, we give users the opportunity to use OpenType font features, such as ligatures, stylistic sets, fractions, and so on. These features work through the font-feature-settings CSS property, which allows users to customize text styles.
Note: I highly recommend reading Sparanoid’s excellent article showcasing all of OpenType’s features.

Modern typography has taken a big step forward, allowing for the use of variable fonts on the web via the font-variation-settings property.

Each variable font has variable properties whose values you can change. For example, in a standard font, you can change the font weight using strictly specified values (400, 500, 600, and so on), whereas in a variable font, you can use any value in the available range, providing more extensive possibilities for text styling.
.style-1 {
  font-weight: 600;
}

.style-2 {
  font-variation-settings: "wght" 777;
}
Below you can see an example of how working with a variable font looks in a text widget.
In addition to the registered values (wght, wdth, slnt, etc.), font makers can also create their own unique font features (as in the example above). To give our users the opportunity to use all possible font features, we need this information first.
All of the features you want to use should be defined in the font file. Let’s look at its specifications. Each font can be represented in the form of tables, providing all of the different information used when rendering its characters.
We use two tables to collect this information about fonts:
- Glyph Substitution Table
The glyph substitution table (GSUB) contains a list of glyph-rendering data. TheGSUB.featureListobject is an enumeration of font features and their properties. You can view an example of data in the table on GitHub. In this table, thetagfield is most interesting. This is the name of the font feature, and it indicates that this feature is available with this font. We can safely usetagin thefont-feature-settingsproperty. - Font Variations Table
The font variations table (fvar) is a representation of the variable properties associated with a font. An example of the table is also available on GitHub. Each object is a font property, with a description of possible values (min,max, default) and a localized name (if any). We use these values with thefont-variation-settingsproperty.
With the help of these two tables, we can cover all of our requirements: using variable font properties and various font features. The resulting data is displayed in the text-widget controls in the editor, where users can style text without using any code.
Using Your Keyboard
Text input is one of the most important aspects of the text-widget user experience. In addition to enabling shortcuts for working with text, we had to deal with some unusual challenges. Navigating text with the arrow keys was definitely one of them.

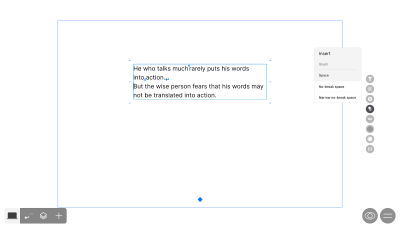
While the user is editing, the text widget also shows hidden characters, such as non-breaking spaces and line breaks. They are implemented as SVG icons inserted in the text, which poses a problem: If we use contenteditable, then these icons prevent users from moving their cursor with the arrow keys.
The solution is simple enough: Use a span and the :before pseudo-element. This way, the browser perceives the icon as being text and the arrow keys work great.
span:before {
  content: "";
  height: 1em;
  position: relative;
  background-repeat: no-repeat;
  background-image: url("data:image/svg+xml,...");
  background-position: center bottom;
  background-size: 1em;
}
Shortcuts
There are two keyboard shortcuts for pasting text in a text widget.
Cmd/Ctrl + V pastes text from the clipboard and keeps any styles it had in the original document. If the text was copied from an application such as Pages, Notes, Word or Google Docs, then your clipboard will contain HTML information, not just plain text. This HTML can be parsed and pasted while keeping the original styles.
You can get the HTML data as follows:
// https://www.w3.org/TR/clipboard-apis/#reading-from-clipboard
document.addEventListener('paste', (e) => {
  const text = e.clipboardData.getData('text/plain');
  const html = e.clipboardData.getData('text/html');

  handlePaste();
});
In addition, we have the Cmd + Shift + V shortcut. When you insert text using this keyboard combination, the browser will leave the plain data in the payload, so styling is controlled by the paste destination. These shortcuts exist in the browser by default, but you need to remember to implement them in your project.
Text Selection And Focus
See the Pen “Selection example” by Ilya Medvedev.
Text selection helps users see which piece of text is currently being edited. Let’s try a simple example: an input field with a button to control the boldness of the text.
In this example, we can select a piece of text and press the Bold button, and the selection in the text will remain afterwards. But what if our example is more complicated? Say we add an input field to the text-size selector. In this case, the focus will shift to the new input.
There are two options for solving this problem:
- After each input event, we force the focus to move back to the text block. In this case, the selection will start blinking after a certain number of input events — we don’t want that.
- We can add the text block to an
iframe. As you probably know, aniframehas its own globalwindowobject. So, as long as the selection is within theiframe, it will persist even if the focus outside is moved.
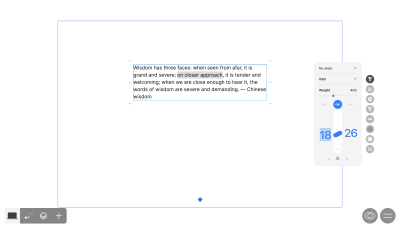
We ended up with an iframe-wrapped text widget. So, as long as the selection is within the iframe, it will persist even if the focus outside is moved. Take a look at the screenshot below. We have two selections on the page: the selected fragment in the text widget and the selected value of the text size in the control.

Performance During Text Input
The responsiveness of your text-editing interface is important. Monitor the frames-per-second (FPS) value closely, especially when it comes to tasks like editing text at a high speed or changing the font size.
Readymag has two viewports: desktop and mobile. Text styles can appear different in each. While the text is being entered, the editor will perform various calculations to synchronize data between viewports. High responsiveness is achieved by using the browser API: requestAnimationFrame and requestIdleCallback:
requestAnimationFrameis called every time the screen is refreshed;requestIdleCallbackis called only when the browser is idle.
This is a great way to perform tedious operations without blocking the main thread.
Accessibility
Enabling accessibility is one of the most important practices in web development today. If your website is designed with accessibility in mind, it will give more people access to your product. This means accommodating not only people with disabilities but also users on different platforms: desktop and touch devices, screen readers, hearing devices, and so on. To understand just how important making projects accessible can be, I recommend checking out the recent accessibility statistics.
To begin incorporating web accessibility practices, first check the Web Content Accessibility Guidelines (WCAG), the most comprehensive resource on the topic. And as long as Readymag is a tool for publication, in addition to WCAG, we also need to follow the Authoring Tool Accessibility Guidelines (ATAG).
Our team is currently at the stage of integrating accessibility into the editor. In subsequent articles, we will share more about our journey towards fully integrating accessibility at Readymag. You can also check any work made with Readymag using our accessibility checklist.
Best Practices
Finally, here are some tips to help you develop a text editor on the web:
- Think carefully about layout.
Identify in advance what capabilities you need and how you will work with the elements in the text editor. - Set up visual testing.
When you work with text, you cannot rely entirely on the snapshot test result. You might get the correct result in the test, expecting the given CSS for the block, but sometimes the result might not be what you expected. - Test your work in different browsers.
While most browsers support new online features reasonably well, there are often problems with displaying the same styles in different browsers. - Use feature flags for safer development of new features.
- Measure FPS in the browser when entering text.
Don’t do CPU-intensive tasks in a single thread. - Don’t be afraid to experiment.
- Last but not least, try Text Widget in Readymag.
Some Useful Links
- “The Complete CSS Demo For OpenType Features,” Sparanoid
- “Introduction To Variable Fonts On The Web,” web.dev
- “Awesome Typography,” Joël Galeran
- “Variable Fonts,” Nick Sherman
- Fontkit
- OpenType.js
Further Reading
- An Introduction To CSS Scroll-Driven Animations: Scroll And View Progress Timelines
- Tight Mode: Why Browsers Produce Different Performance Results
- On-Device AI: Building Smarter, Faster, And Private Applications
- Embracing Introversion In UX


 Register now for WAS 2026
 Register for free to attend Axe-con
 SurveyJS: White-Label Survey Solution for Your JS App


