How To Host A WordPress Site On Amazon Lightsail

Email Newsletter
Weekly tips on front-end & UX.
Trusted by 182,000+ folks.
This article has been kindly supported by our dear friends at AWS who offer reliable, scalable, and inexpensive cloud computing services. Thank you!
A good chunk of all websites out there runs on Amazon Web Services (AWS). At the most basic, a website will usually use Amazon EC2 and Amazon S3 solutions (for computing power and data storage, respectively), and most likely also Amazon CloudFront (as the content delivery network [CDN] to distribute the assets).
This stack works very well and is super powerful, but it is not dead easy to set up, as each of these services needs to be configured to interact with one another. And once that’s done, we need to configure the operating system and install the CMS, and anything else needed to run our software.
If all we need is to launch a website quickly and easily (for instance, to show the website under development to our client or to test a WordPress plugin), spending time to set up all these separate AWS services could be a bit too much.
This is why AWS created Amazon Lightsail, a service that aggregates the other services (EC2, S3, CloudFront, and a few others) via a simplified user interface to launch webservers with everything installed and configured (for both hardware and core software) and ready to be used.
With Lightsail, we can have our website up and running in a matter of minutes.
Unlike most AWS services, Lightsail has a flat pricing structure, with a fixed price per month. (In contrast, EC2 is charged per number of seconds of use; EBS — which provides the volumes to store data in EC2 — by the size and type of disk along with any additional provisioned IOPS; S3, by the size of the stored objects and duration of storage; and CloudFront, by the amount of data transferred.) This makes it way easier to estimate our AWS bill at the end of the month.
Note: You can try out Lightsail for free for the first three months.
In this article, let’s explore how to launch a WordPress site in Lightsail in a quick and easy way.
Creating A Lightsail Instance With WordPress Pre-Installed
To access Lightsail, we head over to lightsail.aws.amazon.com (we need to be logged in to AWS).
Initially, our dashboard will be empty:

Let’s click on “Create instance” to host a WordPress site.
We must select the location of the server, the platform to use (Linux/Unit or Windows), and what software to install (OS + Apps) via the provided blueprints. Please notice that the WordPress blueprint installs the latest version and that there are separate blueprints for WordPress as a single site and as a multisite.

Choose a location that is as close as possible to your users to reduce the latency when accessing the site.

Lightsail has different prices based on how powerful the server is: The more traffic the website has, the more resources the server must have.
We can get a basic server that is good for testing for $3.50/month USD; for production, we’d rather start with a server at $5 or 10/month, monitor its traffic, and analyze (over time) if to upgrade it.
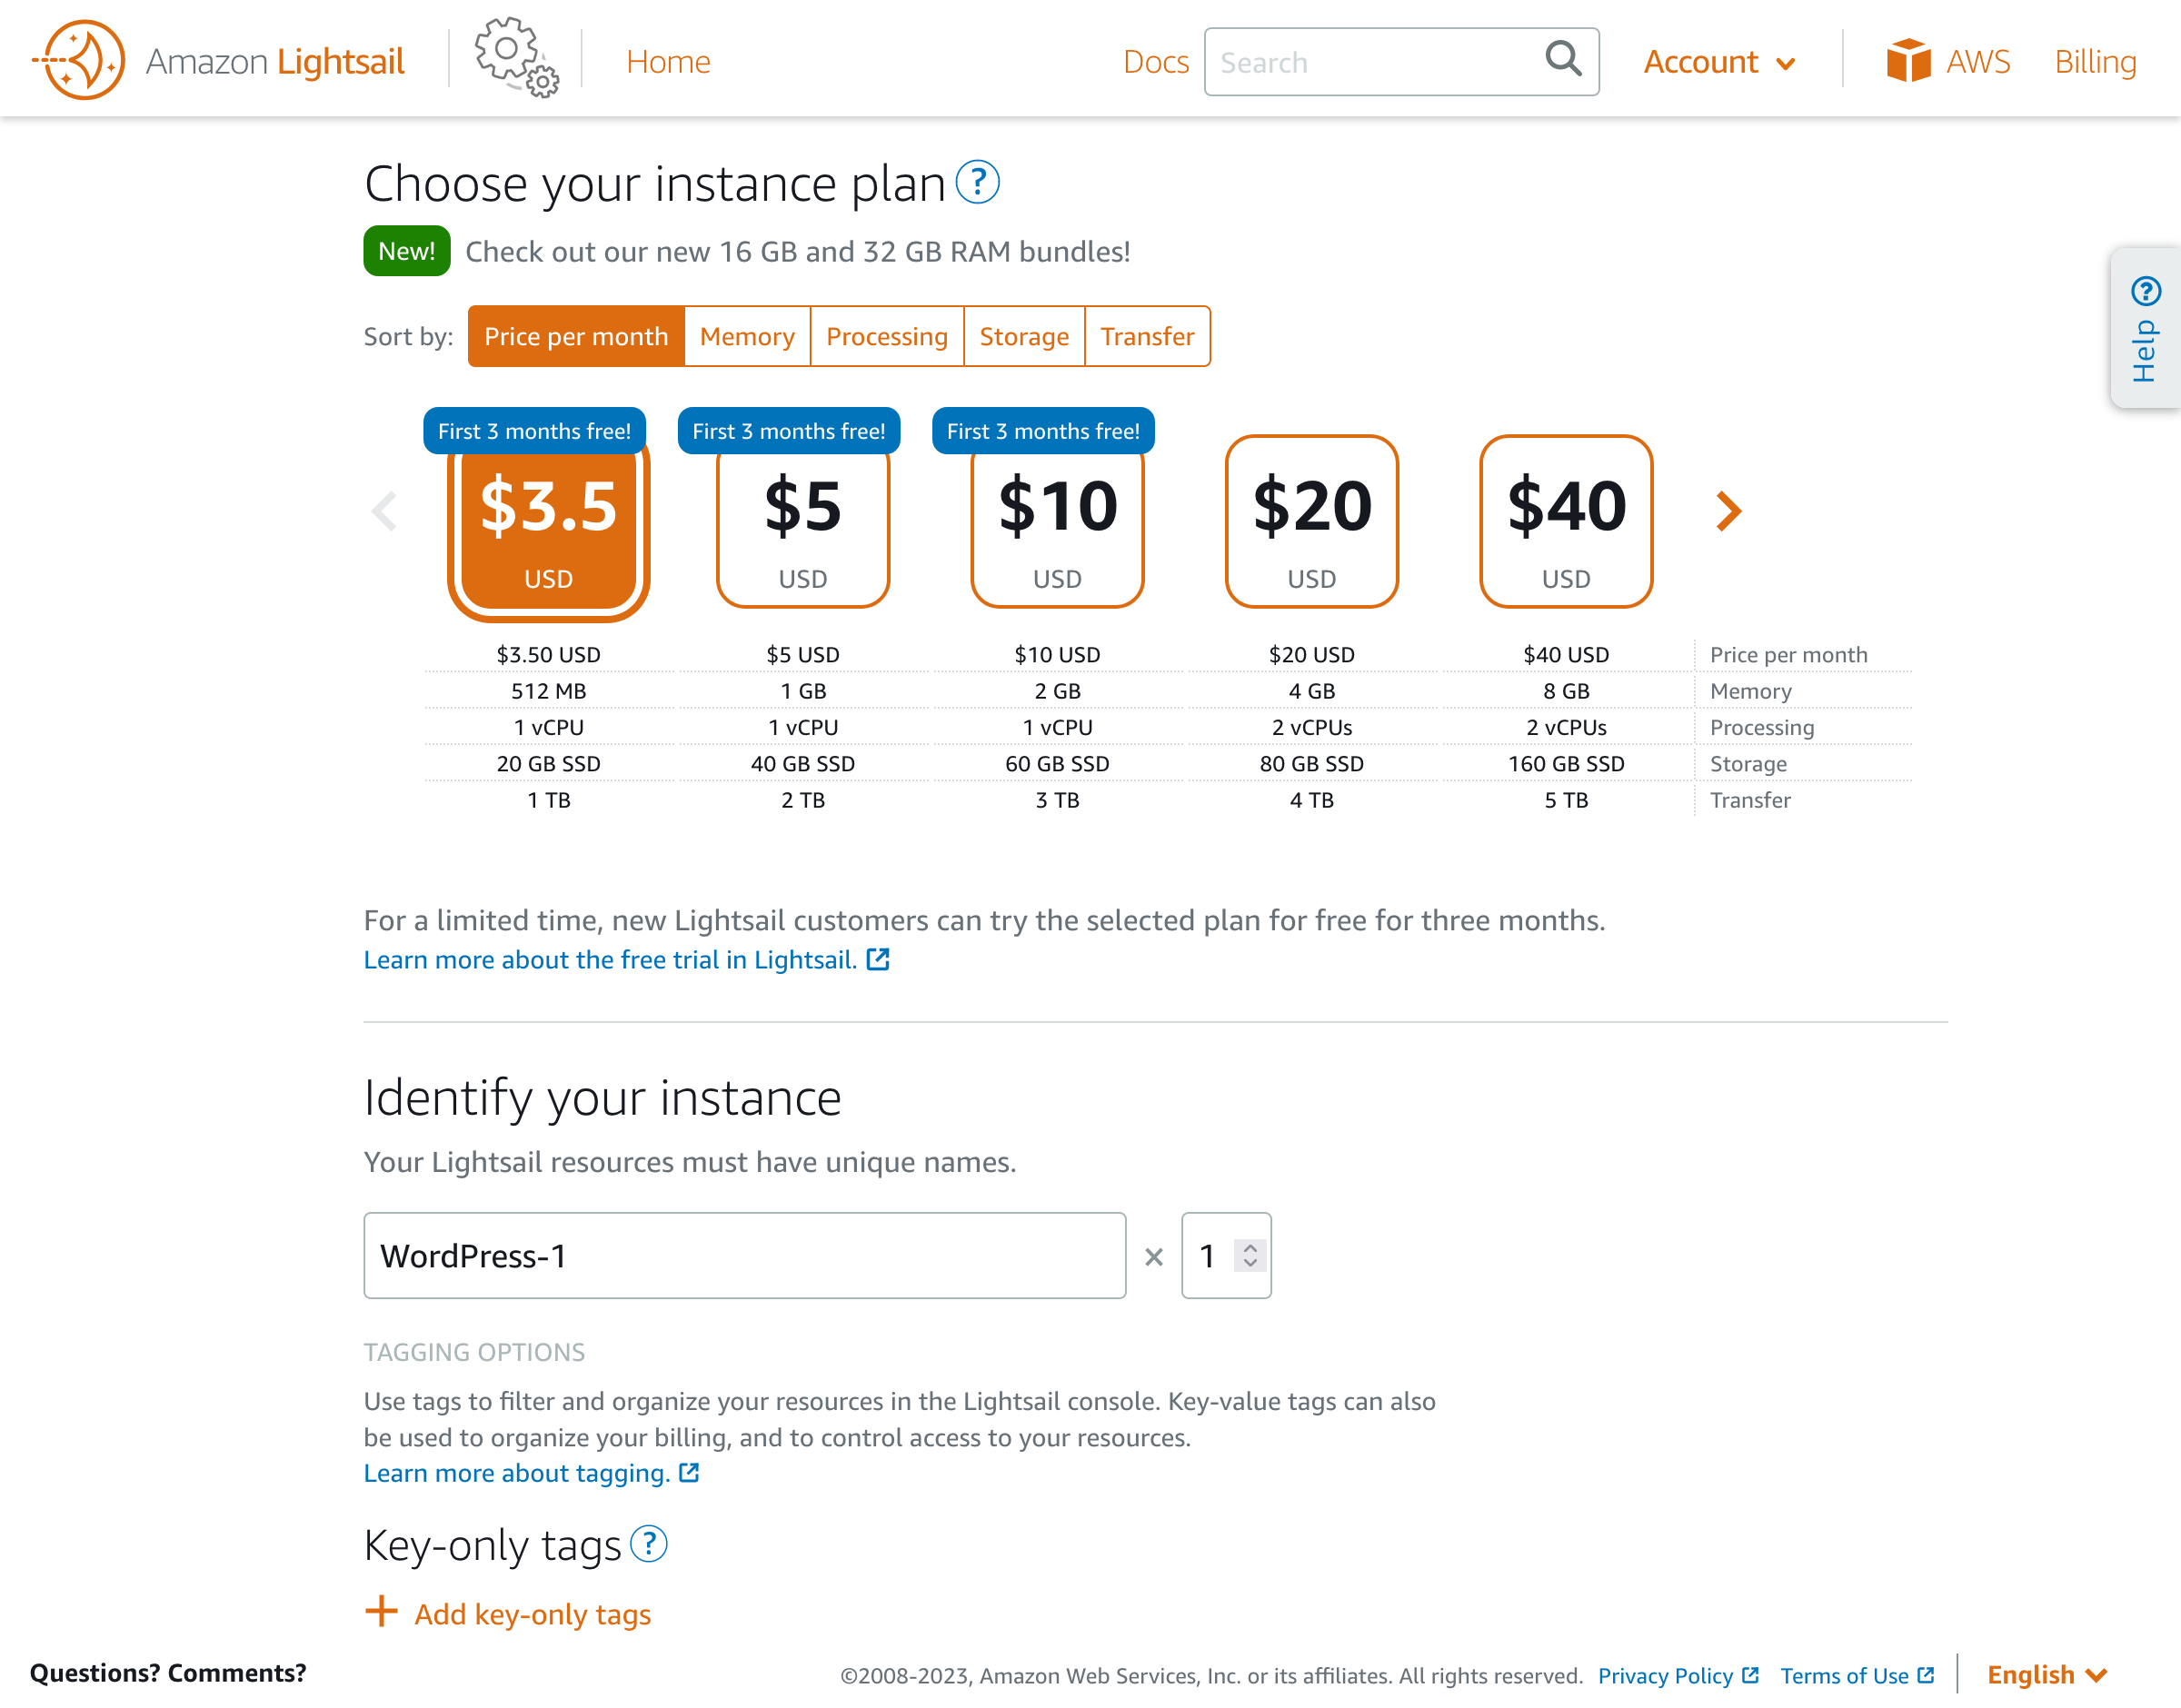
We finally assign a name to the instance and click on “Create instance.”
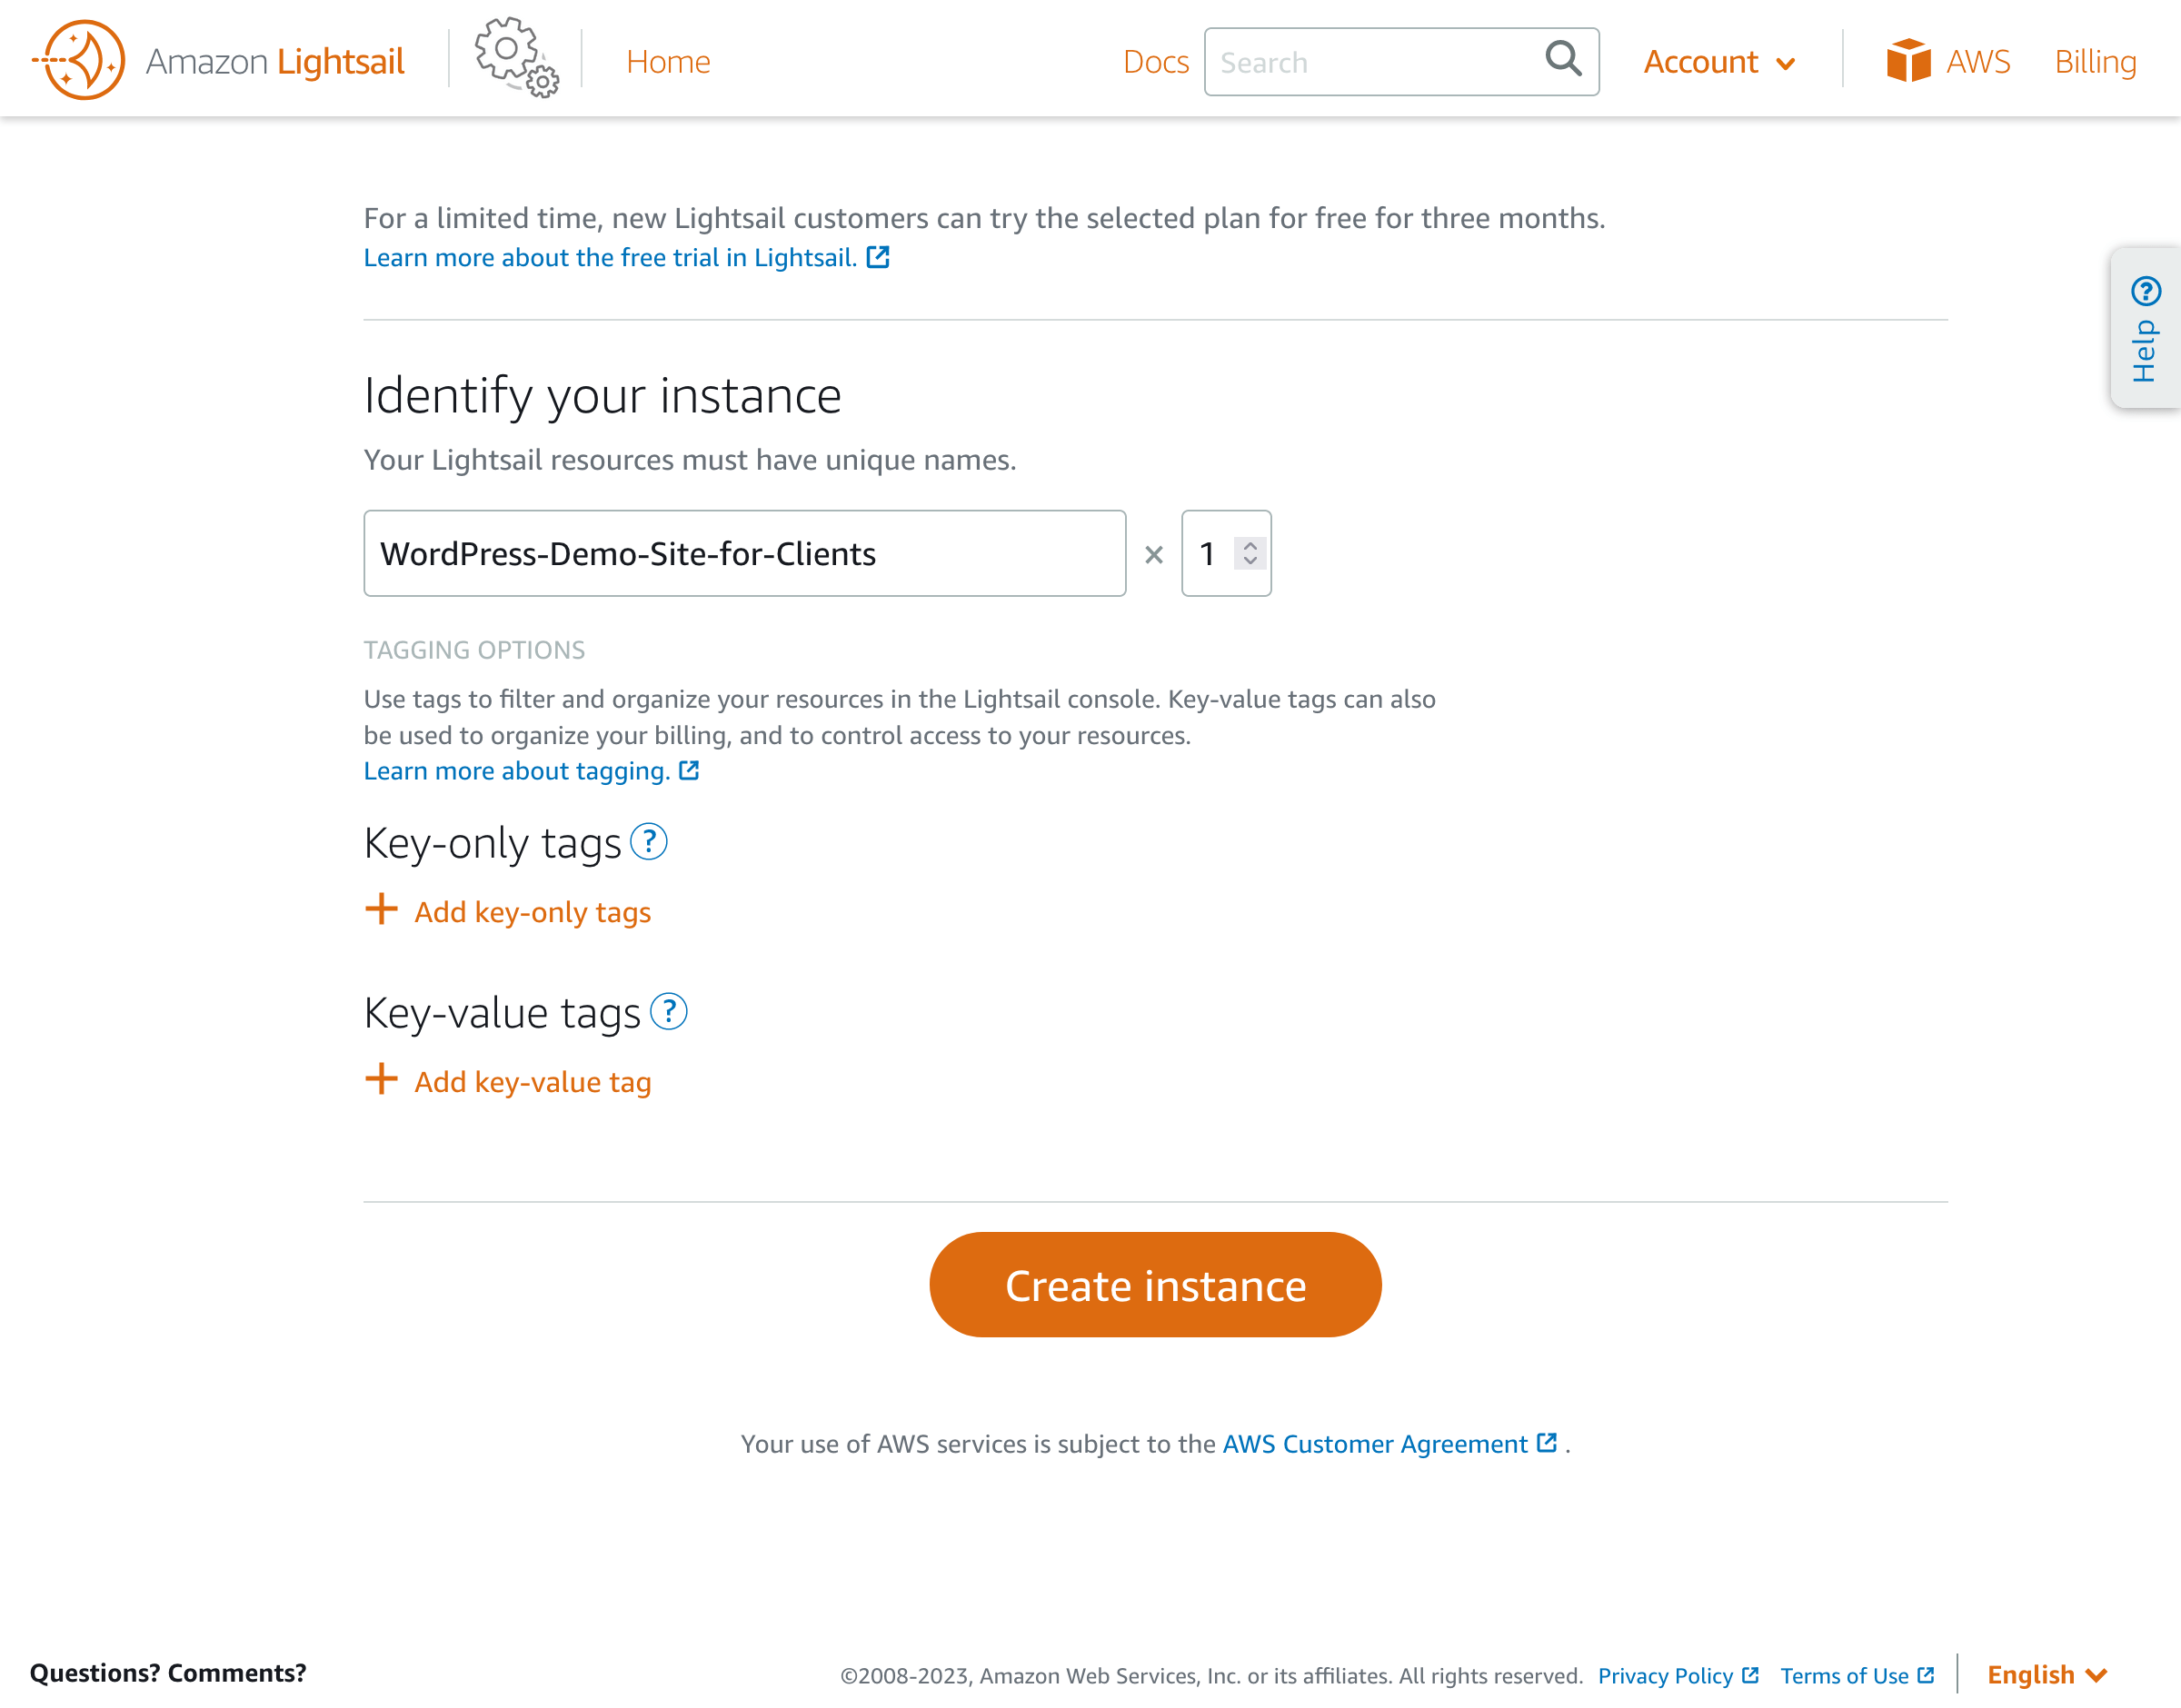
The instance will be created in the background. After less than 1 minute, it will be ready, and its status on the dashboard will change from “Pending” to “Running.”

Please notice the “Terminal” icon right next to the instance’s name. In the sections below, we will be using it to connect to the instance via SSH and execute commands on the server.
Attaching A Static IP
When the instance is created, the IP assigned to it is “elastic,” which can change (for instance, when rebooting the server). So we must create a static IP and attach it to the instance so that it never changes.
For that, head over to the Networking tab and, under “Public IP,” click on “Attach static IP.”

We must provide a name to identify the static IP.
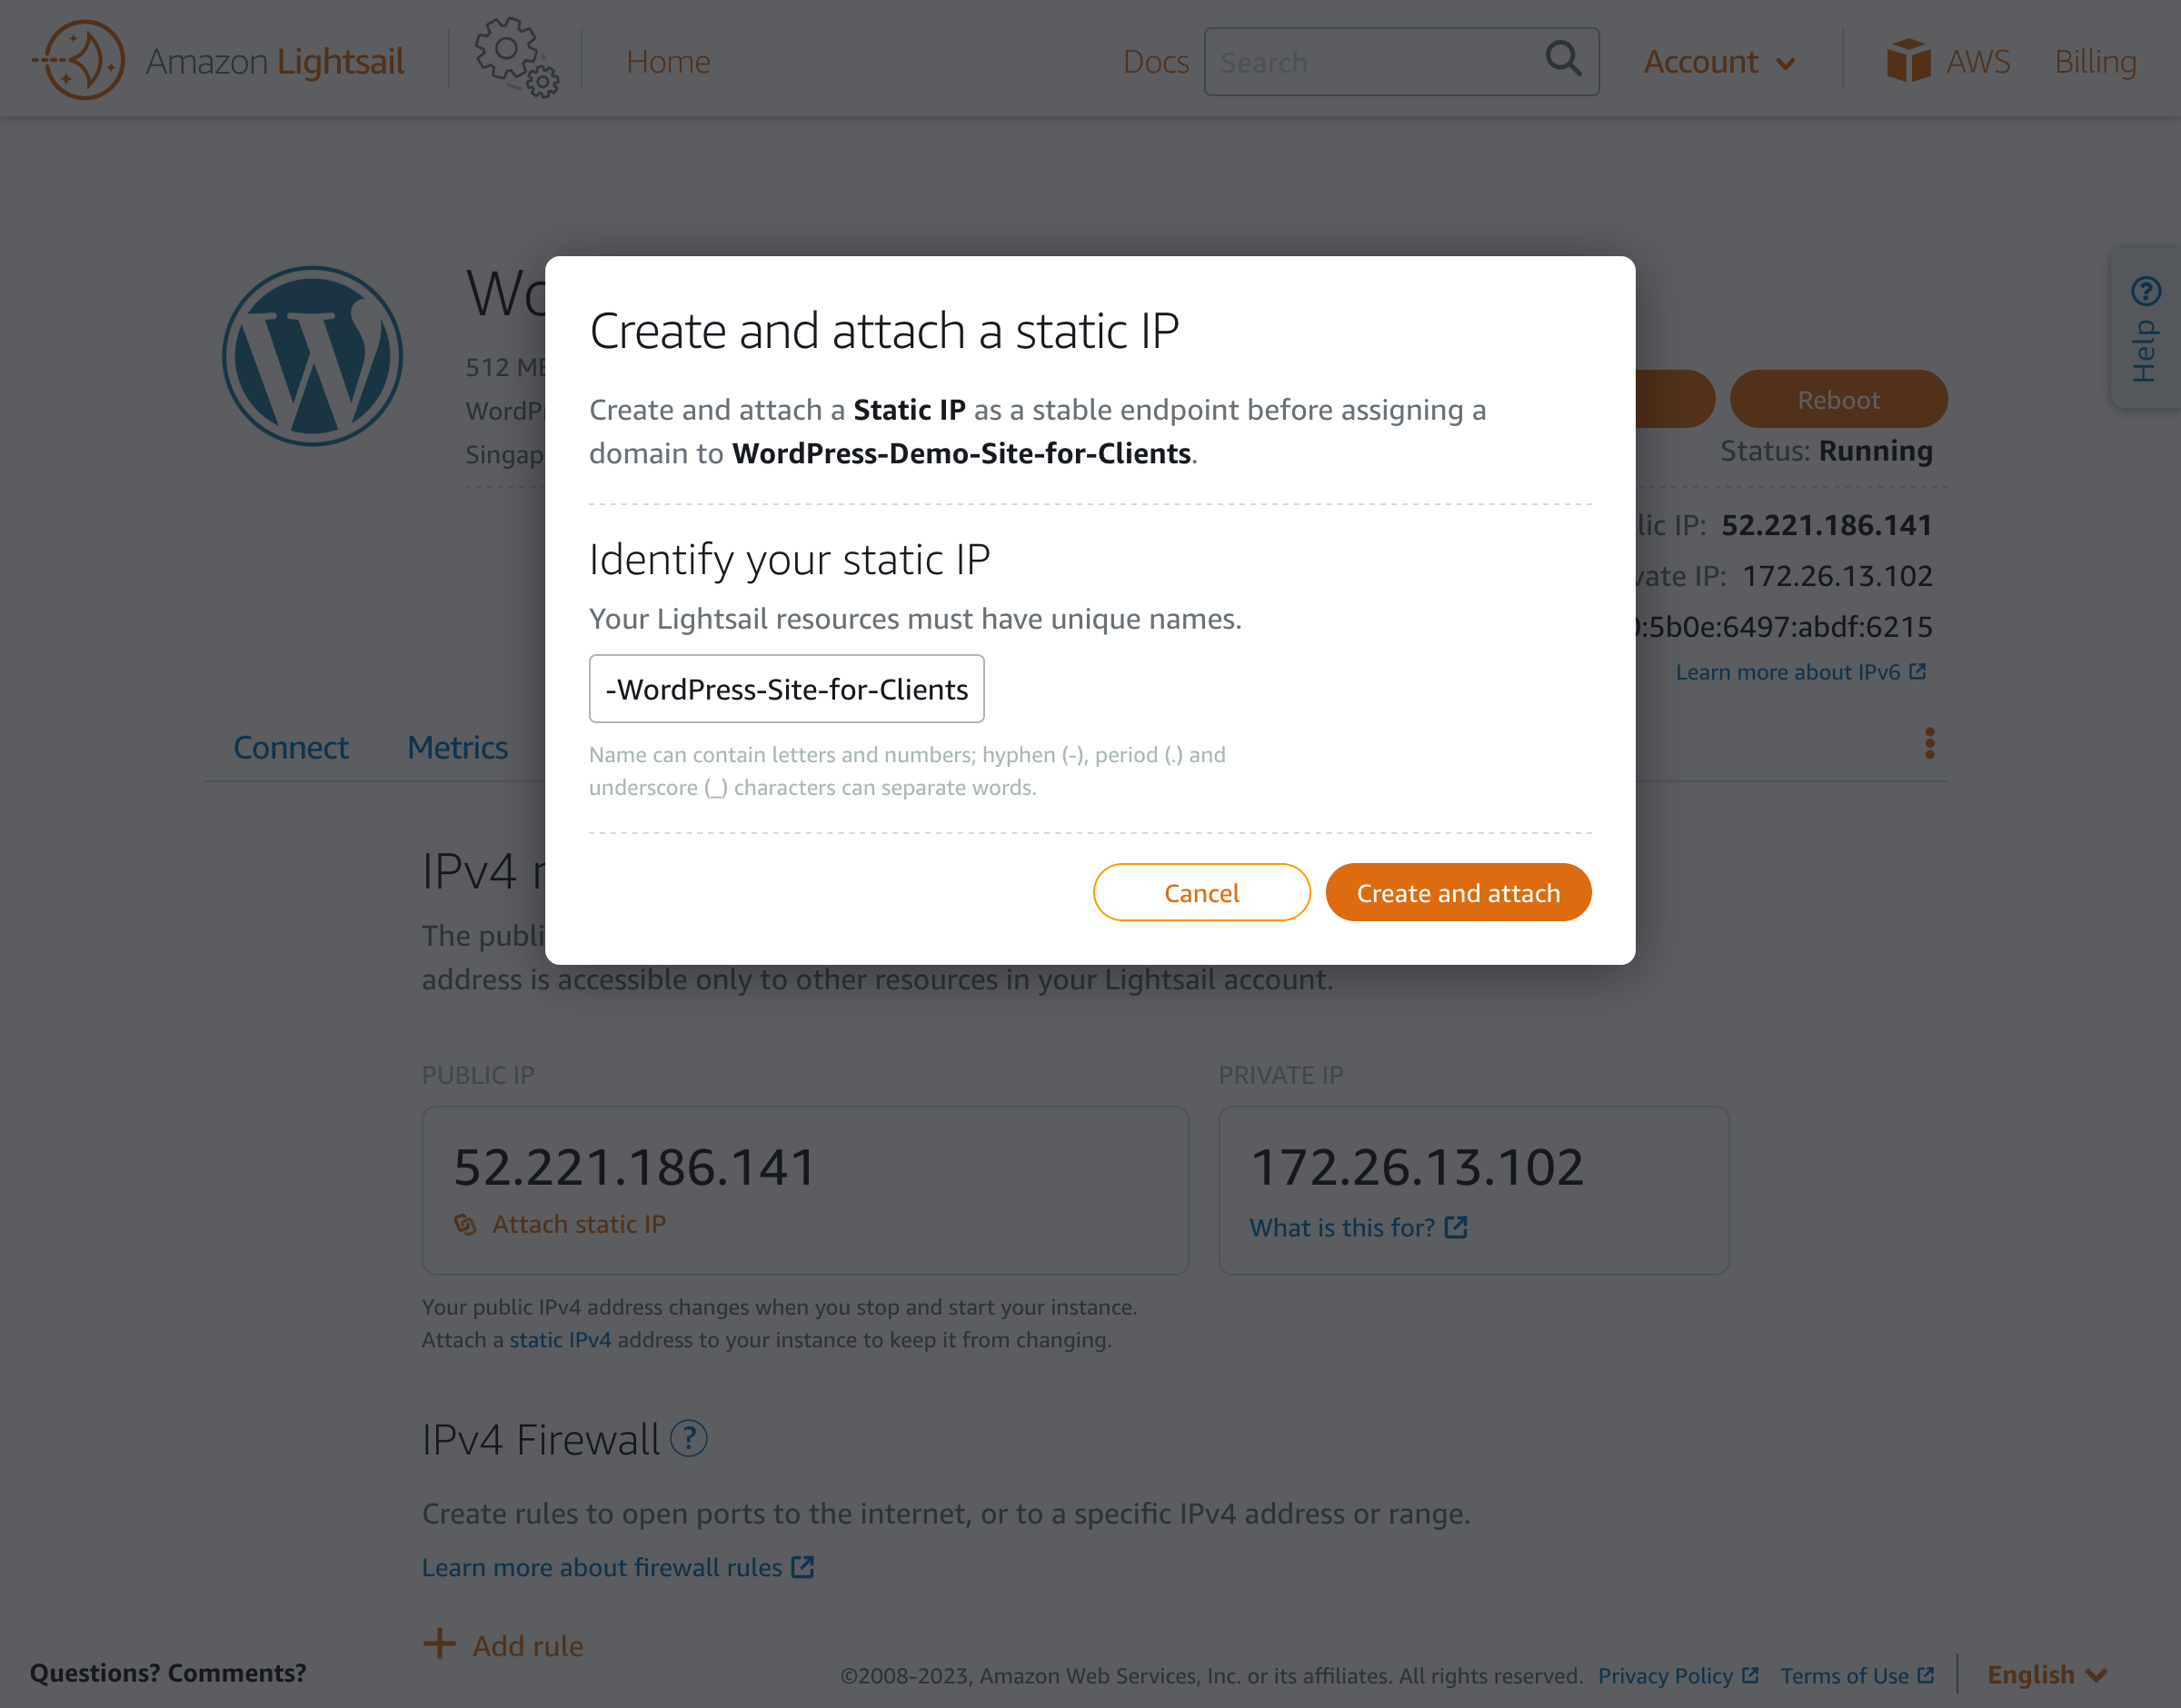
Click on “Create and attach,” upon which the server will now have a static IP associated with it.

We can now access our WordPress site in the browser under http://{PUBLIC_IP}.
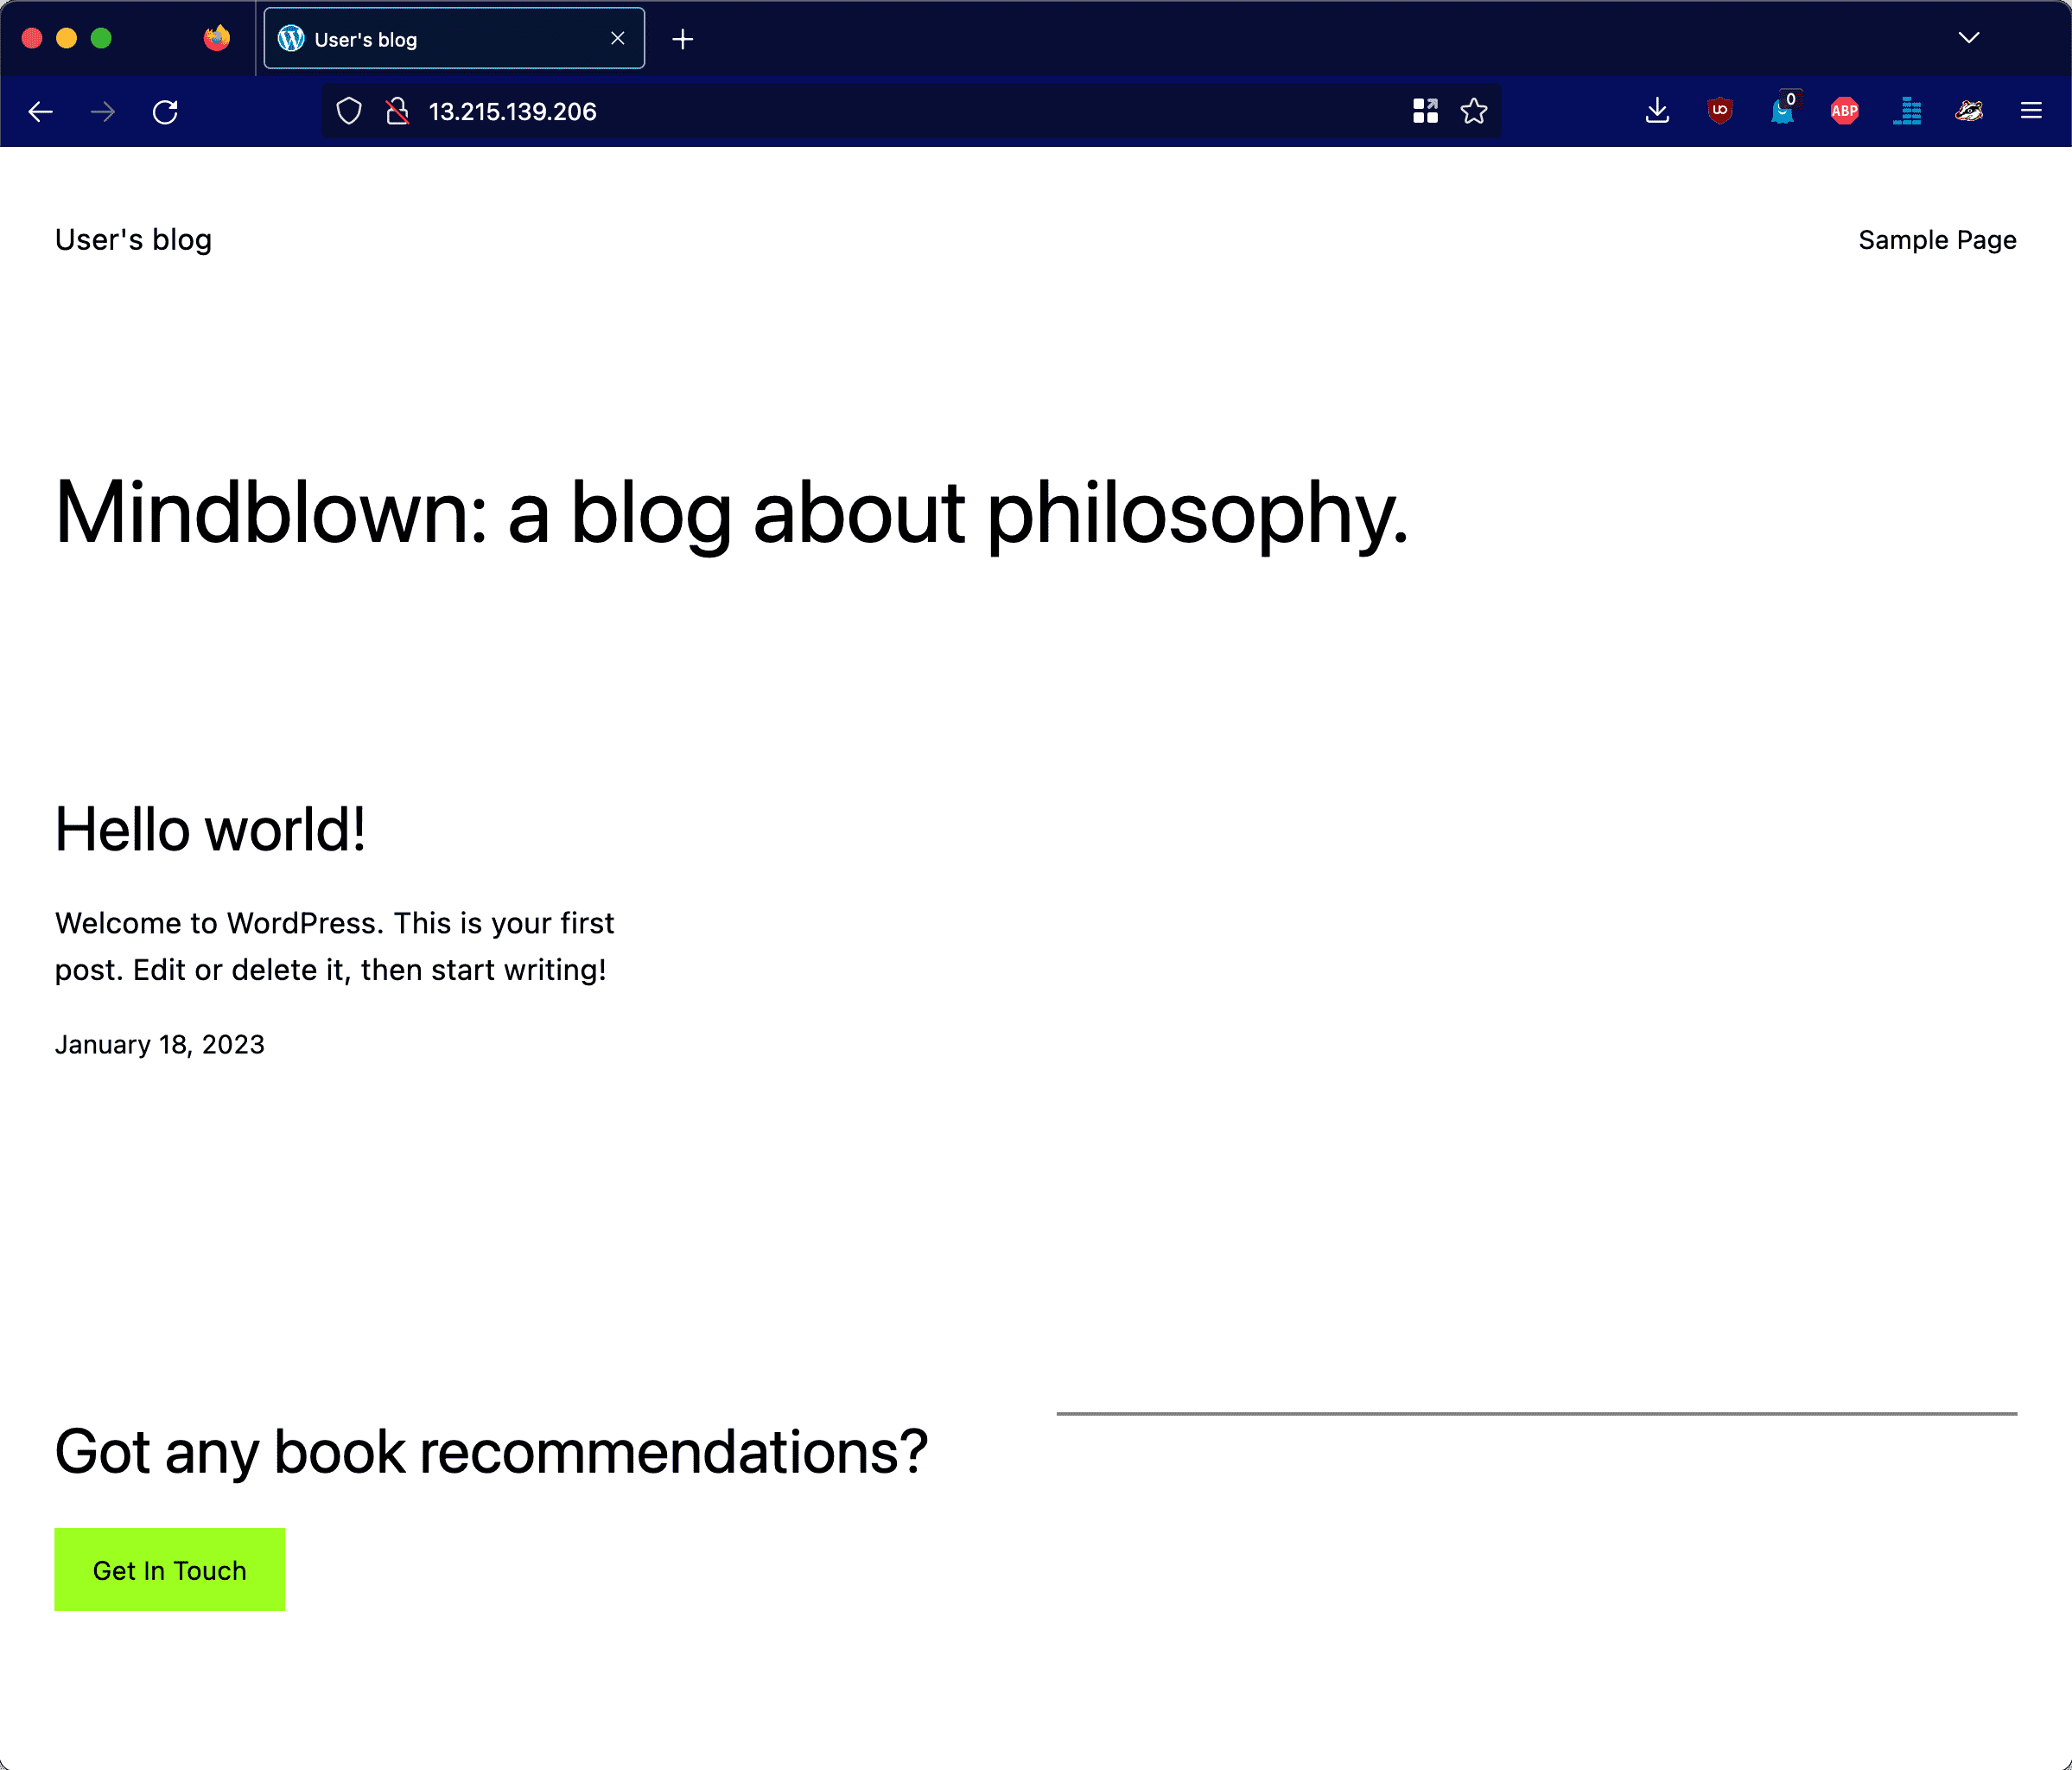
Hello, WordPress site! 👋
Accessing The WP Admin
The WordPress admin’s username is user, and we need to retrieve the password from the server by connecting to it via SSH.
For that, we click on the “Terminal” icon next to the instance name (as seen earlier), upon which a new window opens up in the browser, with a CLI running on the instance.

Execute the following command to print the password on the screen.
cat bitnami_application_password

Then highlight the password, and click on the orange clipboard icon (on the bottom right corner) to copy the password from the popping window.

Head over to the WordPress admin screen under http://{PUBLIC_IP}/wp-login.php, and input the username and password.
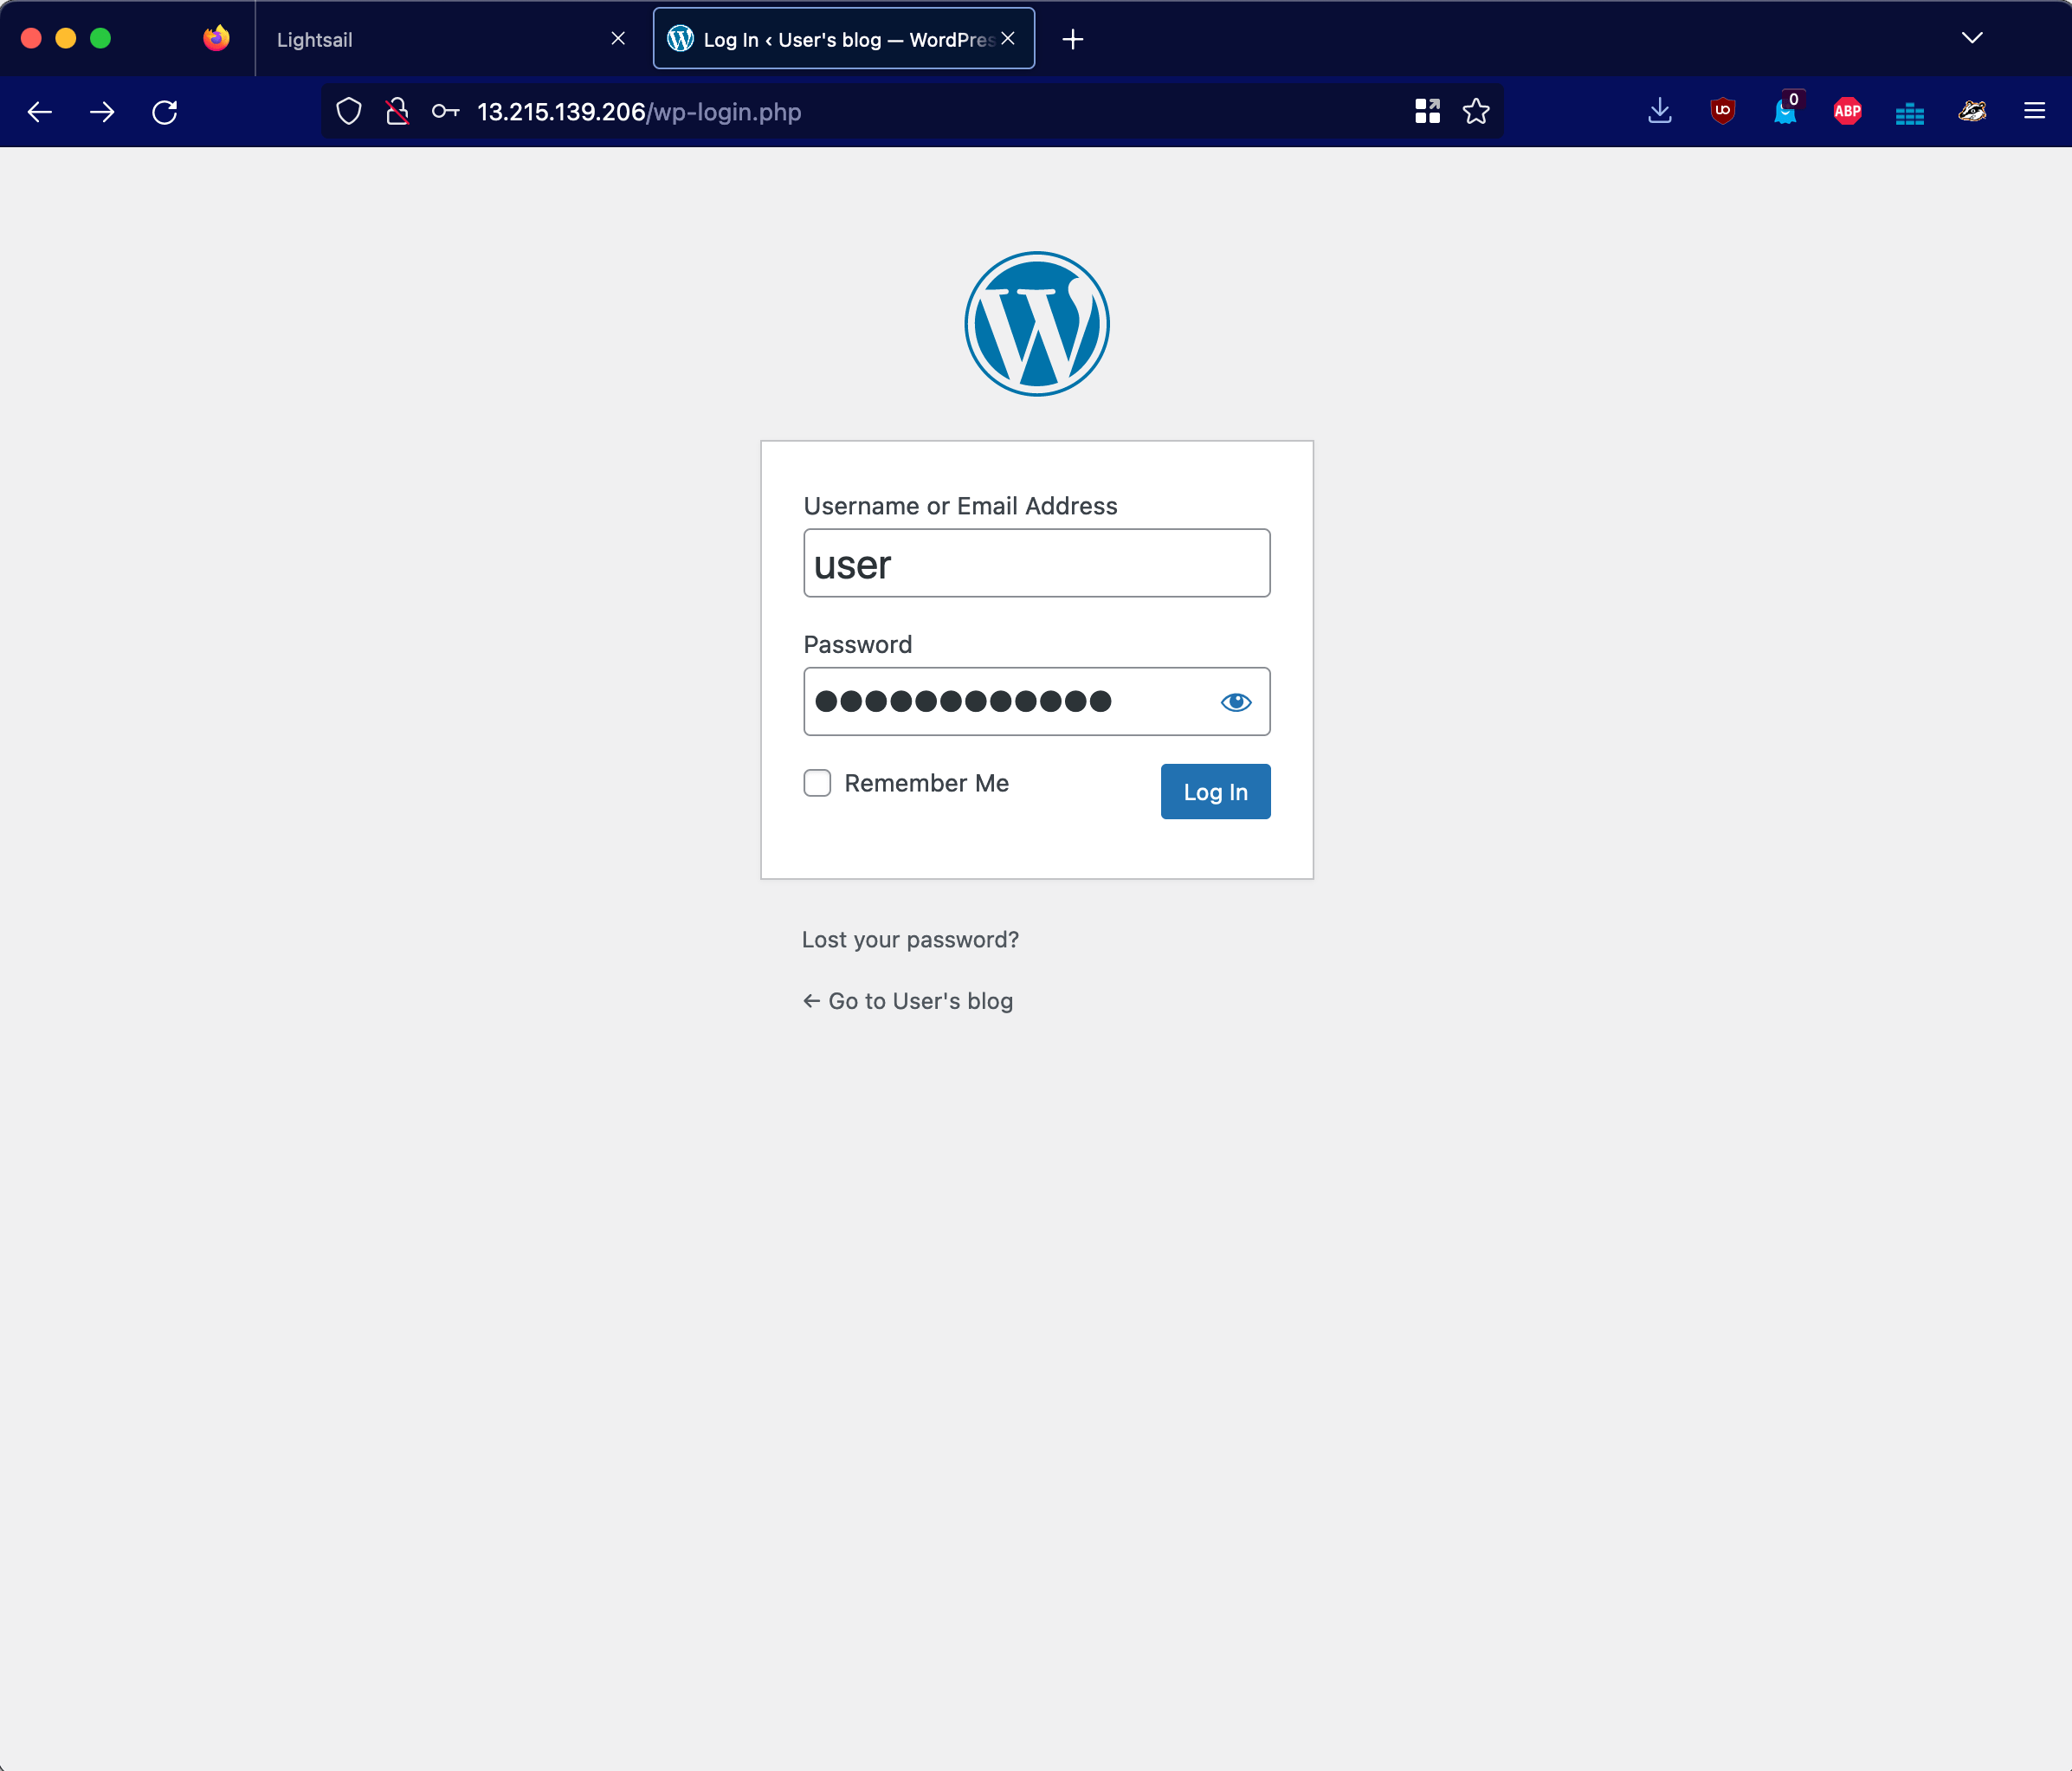
Voilà, we are in.

Using A Custom Domain
Accessing the website straight from the public IP is not ideal, so let’s create a custom domain.
In your DNS service, create an A record mapping your domain or subdomain to the instance’s public IP (if you don’t have a domain, you can also register a new one via Lightsail). I use AWS Route 53, but any DNS service will work.
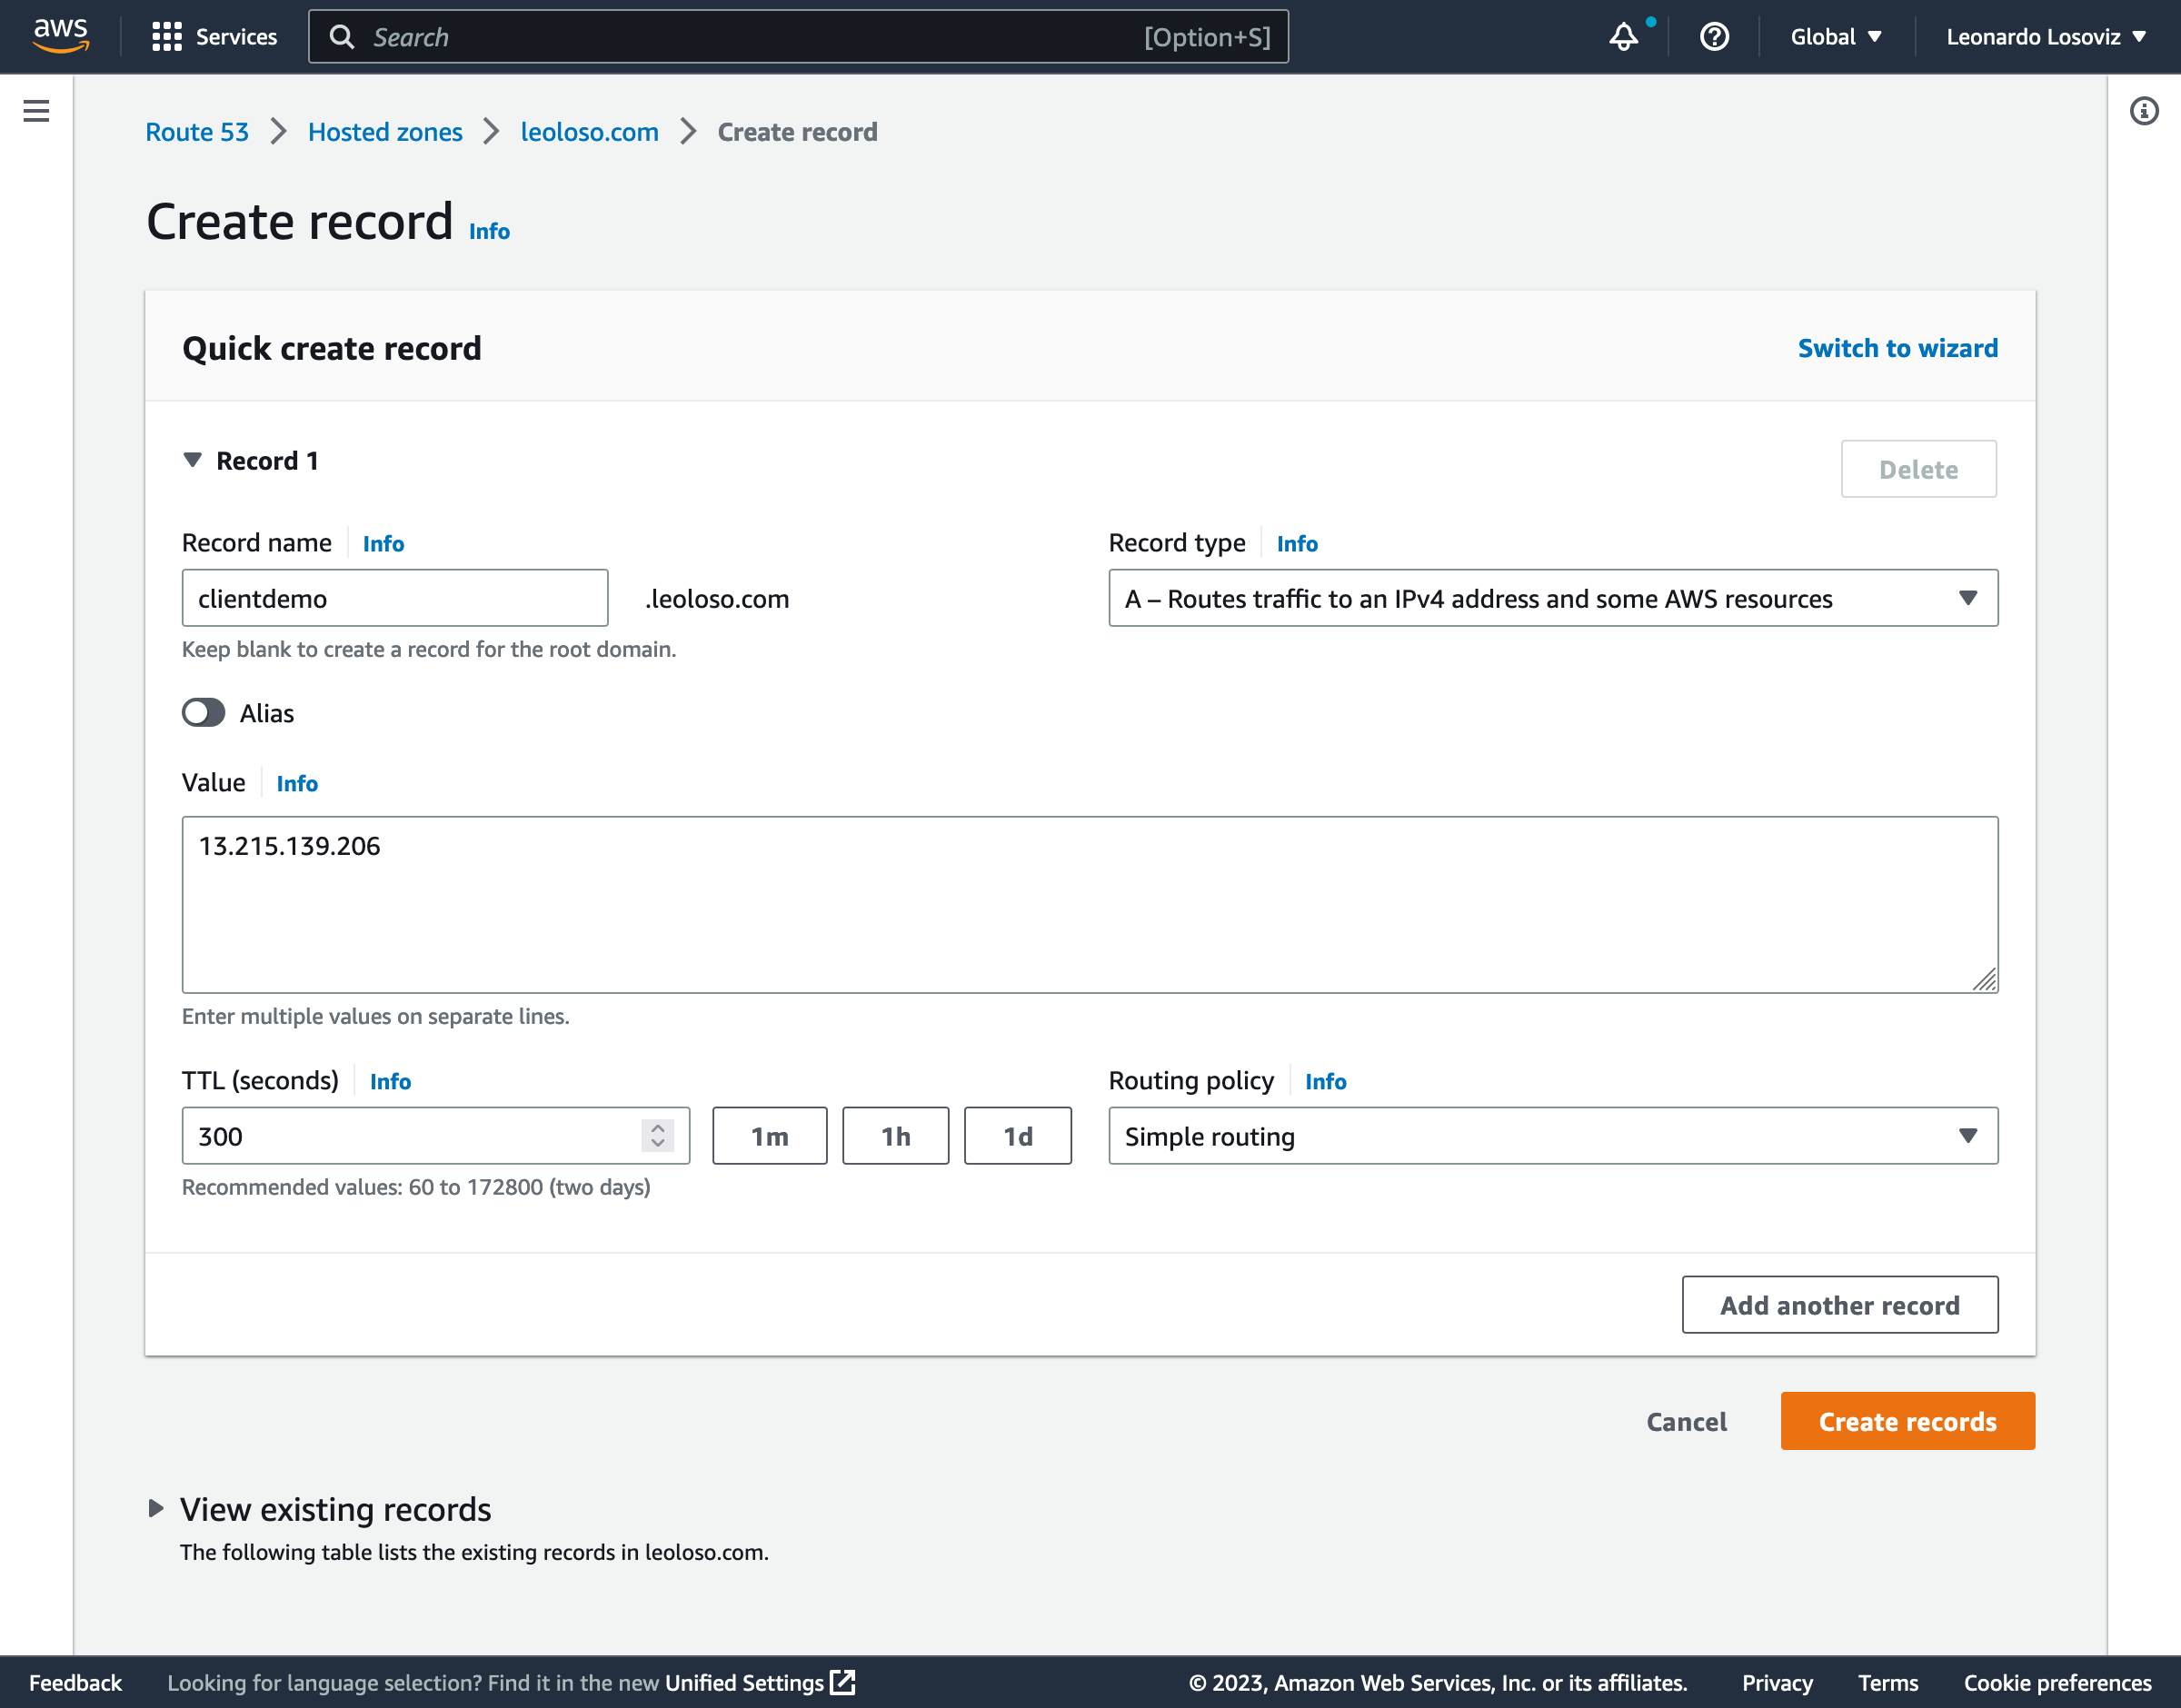
We can now access the website via the chosen domain.

Installing SSL
So far, we have been accessing the website under http. If we try https, we are told it is not secure.

So it’s time to install an SSL certificate provided via Let’s Encrypt. For this, we need to log in to the terminal again and enter the following command:
sudo /opt/bitnami/bncert-tool
The program will request to input the list of domains for which to create the certificate (so you can add yourdomain.com and www.yourdomain.com).
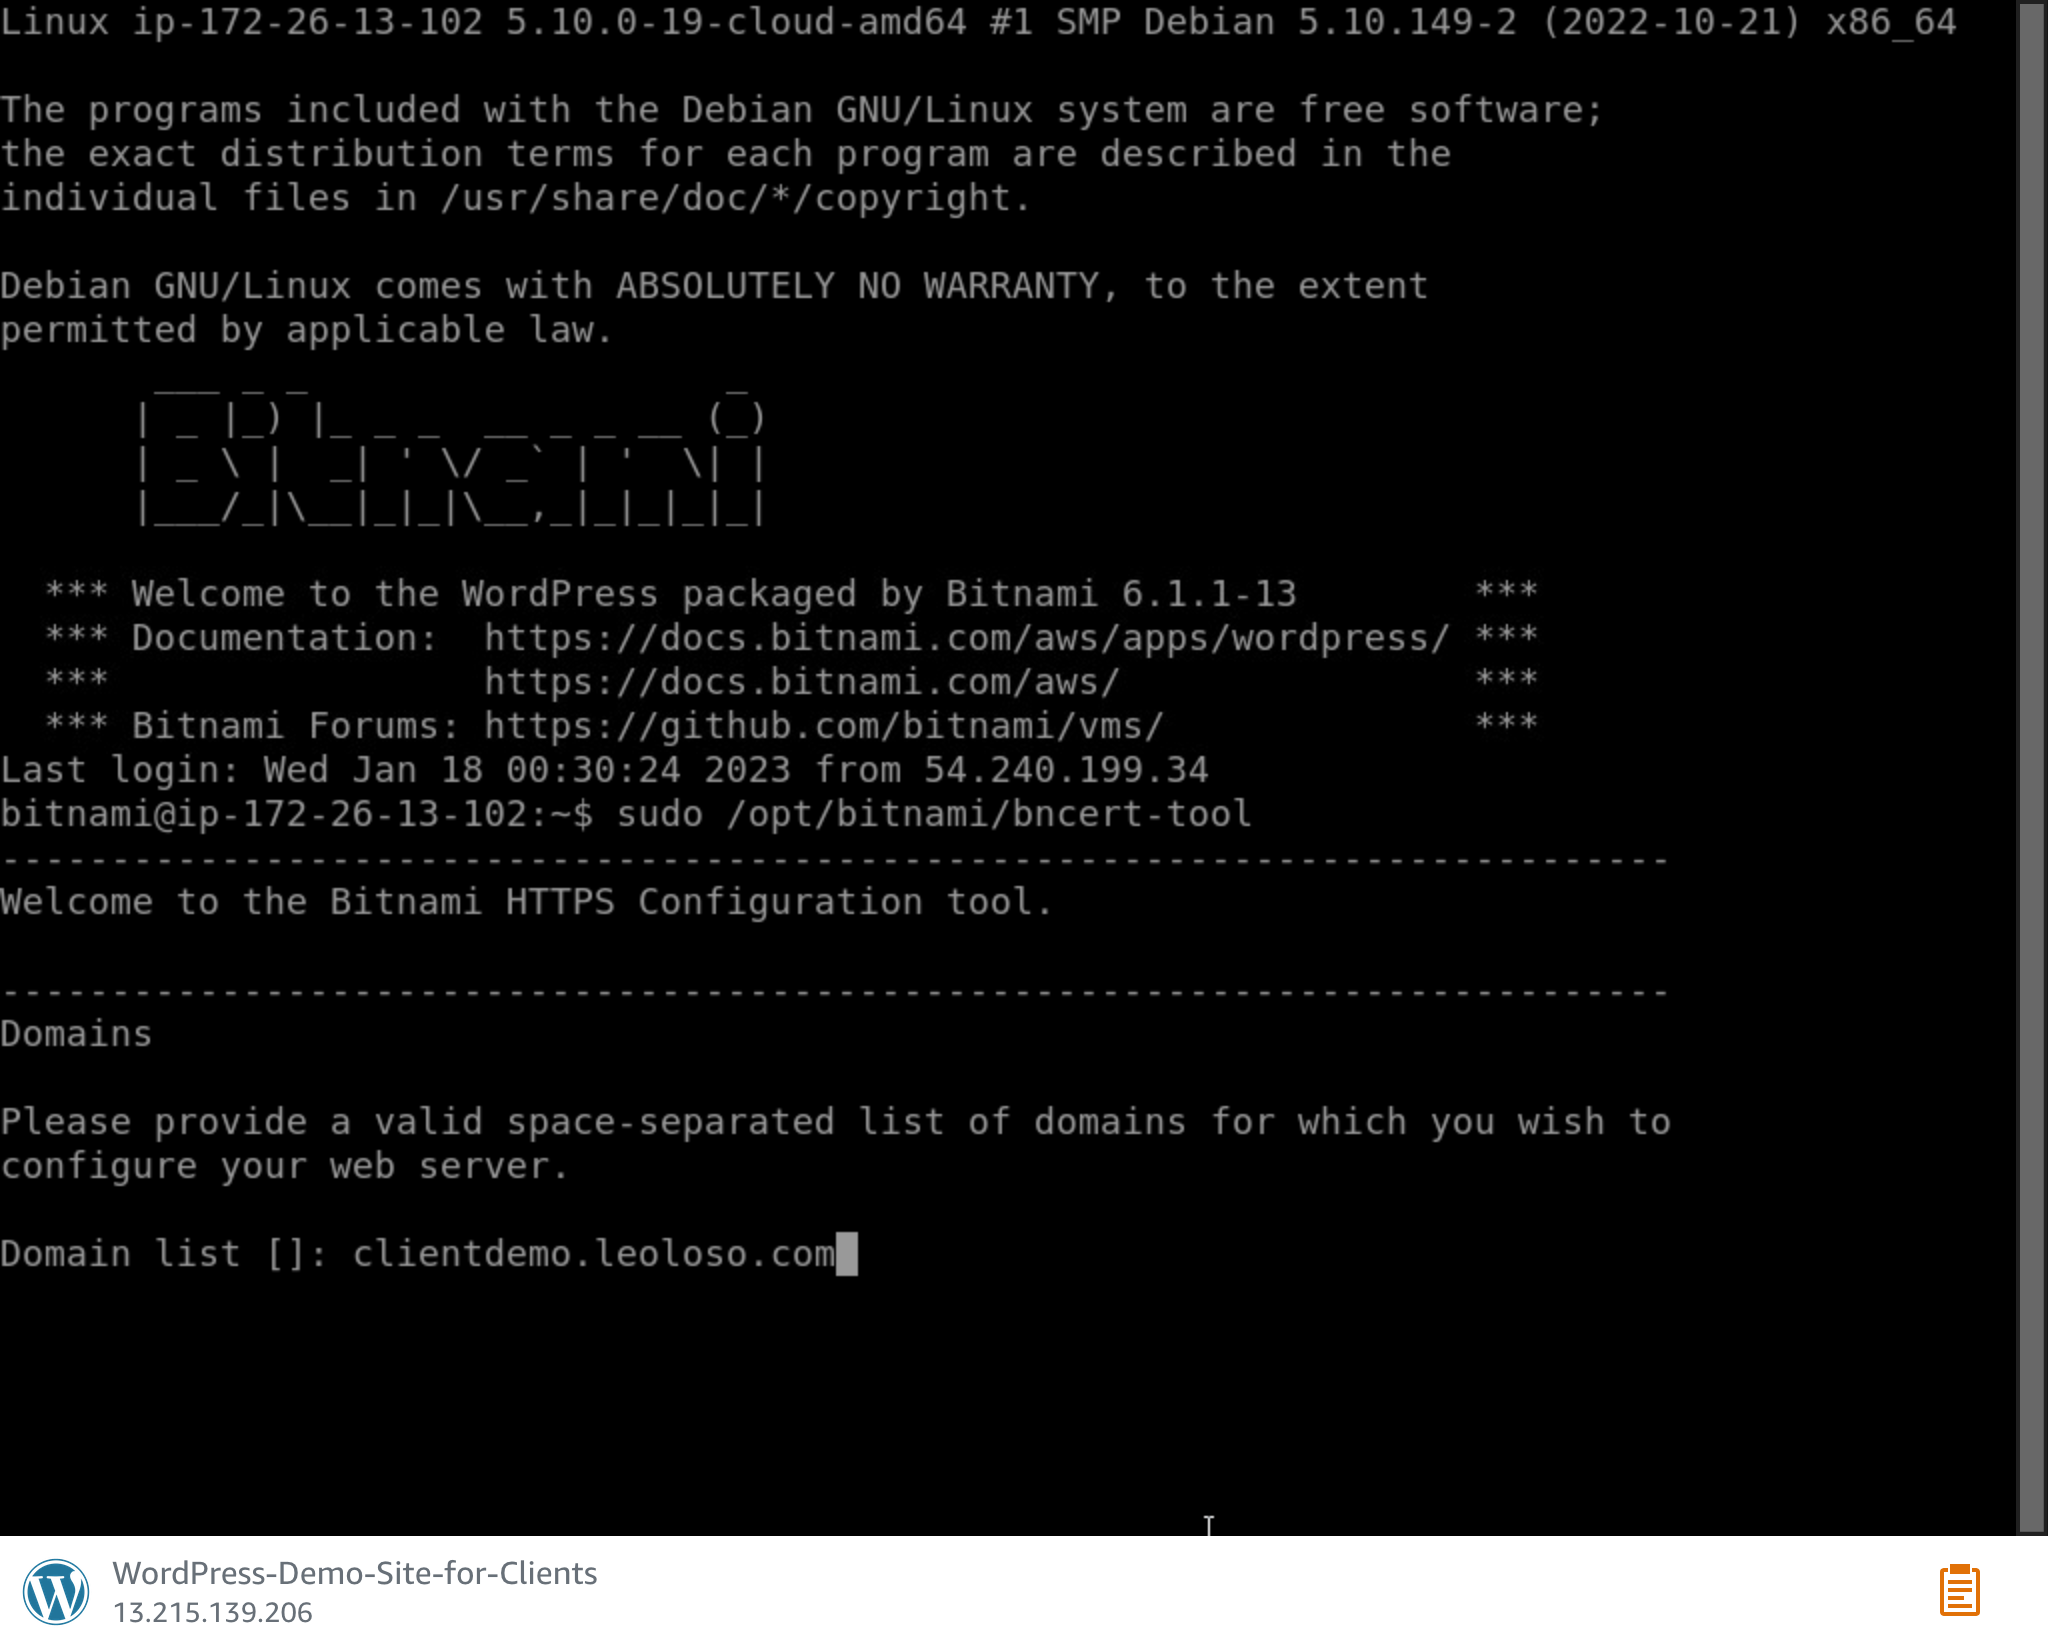
The program will then request some more info (including your email) and ask if to redirect HTTP traffic to HTTPS (it’s recommended to say yes). Once it’s all provided, the certificate will be created.
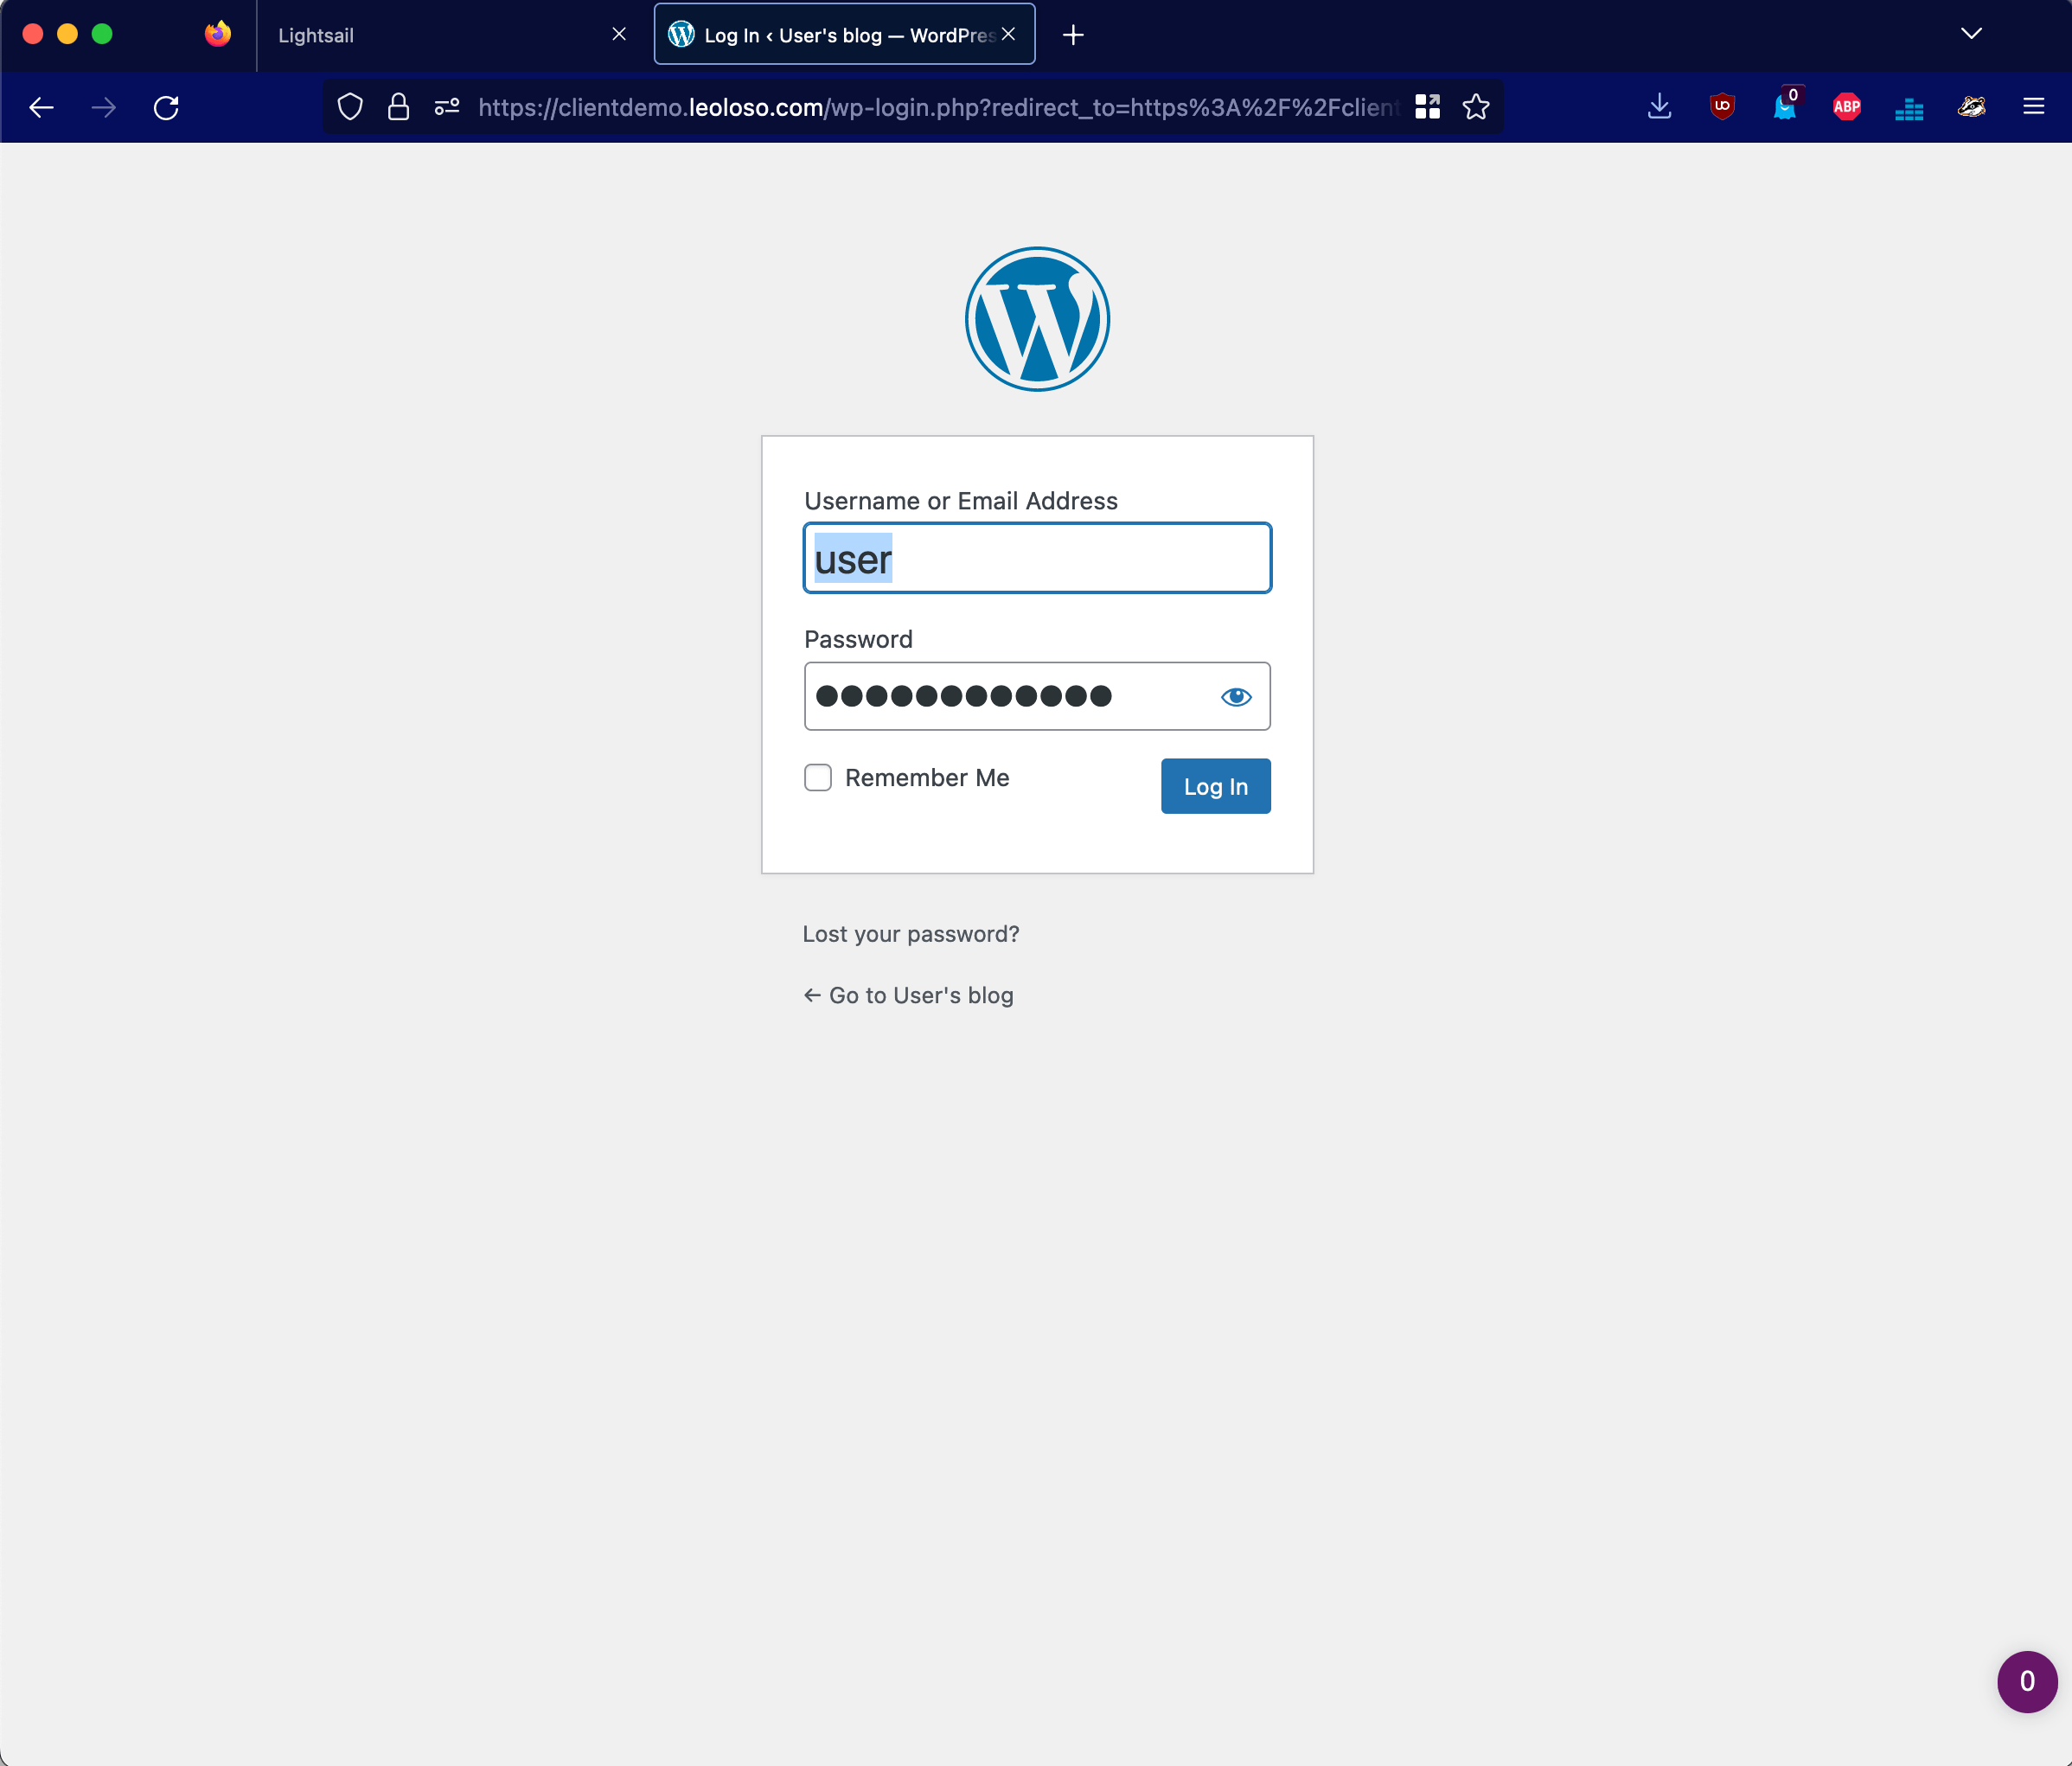
Now, accessing the site under https works well:
There’s one final step to do: Change the site URL in WordPress from http to https so that all links in the site point to the secure location, and we avoid the HTTP to HTTPS redirects.
Heading to the General Settings screen in WordPress, we see that both the “WordPress Address (URL)” and “Site Address (URL)” inputs cannot be edited.

To modify this configuration, we need to edit the wp-config.php file via the terminal.
Then connect to the terminal again, and execute this command:
sudo nano /opt/bitnami/wordpress/wp-config.php
The command opens the file in the nano text editor.

wpconfig.php file with nano. (Large preview)Scroll down until finding this code:
define('WP_SITEURL', 'http://' . $_SERVER['HTTP_HOST'] . '/');
define('WP_HOME', 'http://' . $_SERVER['HTTP_HOST'] . '/');
And replace it with this code:
define('WP_SITEURL', 'https://' . $_SERVER['HTTP_HOST'] . '/');
define('WP_HOME', 'https://' . $_SERVER['HTTP_HOST'] . '/');
if (isset($_SERVER['HTTP_CLOUDFRONT_FORWARDED_PROTO']) && $_SERVER['HTTP_CLOUDFRONT_FORWARDED_PROTO'] === 'https') {
    $_SERVER['HTTPS'] = 'on';
}
Then press Ctrl + O (to save) and Ctrl + X (to exit). Reloading the General Settings screen in WordPress, we see the site URL now uses https.

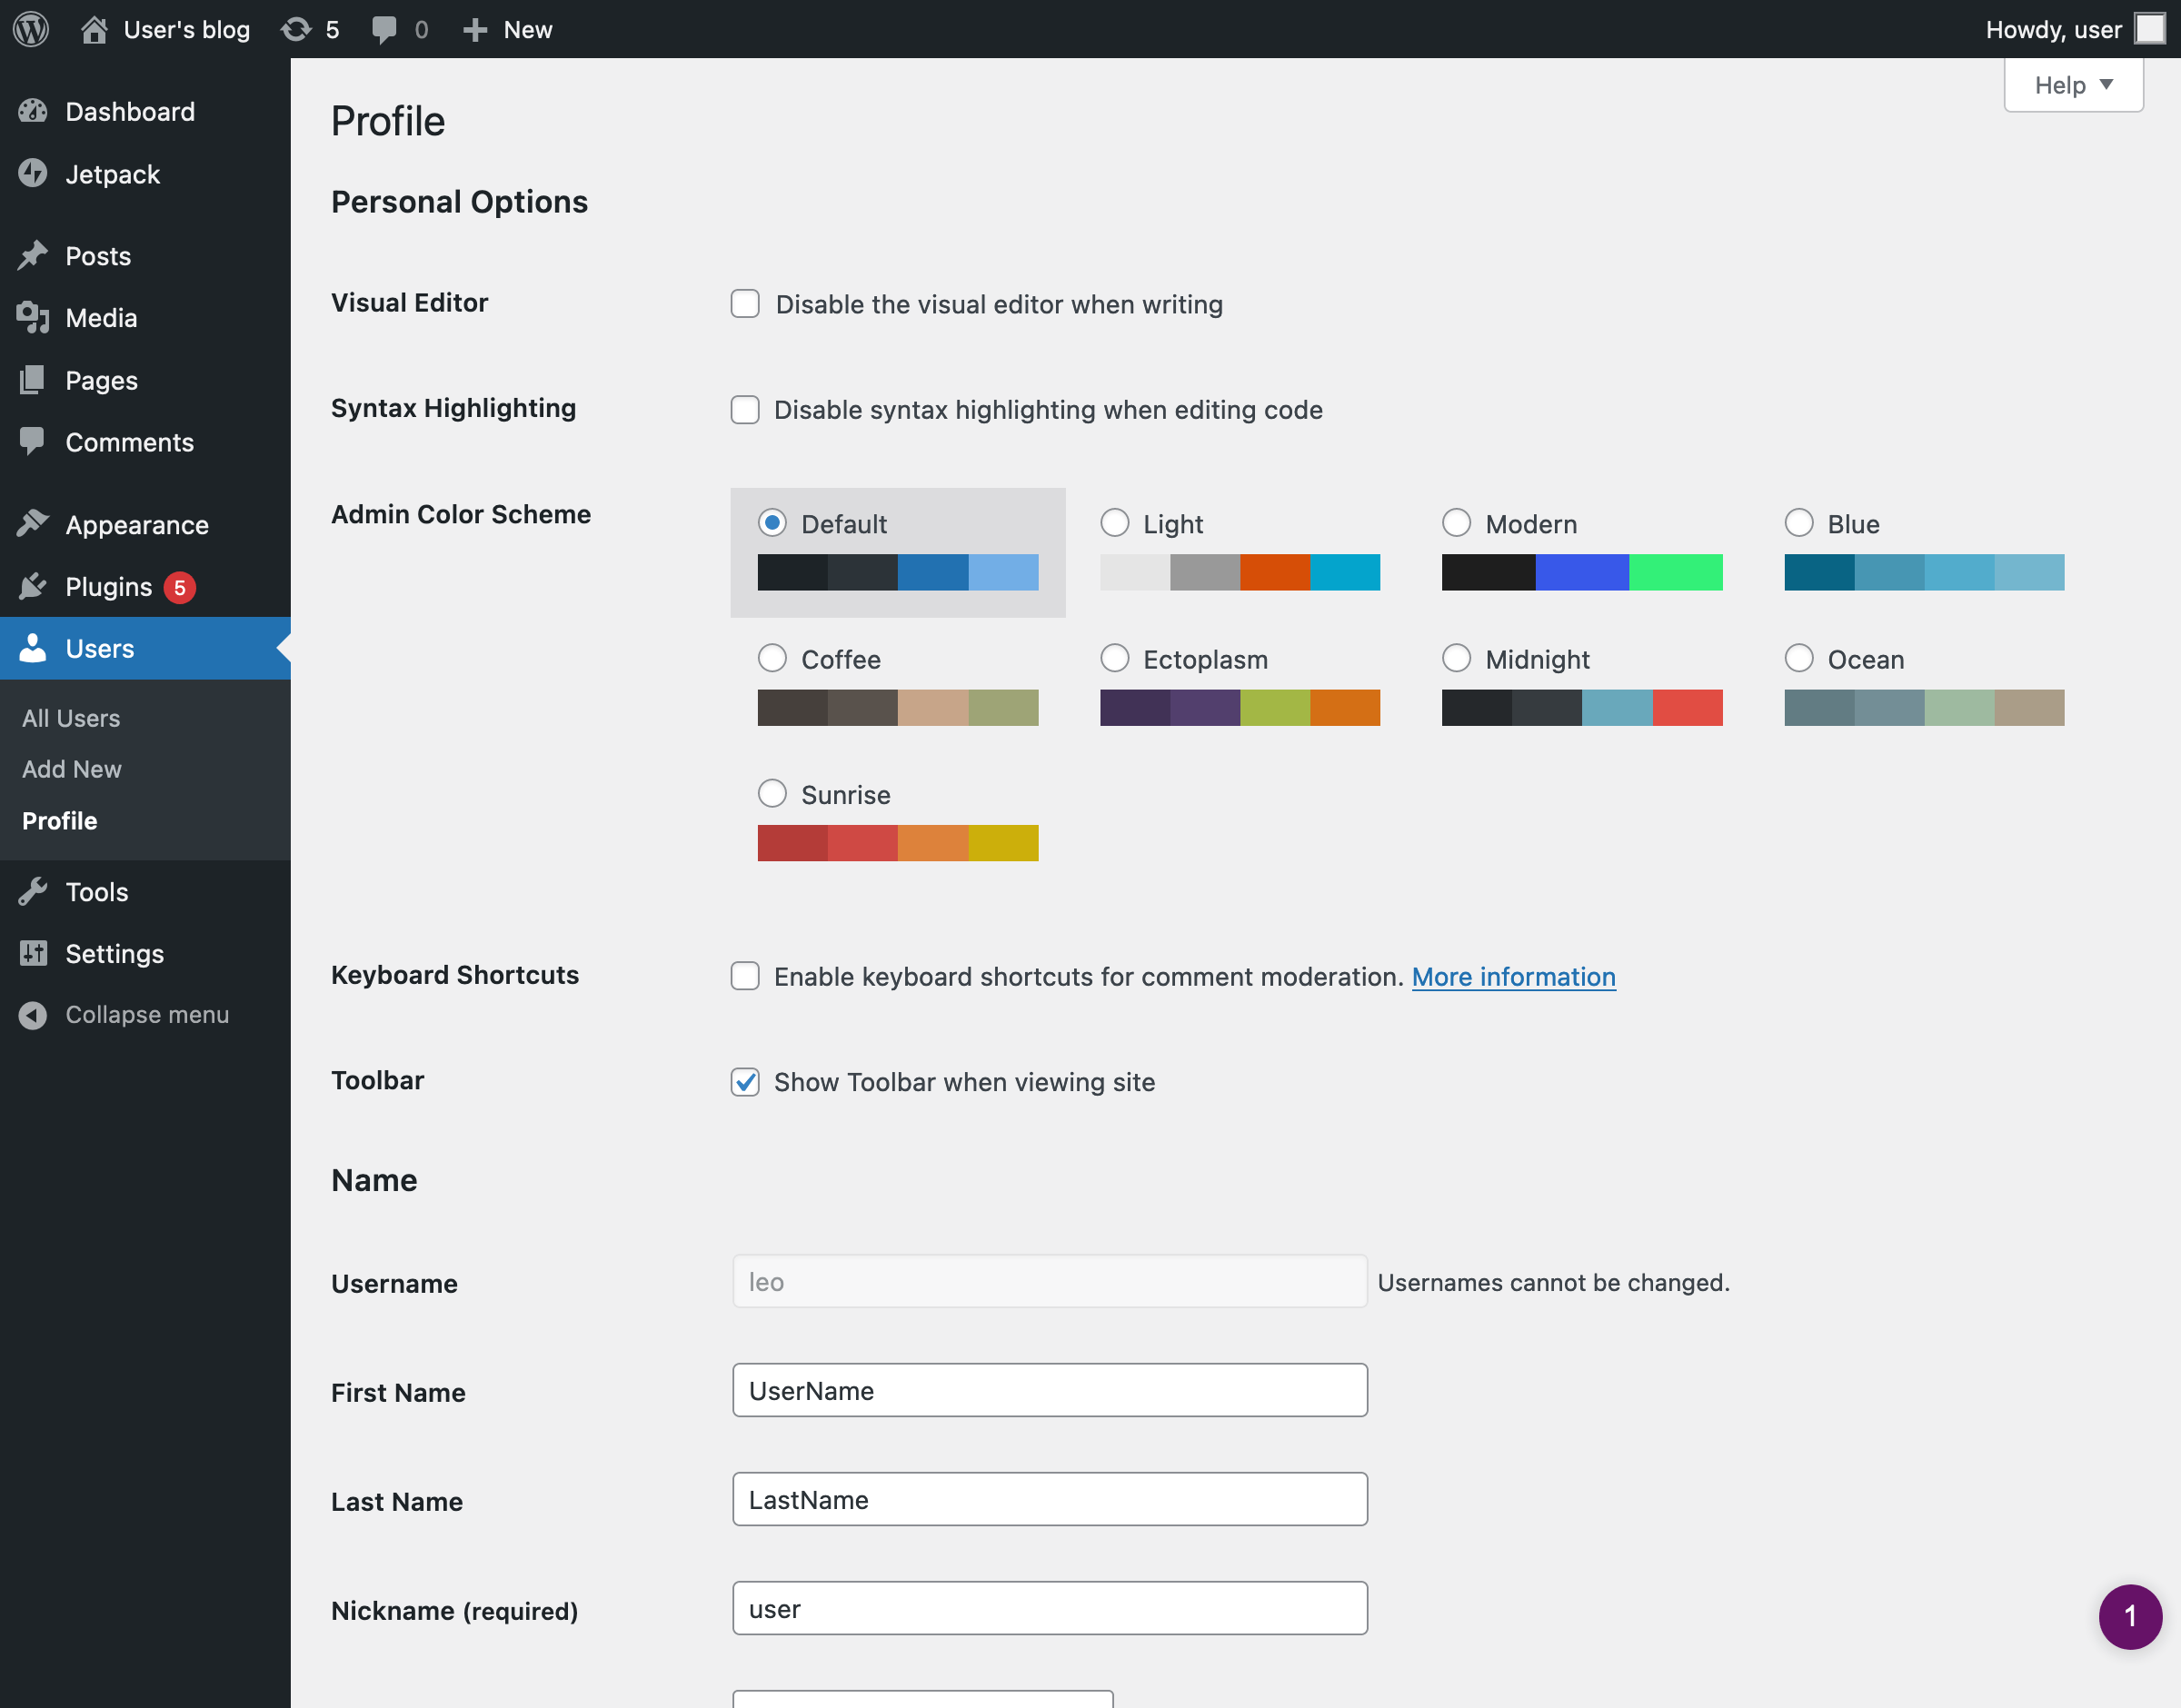
Modifying The Admin Username
Lightsail sets the admin’s username as user. Because WordPress does not allow modification of the username once registered, if we’d like to modify it, we need to do it directly in the MySQL database.
To do this, execute the following command in the terminal (in this case, updating the username to leo):
mysql -u root -p$(cat /home/bitnami/bitnami_application_password) -e 'UPDATE wp_users set user_login = "leo" where ID = 1;' bitnami_wordpress
Going to the admin user’s profile, we can see the username has been updated.
Storing The Images In An S3 Bucket
When uploading images (or any media asset) to WordPress, these are stored under the server’s folder wp-content/uploads and subsequently served from there.
This is a concern because the server should be considered expendable so that if it crashes and needs to be regenerated, no data will be lost. We can create a snapshot from the server to backup our data, and that will contain the folder with the images, but only starting from the moment in which the snapshot was taken; any image uploaded afterward would be lost.
Another issue could arise when hosting the site on multiple servers. If our traffic goes up, we can increase the computing power in Lightsail by launching additional servers (accessed behind a load balancer, and all of them reading/writing to the same managed database).
However, images hosted in one server are in that server alone; if a request for that image were handled by a different server, the image would be missing.
The solution is to host the images in an S3 bucket and have the WordPress site serve the images directly from the bucket.
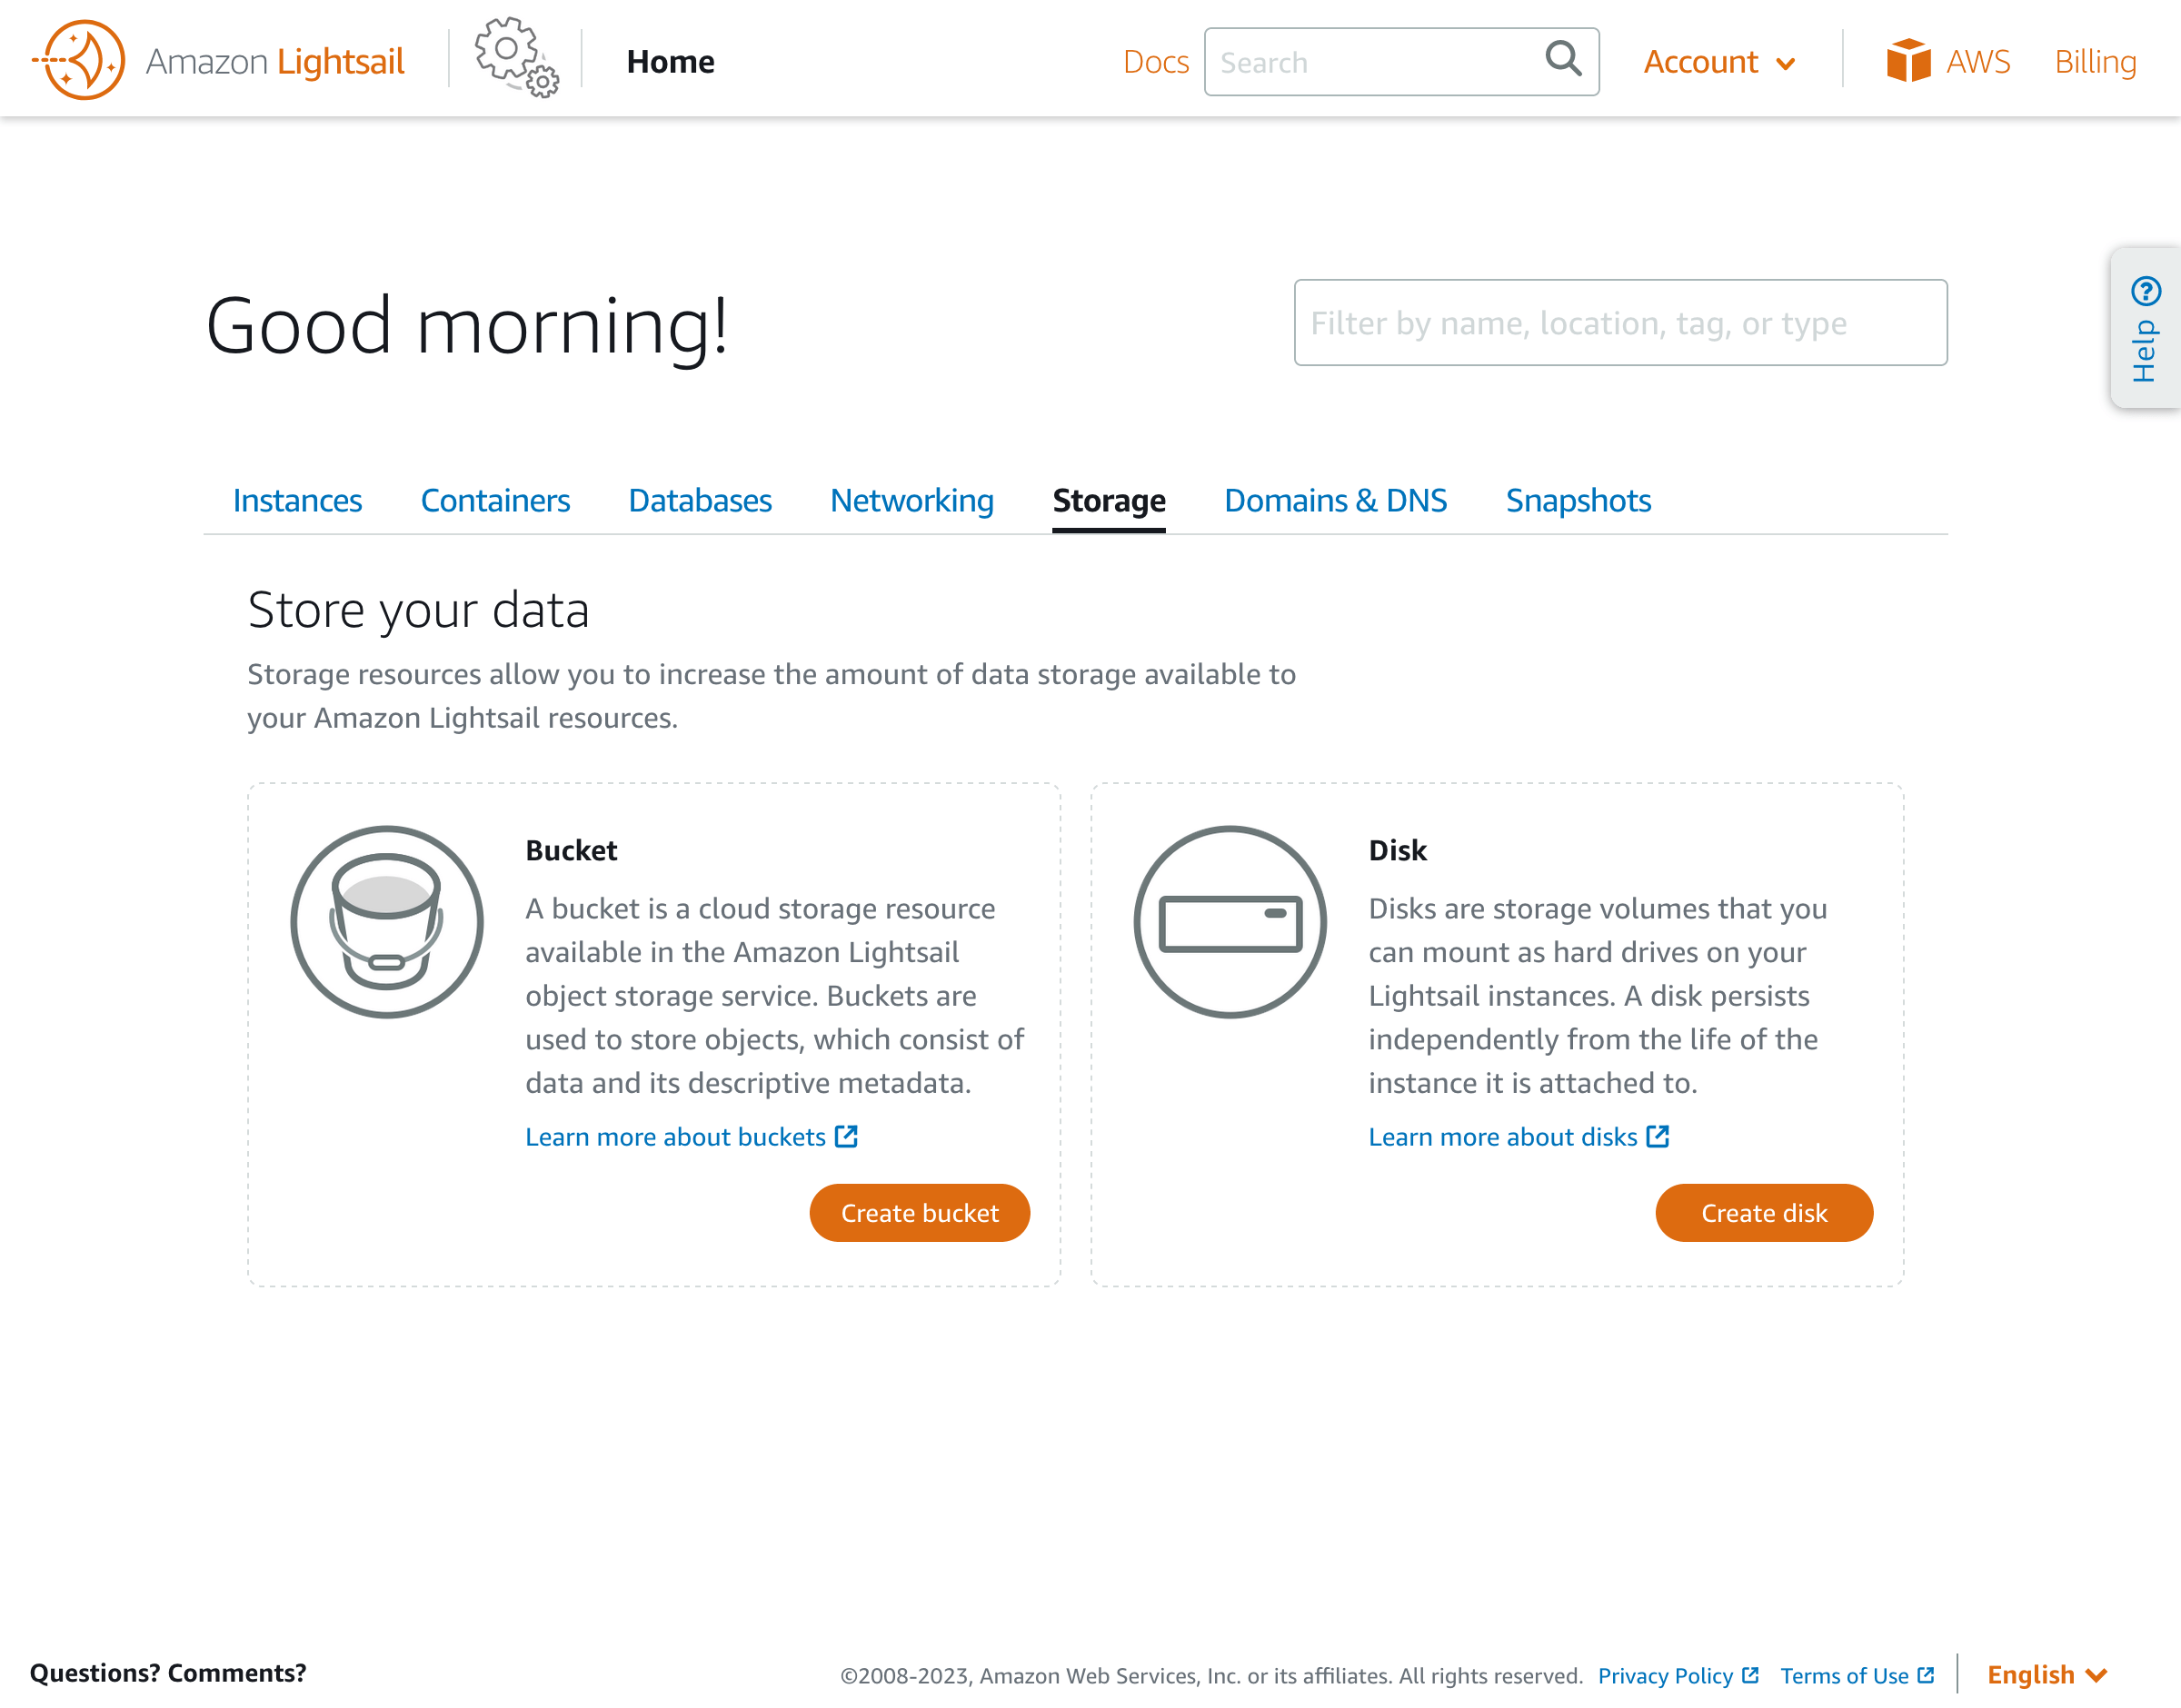
Let’s do that. In Lightsail, head over to the Storage tab and click on “Create bucket.”
Lightsail offers the same flat pricing structure for S3 buckets as for EC2 instances: Depending on our storage and transfer needs, we can choose a plan that costs $1, 3, or 5 per month.
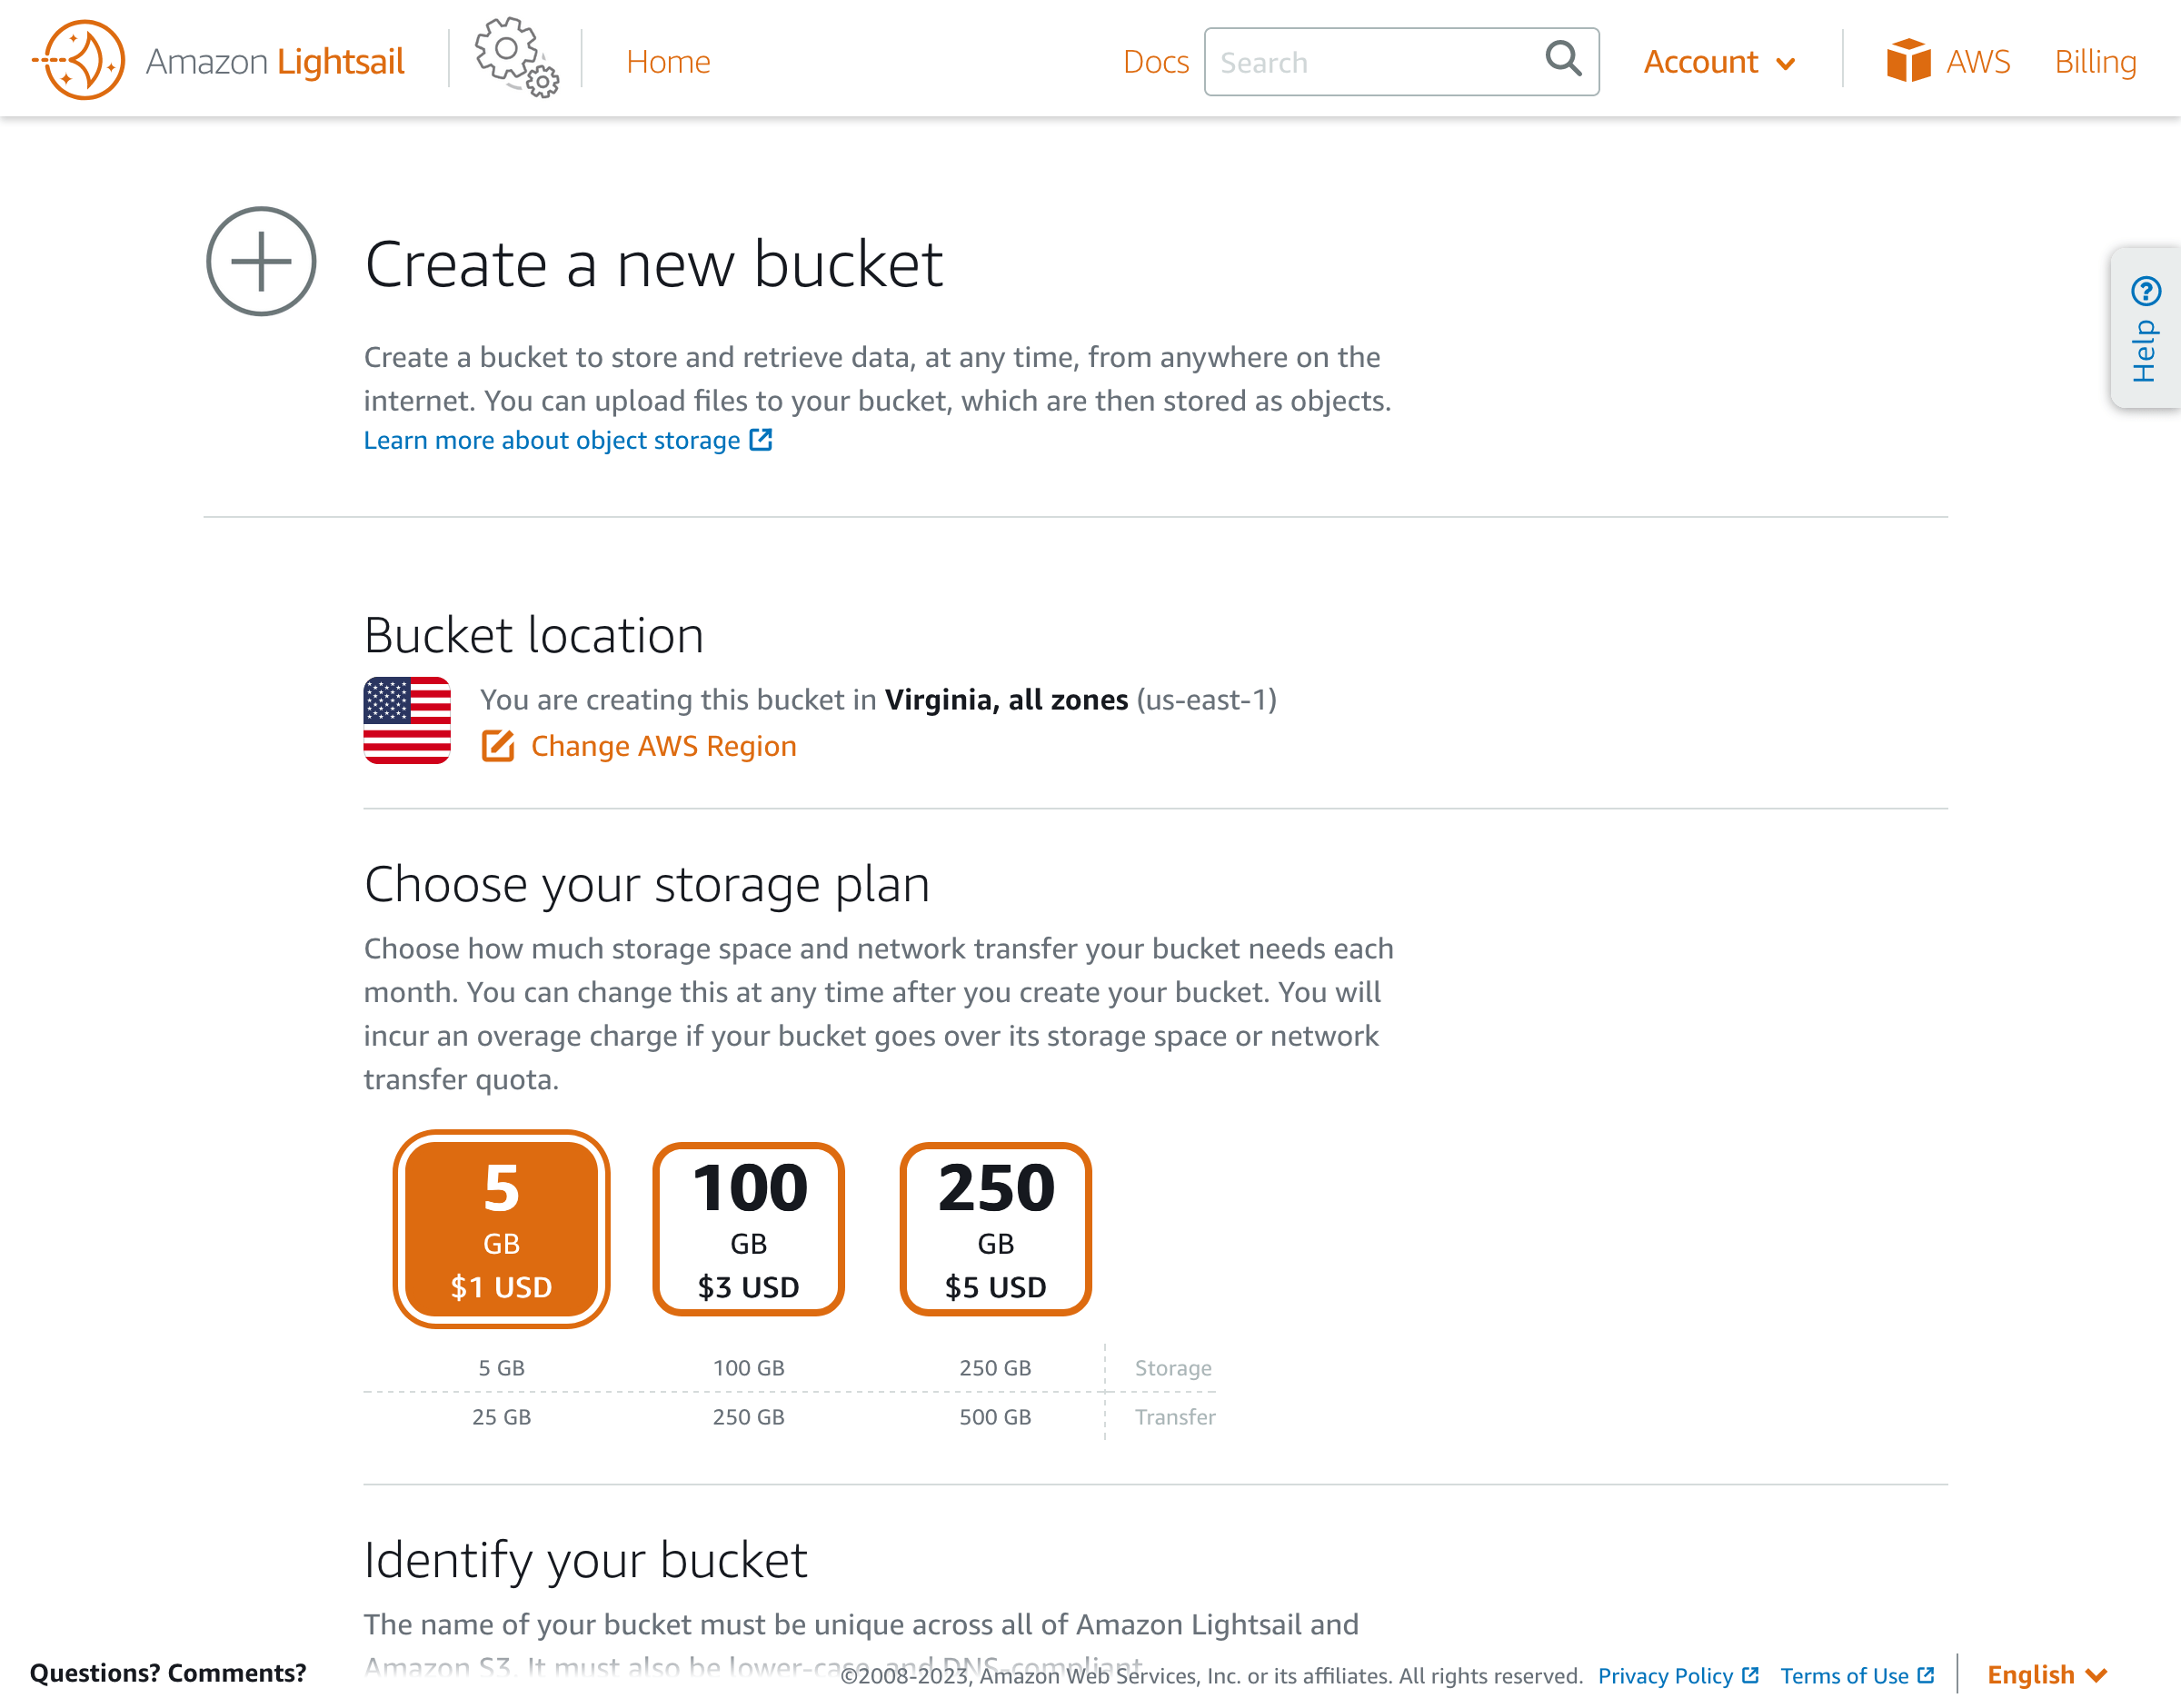
Make sure to choose the same AWS region as the location for the bucket as you had for the server (to reduce latency when uploading the images).

Finally, provide a unique name for the bucket, and click on “Create bucket.”

The bucket is now created, but we still need to configure it to update its permissions to make the uploaded assets public.
Click on the bucket name and, under the Permissions tab, select “Individual objects can be made public and read-only.”

Under Resource access, attach the server to the bucket (then we can avoid defining our AWS credentials on the WordPress site).

Our Lightsail configuration is done. Next, we need to configure the WordPress site to upload images to the bucket.
This is achieved via WP Offload Media Lite, a free WordPress plugin that automatically uploads to S3 any asset added to the WordPress Media Library.
Head over to the plugins screen, search for “WP Offload Media Lite for Amazon S3,” and install and activate the plugin from the search results.

Once activated, head over to Settings > WP Offload Media to configure the plugin.
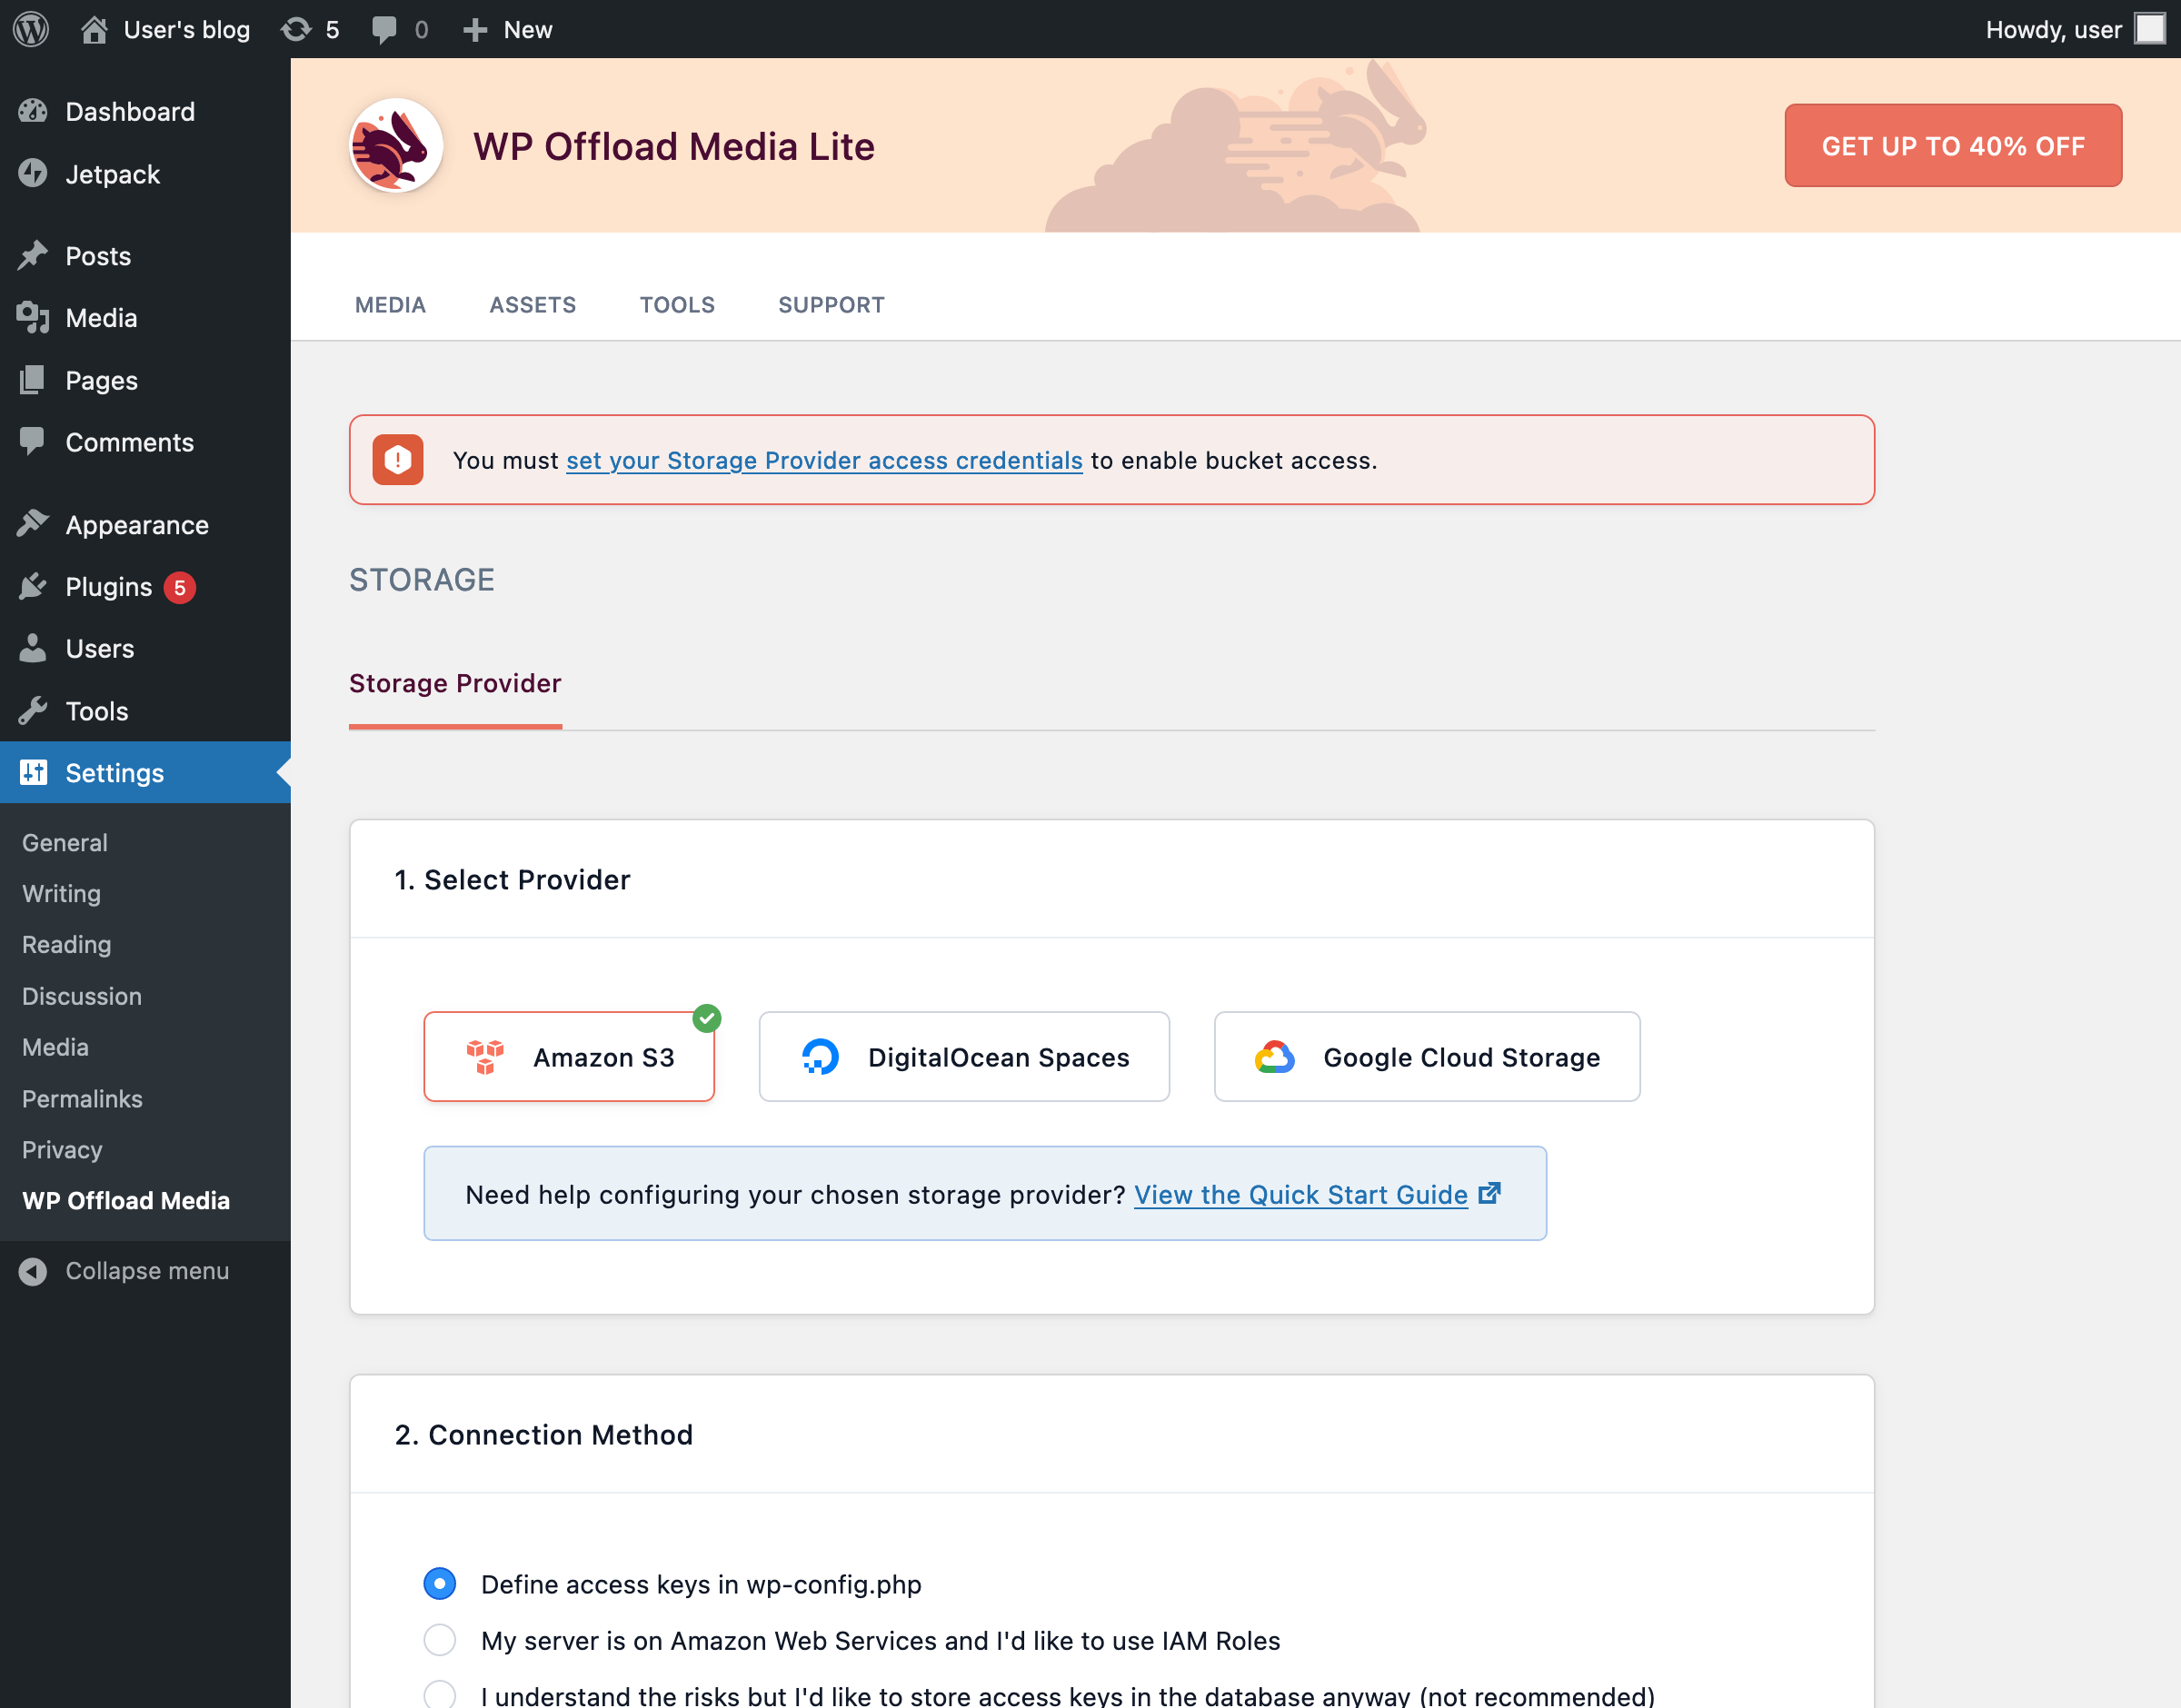
In the Connection Method section, select “My server is on Amazon Web Services, and I’d like to use IAM Roles,” and save your changes.

Next, edit the wp-config.php file via the terminal (as explained earlier), and paste the following code anywhere near the top:
define( 'AS3CF_SETTINGS', serialize( array(
    'provider' => 'aws',
    'use-server-roles' => true,
) ) );
Back to the plugin settings, there is a Storage Provider > Bucket tab, where we must select the bucket we created to host our images.

On the next screen, we can optionally adjust the permissions to access the assets or click on “Keep Bucket Security As Is,” which will finalize the bucket configuration.
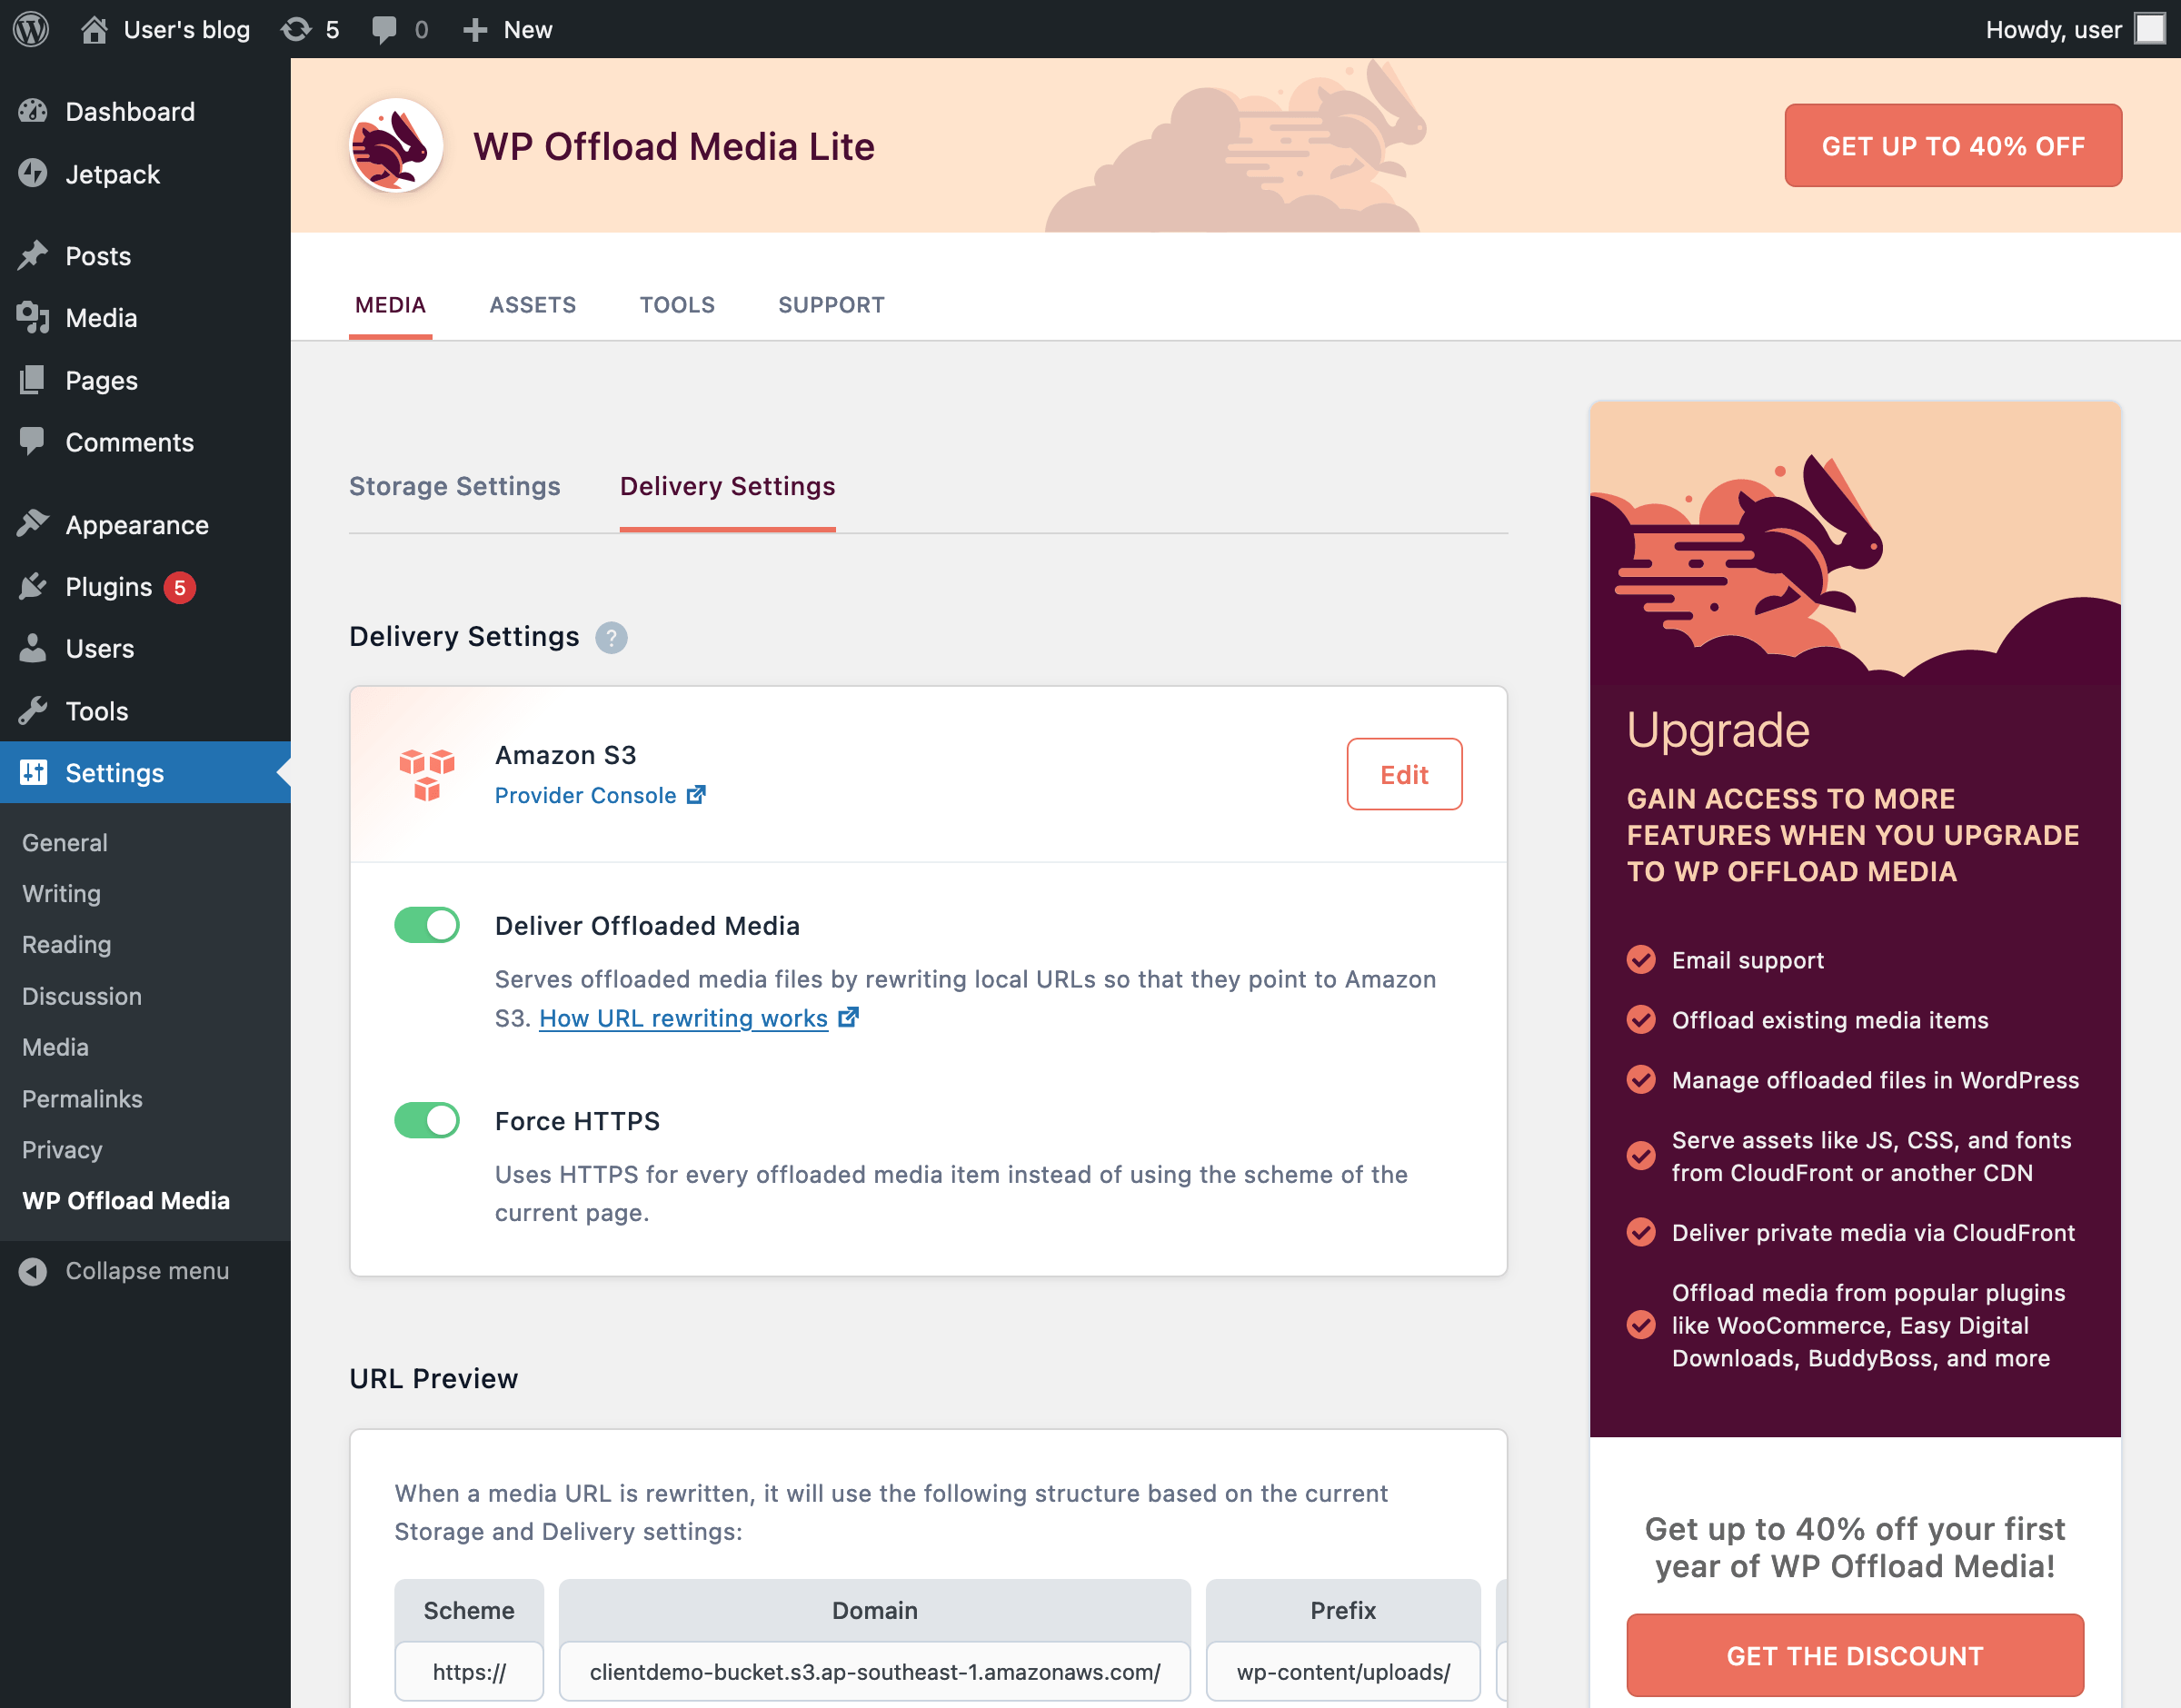
Finally, let’s make the plugin always retrieve the assets using HTTPS. In the Delivery Settings tab, select “Force HTTPS” and then “Save Changes.”

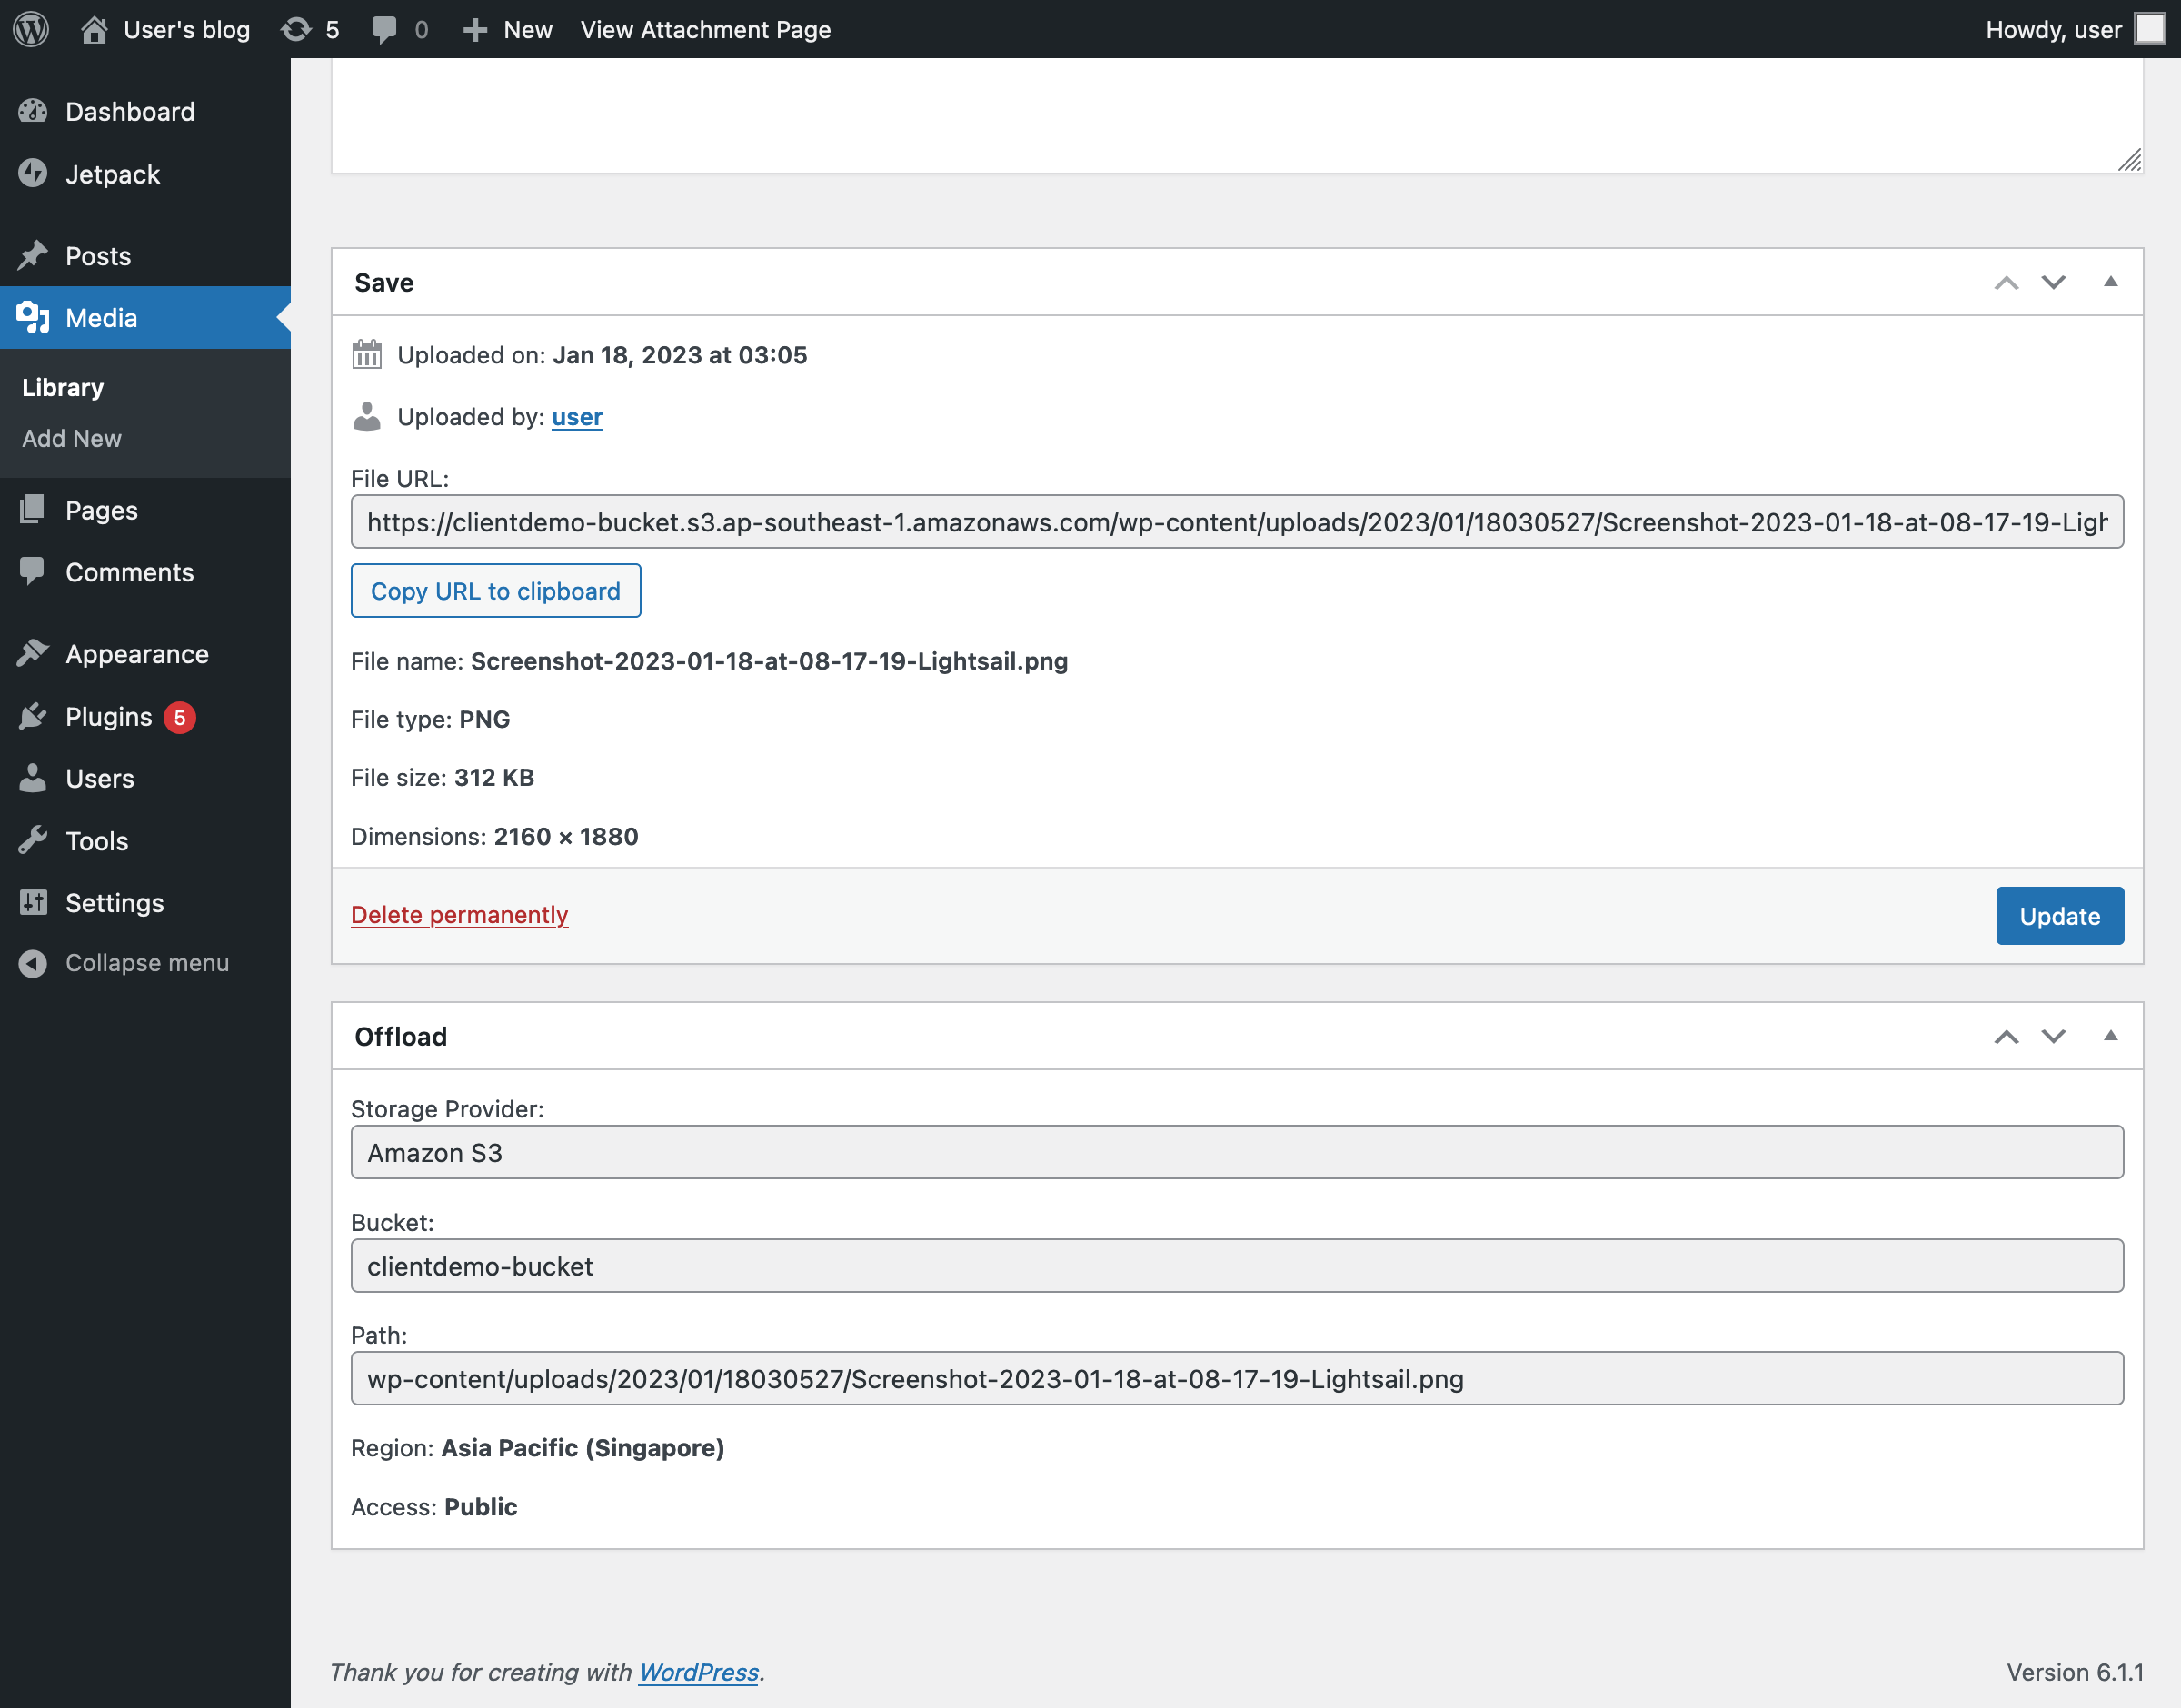
The plugin settings are now complete. We test it out by going to Media > Add New, uploading an image, and inspecting its file URL. If everything goes well, this should start with the bucket URL.
Distributing Images Via A CDN
We are almost done configuring the website. There is only one thing left to do: Add a CDN to access the images, so these will be served from a location nearby the user, reducing the latency and improving the overall performance of the site.
For this, head over to the Networking tab and click on “Create distribution.”

In the Create a distribution screen, choose the bucket as the origin of the distribution.
Note: The image request will be processed by an edge location near the user, which will first retrieve the asset from the bucket, cache it, and serve it from this location from then on.

The pricing structure is flat. Choose the 50 GB plan at $2.50/month, which is free for the first year.
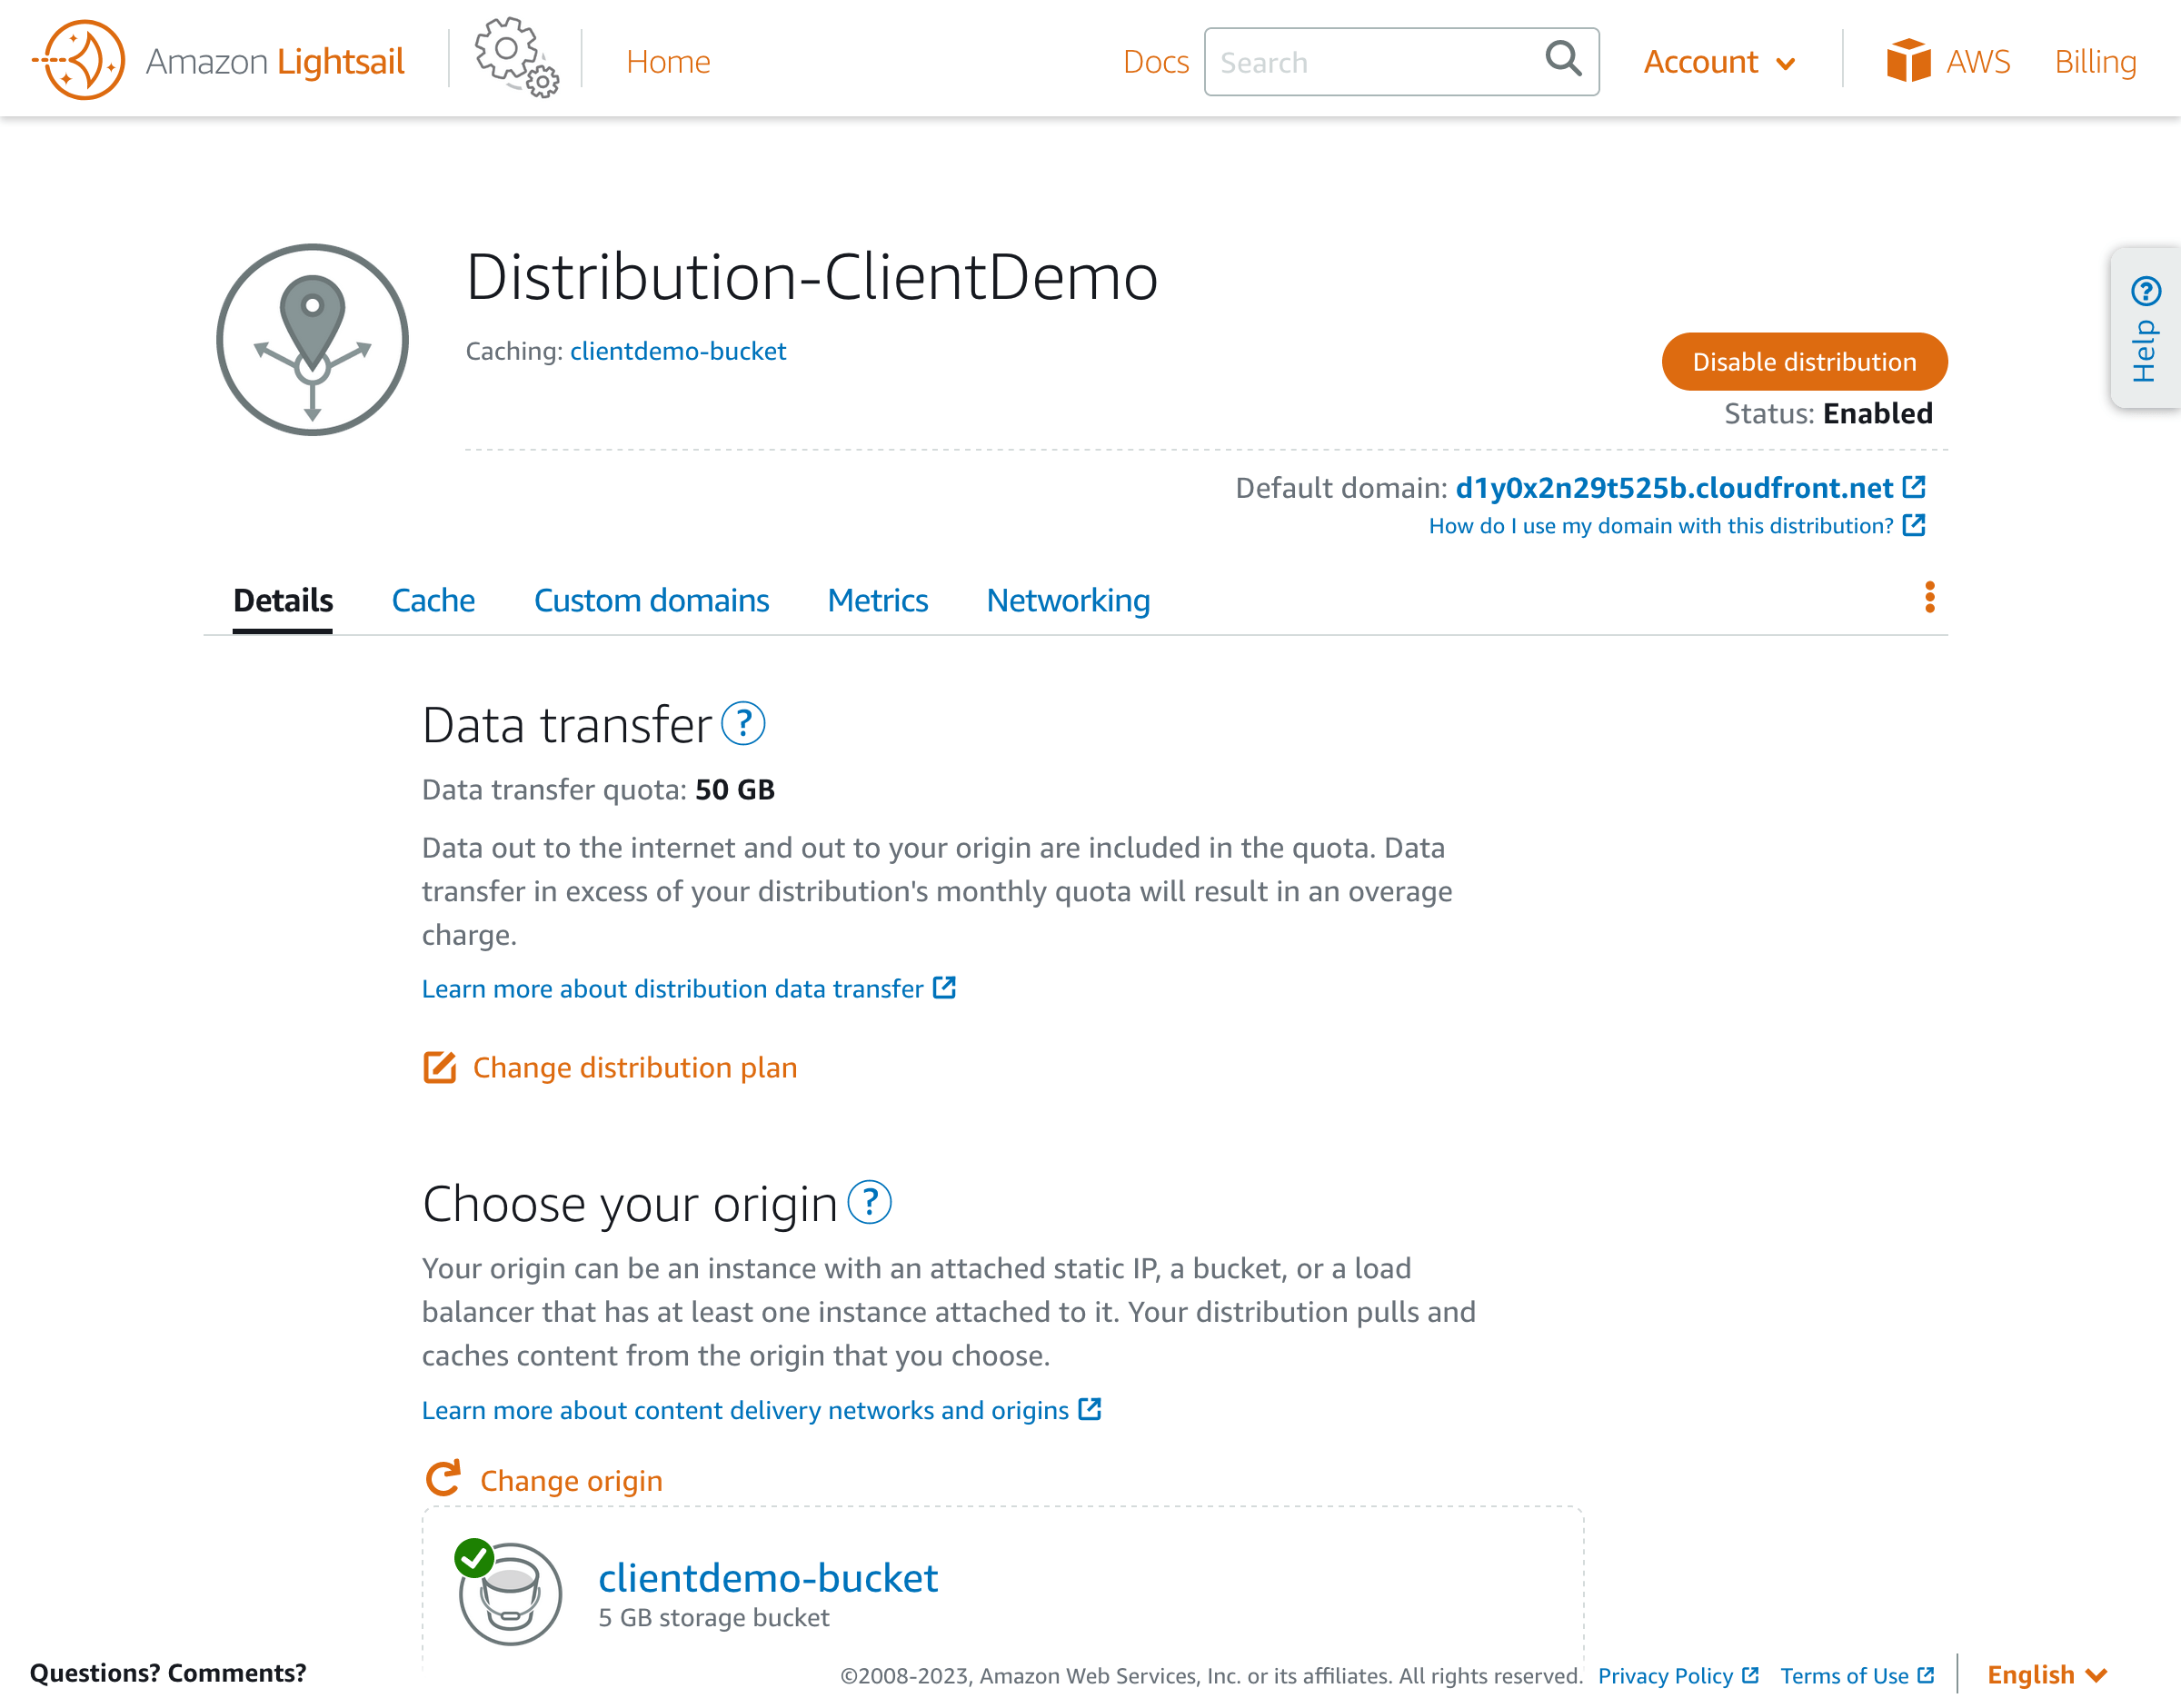
Then provide a unique name for the distribution, and click on “Create distribution.”

The distribution is now created. On the top right, we can visualize the domain from which to access our assets, of shape {subdomain}.cloudfront.net (we can change this to a custom domain under the Custom domains tab).
We must modify the settings for WP Offload Media Lite to indicate to serve images from the CDN.
For that, head over to the Delivery Settings tab and edit the provider (currently set as Amazon S3).
Choose “Amazon CloudFront” and click on “Save Delivery Provider.”

Now back to the Delivery Settings tab, there is a new section, “Use Custom Domain Name (CNAME).” Paste there the distribution domain, and click on “Save Changes.”

To test it out, go once again to Media > Add New, upload an image, and check that the file URL now starts with the distribution domain.

Success! Accessing our WordPress site will now have its assets served by the AWS CDN, greatly increasing the performance of the site.

We’re Done Here, Now It’s Your Turn
Lightsail provides all the power we need to host our websites, as we are used to from AWS, but making it way easier than ever before. In this article, we saw how to launch a WordPress site quickly and easily (the whole process took me between 15 and 30 minutes).
Lightsail conveniently offers a flat pricing structure that takes all surprises away from our bills. And you can try it without spending a penny: it’s free for the first three months. So check it out!