Full Stack GraphQL With Next.js, Neo4j AuraDB And Vercel

Email Newsletter
Weekly tips on front-end & UX.
Trusted by 182,000+ folks.
This article has been kindly supported by our dear friends at Neo4j who are known to be the clear performance leaders in graph technology. Thank you!
Recently I was chatting with some folks about a book I wrote last year titled Full Stack GraphQL Applications. In the book, we demonstrate how to use GraphQL, React.js, and Neo4j to build and deploy full stack applications. One of the most common questions I get from readers is, “Can we use Next.js with this stack?” Next.js is a powerful React framework that adds many additional features and conventions on top of React, so the answer is “Of course!”
In this article, we will explore how to build a full stack GraphQL application that takes advantage of the API Routes feature of Next.js API to combine our GraphQL server and front-end React applications into a single framework.
We’ll use the Neo4j graph database as our data source. Graph databases like Neo4j use the property graph model to enable developers to model, store, and query data as a graph. Both graph databases and GraphQL use the concept of a ‘graph’ to work with application data, making them perfect to use together. The open source Neo4j GraphQL Library makes it even easier to build GraphQL APIs backed by Neo4j, as I’ll illustrate in this article.
Let’s see how to leverage the power of graph data by working with graphs in a full stack GraphQL application with Next.js, Neo4j, and Vercel!
Neo4j AuraDB Overview: Graph Data In The Cloud
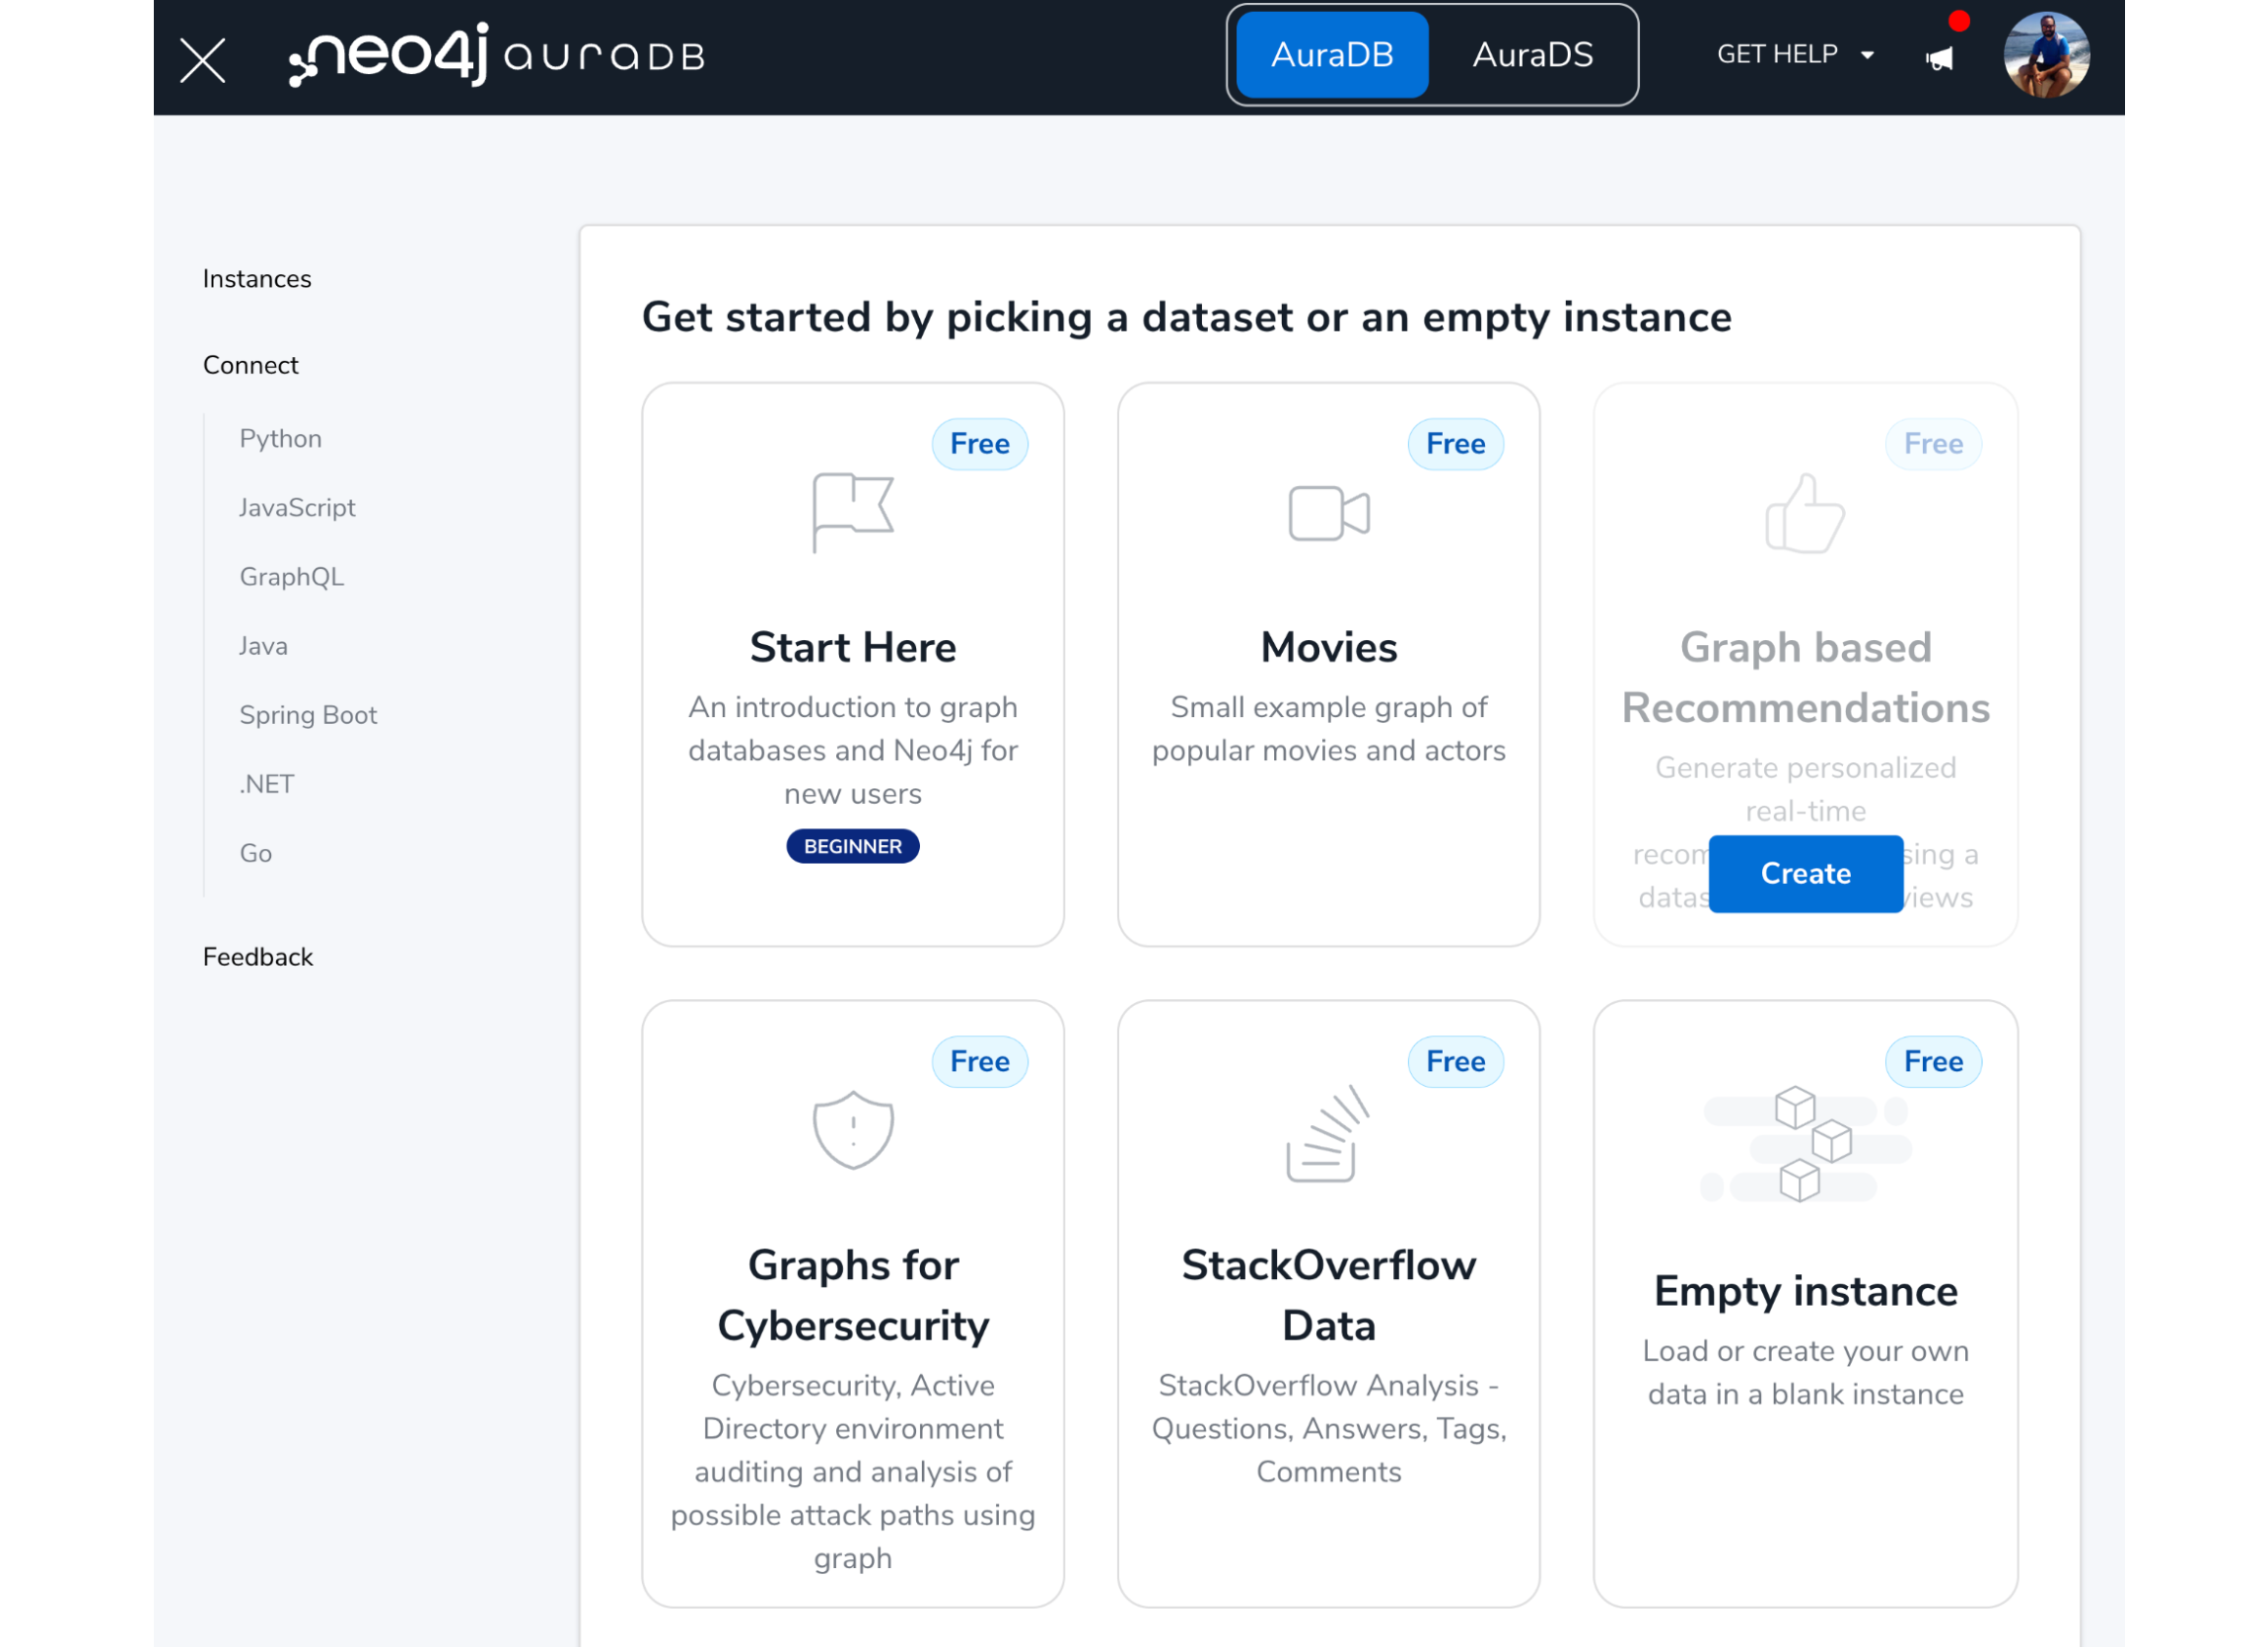
First, we’ll set up our database. The easiest way to get started with Neo4j is by using the free tier of Neo4j AuraDB, Neo4j’s cloud database service. The free tier allows us to spin up a Neo4j cluster for building applications without a credit card. We can also choose from several sample datasets to get started. We’ll choose to load the “Graph-based Recommendations” dataset. This dataset contains information about movies and user ratings to demonstrate approaches for personalized recommendations, a common use case for graph databases.
While our database is being provisioned, we’ll be presented with a randomly generated password and the option to download a .env file that contains the connection credentials for our newly created database. Be sure to download this file, as we’ll use it to set environment variables in our Next.js application.
# Wait 60 seconds before connecting using these details, or login to https://console.neo4j.io to validate the Aura Instance is available
NEO4J_URI=neo4j+s://2826d3f8.databases.neo4j.io
NEO4J_USERNAME=neo4j
NEO4J_PASSWORD=vePwrRzzD23JjCug5tLSPF-pBNsmocHQ45hOc11d6ZY
AURA_INSTANCENAME=Instance01
Once our database is ready, click the Open button to start exploring the data in Neo4j Workspace. Neo4j uses the Cypher query language to interact with the database. The ‘Query’ tab allows us to execute Cypher statements and visualize the results as a graph. Cypher allows us to declaratively define graph patterns using ASCII-art notation. Later, we’ll see how we can use Cypher to find movie recommendations, but for now, this example demonstrates how to filter for a movie by title and traverse the graph to find the actors and genres of the movie as well.

Now that we have our database up and running, we can start to think about the API layer. To build our movies search application, we don’t want just to expose our database to the world — we want an API application to act as a type of gatekeeper, handling things like authorization and business logic. Thanks to a feature of Next.js called API routes, we can combine our GraphQL API application and our React front-end application in a single Next.js project.
Getting Started With Next.js
One of the easiest ways to get started with Next.js is with the create-next-app command line tool. This tool will ask us a few questions to help us create a skeleton Next.js project.
npx create-next-app fullstack-graphql-movies
This will generate a Next.js project with the following structure:
├── README.md
├── jsconfig.json
├── next.config.js
├── package-lock.json
├── package.json
├── pages
│   ├── _app.js
│   ├── _document.js
│   ├── api
│   │   └── hello.js
│   └── index.js
├── public
│   ├── favicon.ico
│   ├── next.svg
│   ├── thirteen.svg
│   └── vercel.svg
└── styles
    ├── Home.module.css
    └── globals.css
We will concern ourselves mostly with the files in the pages directory. With the Next.js file-based routing feature, any files we add to the pages directory will be given their own route using the filename. Let’s start our Next.js application by running the following command:
npm run dev
This will launch a local web server and serve our Next.js application at http://localhost:3000 by default. If we go to this address, we’ll see the default Next.js splash screen. The code for this page can be found in pages/index.js.
If we navigate in our web browser to http://localhost:3000/api/hello, we’ll see an example of a Next.js API route.
{
  name: "John Doe"
}
If we examine the code at pages/api/hello.js, we can see the logic powering this API endpoint, defined as a single function:
// Next.js API route support: https://nextjs.org/docs/api-routes/introduction

export default function handler(req, res) {
  res.status(200).json({ name: 'John Doe' })
}
Similar to its parent pages directory, any file created in the API directory results in a new endpoint matching the name of the file. Unlike pages that define React components, the API directory defines new API routes which can be deployed as serverless functions.
In the next section, we’ll learn how to create a GraphQL server using a Next.js API route and the Neo4j GraphQL Library.
First, let’s bring over the .env file we downloaded from Aura and rename it .env.local in the root directory of our project. Next.js supports setting environment variables using .env files by default, so we’ll be able to use our Neo4j AuraDB credentials in our API route to connect to the database.
Building A Serverless GraphQL Server With Next.js API Routes
Now we’re ready to build our GraphQL API application as a Next.js API route. First, let’s install some dependencies, including the Neo4j GraphQL Library and GraphQL Yoga.
npm install graphql-yoga @neo4j/graphql graphql neo4j-driver
Since GraphQL Yoga supports Next.js API Routes, we’ll use it as our GraphQL ‘server’ framework. We’re going to use the Neo4j GraphQL Library to generate a full GraphQL API, including database queries, using just GraphQL type definitions. Let’s create a new file, graphql.js, in the API directory.
We saw the graph data model containing movies, actors, and genres for our movie’s dataset above, so we’ll write GraphQL-type definitions to match.
 type Movie {
    title: String!
    plot: String
    poster: String
    imdbRating: Float
    actors: [Actor!]! @relationship(type: "ACTED_IN", direction: IN)
    genres: [Genre!]! @relationship(type: "IN_GENRE", direction: OUT)
  }

  type Genre {
    name: String!
    movies: [Movie!]! @relationship(type: "IN_GENRE", direction: IN)
  }

  type Actor {
    name: String
  }
Note the use of the @relationship directive. GraphQL schema directives are GraphQL’s built-in extension mechanism and allow us to add additional information used in the Neo4j GraphQL Library’s schema generation process to configure the API. You can see more examples of directives in the documentation.
Next, we’ll read our Neo4j connection credentials from environment variables defined in the .env.local file and create a Neo4j driver instance to connect to the database.
// Read our Neo4j connection credentials from environment variables (see .env.local)
const { NEO4J_URI, NEO4J_USERNAME, NEO4J_PASSWORD } = process.env;

// Create a Neo4j driver instance to connect to Neo4j AuraDB
const driver = neo4j.driver(
  NEO4J_URI,
  neo4j.auth.basic(NEO4J_USERNAME, NEO4J_PASSWORD)
);
Next, we’re ready to pass our GraphQL type definitions and Neo4j driver instance as we create a new Neo4j GraphQL instance:
// Type definitions and a Neo4j driver instance are all that's required for
// building a GraphQL API with the Neo4j GraphQL Library - no resolvers!
const neoSchema = new Neo4jGraphQL({
  typeDefs,
  driver,
});
Because it involves verifying the schema and some database state, building the Neo4j GraphQL schema is an asynchronous process. I’ve moved the asynchronous bit to a function called initServer, which logs when it’s called. I did this so we can see in the application logs each time our GraphQL server is rebuilt. We’ll want to monitor this and make sure we aren’t rebuilding the GraphQL schema at each request, and this will help us do that.
// Building the Neo4j GraphQL schema is an async process
const initServer = async () => {
  console.log("Building GraphQL server");
  return await neoSchema.getSchema();
};

// Note the use of the top-level await here in the call to initServer()
export default createYoga({
  schema: await initServer(),
  graphqlEndpoint: "/api/graphql",
});
You’ll see that we used awaitwith our top-level module export. This is currently an experimental feature that we’ll need to explicitly enable in next.config.js.
const nextConfig = {
  reactStrictMode: true,
  webpack: (config, options) => {
    config.experiments = {
      topLevelAwait: true,
      layers: true,
    };
    return config;
  },
};
Enabling usage of top-level await will allow us to gracefully handle the asynchronous server setup in our API Route.
Now, if we run npm run dev, open our web browser, and navigate to http://localhost:3000/api/graphql, we’ll see the GraphQL Yoga GraphiQL in-browser IDE and be able to start querying our GraphQL API to fetch movie data from Neo4j. Note that we didn’t need to write any resolver functions or database querying logic to implement our GraphQL API. The Neo4j GraphQL Library generated operations for each type defined in our type definitions, including arguments for filtering and pagination.
Now that we’ve created a Next.js API route for our GraphQL endpoint, let’s see how we can use our GraphQL endpoint in our React application.
Client Side Data Fetching With Apollo Client In Next.js
There are several ways to approach data fetching with Next.js, such as static site generation, server-side rendering, and client-side rendering. We’re going to focus on client-side rendering with GraphQL — executing GraphQL requests from the client web browser to fetch data and update the DOM in our application. For an overview of other approaches to data fetching with Next.js, see this blog post that also shows other ways of using Neo4j with Next.js.
We’ll be using Apollo Client in our React application to execute GraphQL data fetching queries. Apollo Client has a React integration that uses hooks as the primary interface. Hooks are functions that allow us to ‘hook’ into React state and other lifecycle methods and are commonly used with data fetching in React applications. Let’s install Apollo Client and start using it in our React application.
npm install @apollo/client
We’ll need to update pages/_app.js to create our Apollo Client instance and inject it into the React component hierarchy so that we can make use of the useQuery and useMutation hooks that Apollo Client provides for interacting with a GraphQL API from our React application.
In pages/_app.js, we first import the modules we’ll need from Apollo Client.
import {
  ApolloProvider,
  ApolloClient,
  InMemoryCache,
  HttpLink,
} from "@apollo/client";
The ApolloProvider component uses the React Context API to make our Apollo Client instance available throughout our React application. The InMemoryCache and HttpLinkmodules are used to configure the cache and networking layer for connections to our GraphQL API.
Next, we’ll define a function to create a new ApolloClient instance, specifying the endpoint for our GraphQL API served as an API route.
const createApolloClient = () => {
  const link = new HttpLink({
    uri: "/api/graphql",
  });

  return new ApolloClient({
    link,
    cache: new InMemoryCache(),
  });
};
Then we can inject the ApolloProvider component into our React component hierarchy.
export default function App({ Component, pageProps }) {
  return (
    <ApolloProvider client={createApolloClient()}>
      <Component {...pageProps} />
    </ApolloProvider>
  );
Now we’re ready to start fetching data in our application. Let’s replace the Next.js default landing page with a movies search page that will allow us to search for movies by genre and see details about the top-rated movies. Later, we’ll add a movie recommendation feature to show recommended movies based on the top results.
We’ll replace the existing index.js, starting with some imports.
import React, { useState } from "react";
import { gql, useQuery } from "@apollo/client";
useState is a hook function that allows us to work with React state variables. useQuery is a hook function provided by Apollo Client that we’ll use to query data from our GraphQL API. The gql template tag helps with parsing GraphQL operations.
As you can see, hooks are such a fundamental part of React that we use a hook to manage state variables as well. To enable the user to search for movies by genre, we’ll declare a state variable to keep track of the user’s selected genre.
const [selectedGenre, setSelectedGenre] = useState("Action");
Next, we need to define the GraphQL query used to search for movies by genre. We’ll also return information about the movie, like the poster URL and who acted in it. We’ll use a GraphQL variable in the query to filter for movies matching the selected genre.
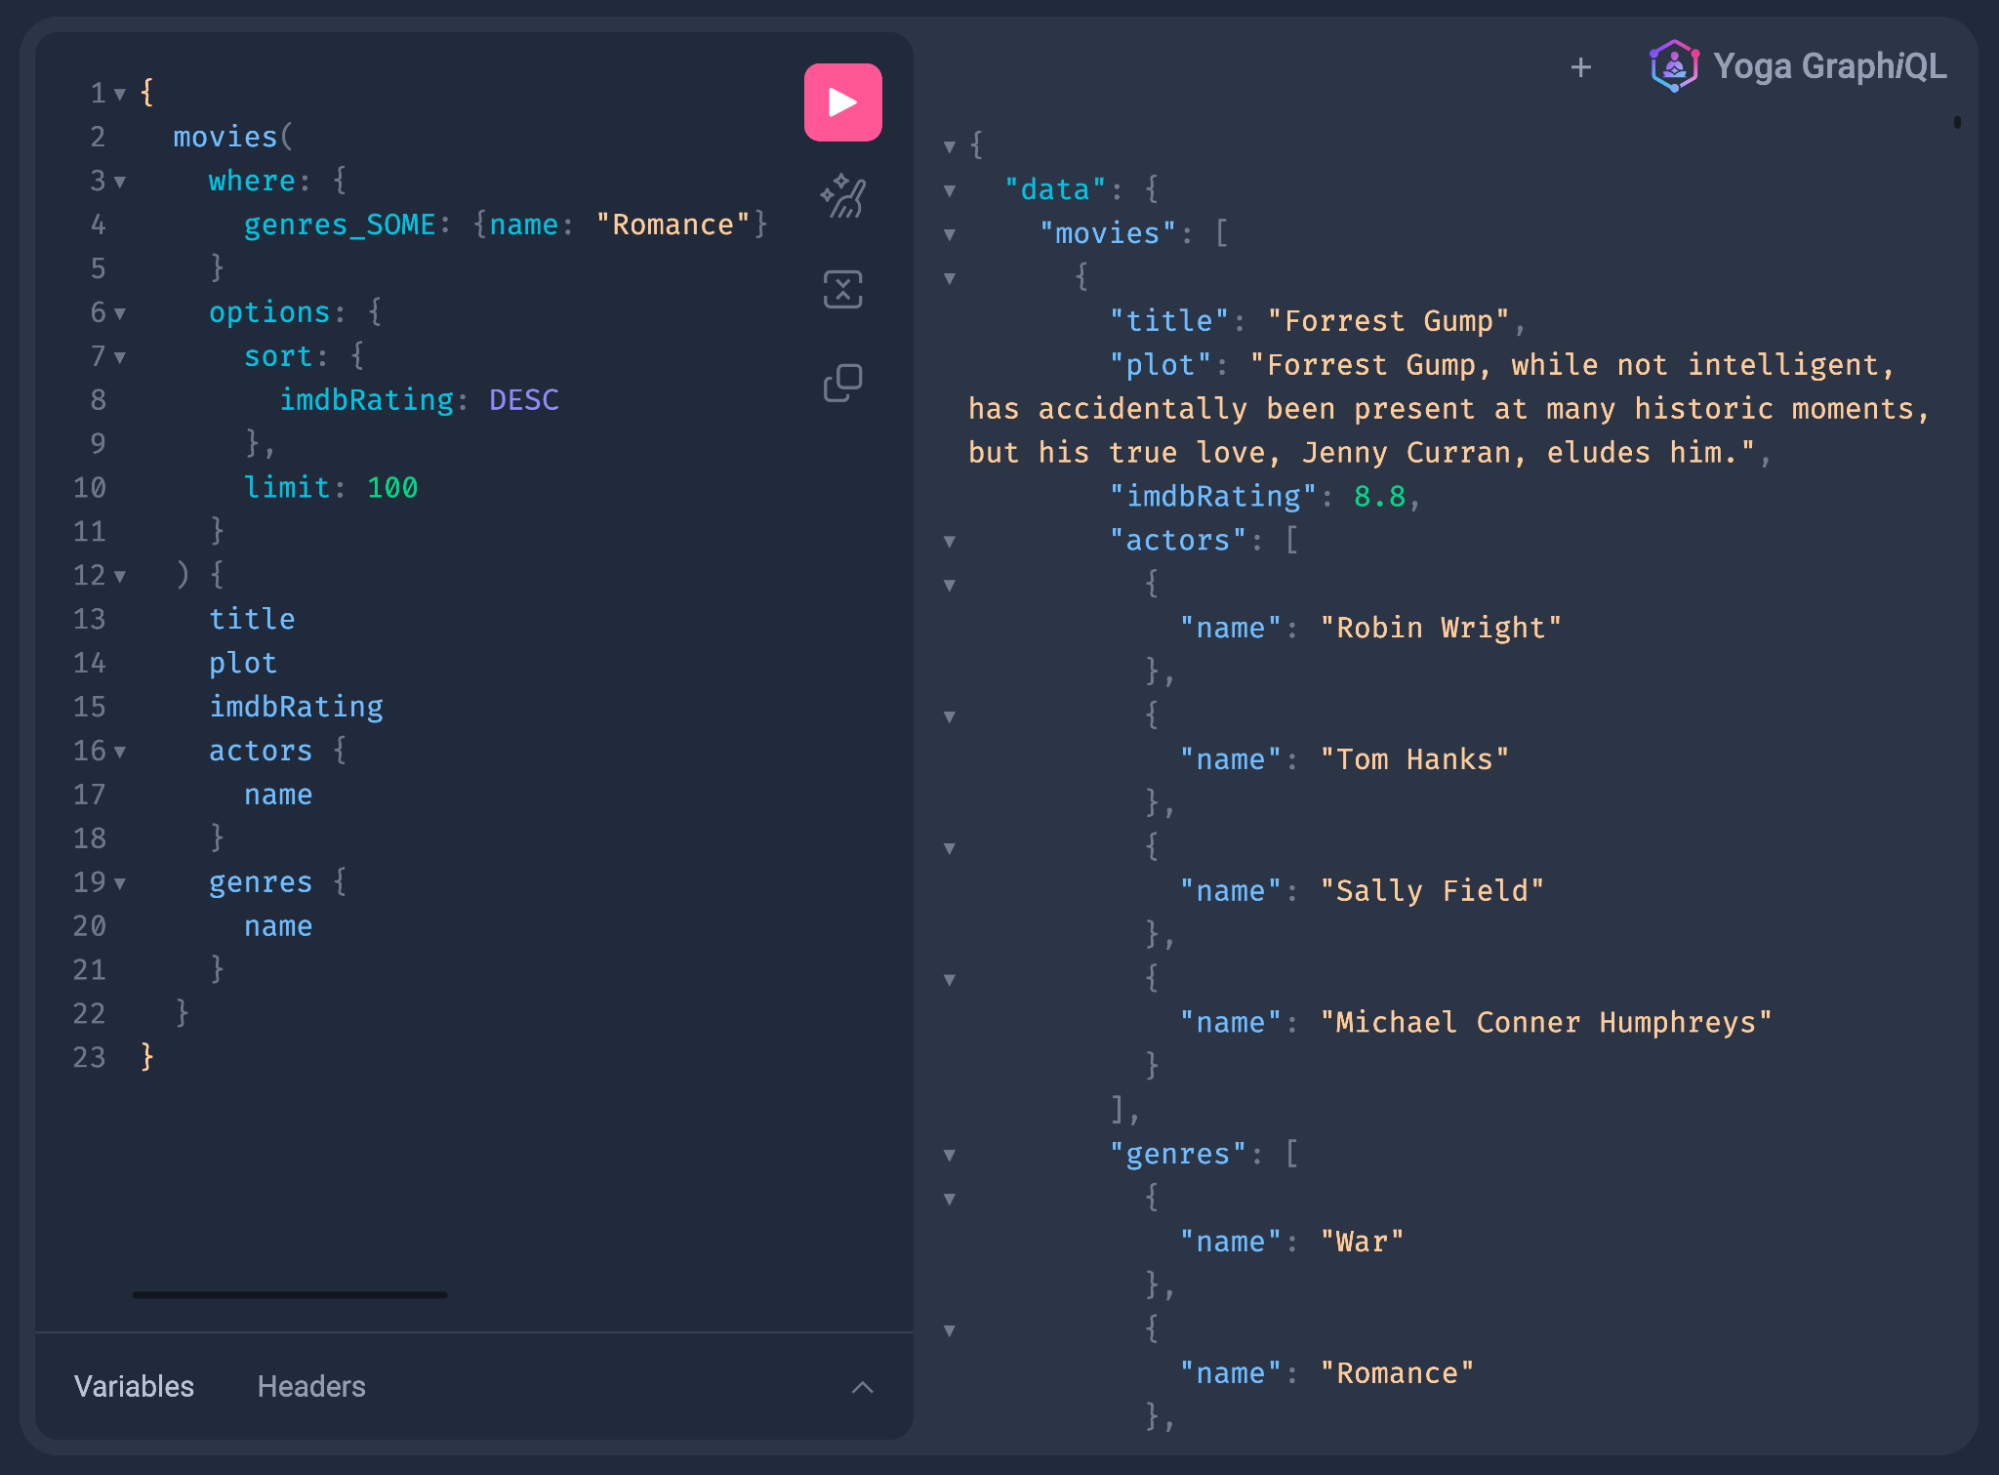
const MOVIE_SEARCH_QUERY = gql`
    query MovieSearch($selectedGenre: String!) {
      movies(
        where: {
          genres: { name: $selectedGenre }
          imdbRating_GTE: 0.0
          poster_NOT:""
        }
        options: { limit: 100, sort: { imdbRating: DESC } }
      ) {
        title
        plot
        poster
        imdbRating
        actors {
          name
        }
        genres {
          name
        }
      }
    }
  `;
We’ll use this query with the useQuery hook to fetch data, passing in the value of our selectedGenre state variable. If we have an error or loading state from our GraphQL operation, then we render a placeholder.
 const { loading, error, data } = useQuery(MOVIE_SEARCH_QUERY, {
    variables: { selectedGenre },
  });

  if (error) return <p>Error</p>;
  if (loading) return <p>Loading...</p>;
We’ll use a simple select form input to let the user choose the movie genre. By binding the value of the form to our selectedGenre state variable, we have created what’s called a controlled component — a form that is controlled by React state.
To render the results of the movie search GraphQL query, we’ll map over the movie results and add a row to a table with the details for each movie. We can find the results of our GraphQL operation in the data variable, the shape of which matches the selection set of our GraphQL query.
<h2>Results</h2>
      <table>
        <thead>
          <tr>
            <th>Poster</th>
            <th>Title</th>
            <th>Genre</th>
            <th>Rating</th>
          </tr>
        </thead>
        <tbody>
          {data &&
            data.movies &&
            data.movies.map((m, i) => (
              <tr key={i}>
                <td>
                  <img src={m.poster} style={{ height: "50px" }}></img>
                </td>
                <td>{m.title}</td>
                <td>
                  {m.genres.reduce(
                    (acc, c, i) =>
                      acc + (i === 0 ? " " : ", ") + c.name,
                    ""
                  )}
                </td>
                <td>{m.imdbRating}</td>
              </tr>
            ))}
        </tbody>
      </table>
If we return to our web browser, we can see our application up and running. Try choosing a different genre in the form to see the results of our GraphQL search.

Now that we have our application running locally, let’s see how we can deploy this simple movie search application to the web using Vercel and Neo4j AuraDB.
Deploying to Vercel And Neo4j AuraDB
Next.js is a powerful React framework when used on its own, but when we pair Next.js with Vercel, a platform for deploying web applications, we can leverage some huge developer experience benefits. To deploy our application on Vercel, we’ll first push it to GitHub and connect the GitHub repository to a new project in Vercel. Later, we’ll show an advantage of using this approach when adding new features to our app: ‘preview’ deployments that allow us to test and share our updated application to gather feedback before updating the production deployment.
First, we’ll create a new GitHub repository and push our Next.js application to it. By default, create-next-app generated a git repository for us when we started the project. Let’s commit our changes and push them to our new GitHub repository.
git add -A
git commit -m "add fullstack graphql app"
git remote add origin git@github.com:johnymontana/fullstack-graphql-movies.git
git push -u origin main
Next, we’ll sign in to Vercel and create a new project. If you don’t have a Vercel account, you can create one for free. The free tier of Vercel includes all the features we need to deploy our Next.js application.
Since our .env.local file with our database credentials wasn’t checked for version control to keep our secrets safe, we’ll need to specify our Neo4j AuraDB credentials as environment variables when configuring the project in Vercel. We can use a different database here to have multiple development, staging, and production environments.

Hit the Deploy button, and after a few seconds (and some confetti), our application will be deployed to the web. Vercel will even assign our app a new domain name and SSL certificate. Our React application is deployed to Vercel’s CDN, while our API Routes are deployed as serverless functions.
This is great, but let’s see how we can take advantage of Vercel’s preview deployment feature. We’ll add a new feature to our app and push it to a new branch of our GitHub repository, which will trigger a new preview deployment on Vercel.
Adding A New Feature And Vercel Preview Deployments
Preview deployments allow us to test and share new features to our application without updating our production deployment. To see how this works, let’s add a recommended movie feature to our application. To do this, we’ll add a new field to the Movie type in our GraphQL API called similar that will return a list of similar movies a user might be interested in watching if they liked the original movie. We’ll use the @cypher schema directive to attach custom logic to our GraphQL API using a Cypher statement.
First, we’ll write a Cypher query to find similar movies. We saw earlier that Cypher allows us to declare graph patterns using ASCII-art syntax, so our Cypher query will define a graph pattern to find similar movies by traversing through the actors and genres of the movie.
MATCH (m:Movie {title: "Matrix, The"})
MATCH (m)-[:ACTED_IN|:IN_GENRE]-()-[:ACTED_IN|:IN_GENRE]-(rec:Movie)
WITH rec, COUNT(*) AS score ORDER BY score DESC
RETURN rec LIMIT 3
We could also use things like user ratings to improve our movie recommendations, but this is a good start. In our GraphQL type definitions in api/graphql.js, we’ll add our new similar field and annotate it with our movie recommendation Cypher statement.
 extend type Movie {
    similar(first: Int = 4): [Movie!]! @cypher(statement: """
    MATCH (this)-[:ACTED_IN|:IN_GENRE]-()-[:ACTED_IN|:IN_GENRE]-(rec:Movie)
    WITH rec, COUNT(*) AS score ORDER BY score DESC
    RETURN rec LIMIT $first
    """)
 }
We use the this variable in the Cypher statement to refer to the currently resolved movie. Similarly, any GraphQL field arguments we define will be passed to the Cypher statement as Cypher parameters, like the $first parameter that will allow for specifying the maximum number of similar movies to return.
If we include this new similar field in our GraphQL movies search query and in the result table, we’ll see a recommended movie for each movie in our search results.

Let’s create a new git branch and commit our changes to this new branch. This will trigger a preview deployment on Vercel. Our updates will be deployed to a new domain, which we’ll be able to share and test before merging the changes to the main branch and moving the deployment to our main domain.
git checkout -b recommendations
git add -A
git commit -m "add recommendations feature"
git push origin recommendations

One neat feature included in each preview deployment is the ability for our users to add annotations and feedback to our app just by clicking on the screen. This is a great way to gather feedback on a new feature just by sharing the URL to your preview deployment!

In this blog post, we saw how to use Next.js and Neo4j AuraDB to build and deploy a full stack GraphQL web application. We used the Neo4j GraphQL Library in a Next.js API route to quickly create a fully featured GraphQL API backed by a native graph database as a serverless function. We also saw some of the advantages of using Vercel to deploy our full stack application, like the preview deployment functionality.
Where To Go From Here
To learn more about building full stack GraphQL applications, be sure to download my book Full Stack GraphQL Applications. Thanks to Neo4j, you can download the ebook version for free! The book covers more advanced features of the Neo4j GraphQL Library, like adding authorization rules, how to work with mutations, using GraphQL for client state management, and more. You can find the code for this blog post on GitHub.