How To Build A Multilingual Website With Nuxt.js

Email Newsletter
Weekly tips on front-end & UX.
Trusted by 182,000+ folks.
This article has been kindly supported by our dear friends at Hygraph, who help developers build limitless solutions by supporting their favorite frontend frameworks, systems, and APIs with a robust GraphQL-native API-first approach. Thank you!
Internationalization, often abbreviated as i18n, is the process of designing and developing software applications in a way that they can be easily adapted to various spoken languages like English, German, French, and more without requiring substantial changes to the codebase. It involves moving away from hardcoded strings and techniques for translating text, formatting dates and numbers, and handling different character encodings, among other tasks.
Internationalization can give users the choice to access a given website or application in their native language, which can have a positive impression on them, making it crucial for reaching a global audience.
What We’re Making
In this tutorial, we’re making a website that puts these i18n pieces together using a combination of libraries and a UI framework. You’ll want to have intermediate proficiency with JavaScript, Vue, and Nuxt to follow along. Throughout this article, we will learn by examples and incrementally build a multilingual Nuxt website. Together, we will learn how to provide i18n support for different languages, lazy-load locale messages, and switch locale on runtime.
After that, we will explore features like interpolation, pluralization, and date/time translations.
And finally, we will fetch dynamic localized content from an API server using Hygraph as our API server to get localized content. If you do not have a Hygraph account please create one for free before jumping in.
As a final detail, we will use Vuetify as our UI framework, but please feel free to use another framework if you want. The final code for what we’re building is published in a GitHub repository for reference. And finally, you can also take a look at the final result in a live demo.
The nuxt-i18n Library
nuxt-i18n is a library for implementing internationalization in Nuxt.js applications, and it’s what we will be using in this tutorial. The library is built on top of Vue I18n, which, again, is the de facto standard library for implementing i18n in Vue applications.
What makes nuxt-i18n ideal for our work is that it provides the comprehensive set of features included in Vue I18n while adding more functionalities that are specific to Nuxt, like lazy loading locale messages, route generation and redirection for different locales, SEO metadata per locale, locale-specific domains, and more.
Initial Setup
Start a new Nuxt.js project and set it up with a UI framework of your choice. Again, I will be using Vue to establish the interface for this tutorial.
Let us add a basic layout for our website and set up some sample Vue templates.
First, a “Blog” page:
<!-- pages/blog.vue -->
<template>
  <div>
    <v-card color="cardBackground">
      <v-card-title class="text-overline">
        Home
      </v-card-title>
      <v-card-text>
        This is the home page description
      </v-card-text>
    </v-card>
  </div>
</template>
Next, an “About” page:
<!-- pages/about.vue -->
<template>
  <div>
    <v-card color="cardBackground">
      <v-card-title class="text-overline">
        About
      </v-card-title>
      <v-card-text>
        This is the about page description
      </v-card-text>
    </v-card>
  </div>
</template>
This gives us a bit of a boilerplate that we can integrate our i18n work into.
Translating Plain Text
The page templates look good, but notice how the text is hardcoded. As far as i18n goes, hardcoded content is difficult to translate into different locales. That is where the nuxt-i18n library comes in, providing the language-specific strings we need for the Vue components in the templates.
We’ll start by installing the library via the command line:
npx nuxi@latest module add i18n
Inside the nuxt.config.ts file, we need to ensure that we have @nuxtjs/i18n inside the modules array. We can use the i18n property to provide module-specific configurations.
// nuxt.config.ts
export default defineNuxtConfig({
  // ...
  modules: [
    ...
    "@nuxtjs/i18n",
    // ...
  ],
  i18n: {
    // nuxt-i18n module configurations here
  }
  // ...
});
Since the nuxt-i18n library is built on top of the Vue I18n library, we can utilize its features in our Nuxt application as well. Let us create a new file, i18n.config.ts, which we will use to provide all vue-i18n configurations.
// i18n.config.ts
export default defineI18nConfig(() => ({
  legacy: false,
  locale: "en",
  messages: {
    en: {
      homePage: {
        title: "Home",
        description: "This is the home page description."
      },
      aboutPage: {
        title: "About",
        description: "This is the about page description."
      },
    },
  },
}));
Here, we have specified internationalization configurations, like using the en locale, and added messages for the en locale. These messages can be used inside the markup in the templates we made with the help of a $t function from Vue I18n.
Next, we need to link the i18n.config.ts configurations in our Nuxt config file.
// nuxt.config.ts
export default defineNuxtConfig({
  ...
  i18n: {
    vueI18n: "./i18n.config.ts"
  }
  ...
});
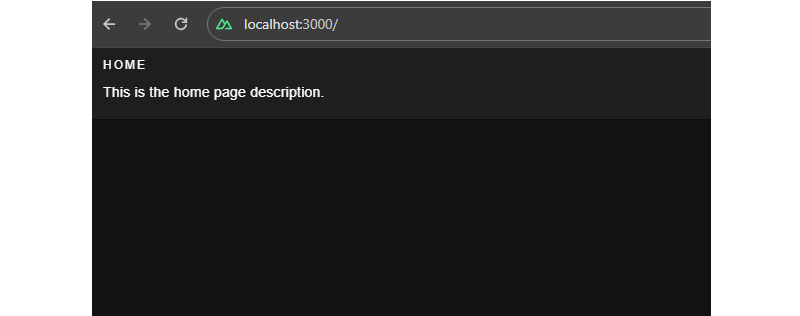
Now, we can use the $t function in our components — as shown below — to parse strings from our internationalization configurations.
Note: There’s no need to import $t since we have Nuxt’s default auto-import functionality.
<!-- i18n.config.ts -->
<template>
  <div>
    <v-card color="cardBackground">
      <v-card-title class="text-overline">
        {{ $t("homePage.title") }}
      </v-card-title>
      <v-card-text>
        {{ $t("homePage.description") }}
      </v-card-text>
    </v-card>
  </div>
</template>
Lazy Loading Translations
We have the title and description served from the configurations. Next, we can add more languages to the same config. For example, here’s how we can establish translations for English (en), French (fr) and Spanish (es):
// i18n.config.ts
export default defineI18nConfig(() => ({
  legacy: false,
  locale: "en",
  messages: {
    en: {
      // English
    },
    fr: {
      // French
    },
    es: {
      // Spanish
    }
  },
}));
For a production website with a lot of content that needs translating, it would be unwise to bundle all of the messages from different locales in the main bundle. Instead, we should use the nuxt-i18 lazy loading feature asynchronously load only the required language rather than all of them at once. Also, having messages for all locales in a single configuration file can become difficult to manage over time, and breaking them up like this makes things easier to find.
Let’s set up the lazy loading feature in nuxt.config.ts:
// etc.
  i18n: {
    vueI18n: "./i18n.config.ts",
    lazy: true,
    langDir: "locales",
    locales: [
      {
        code: "en",
        file: "en.json",
        name: "English",
      },
      {
        code: "es",
        file: "es.json",
        name: "Spanish",
      },
      {
        code: "fr",
        file: "fr.json",
        name: "French",
      },
    ],
    defaultLocale: "en",
    strategy: "no_prefix",
  },

// etc.
This enables lazy loading and specifies the locales directory that will contain our locale files. The locales array configuration specifies from which files Nuxt.js should pick up messages for a specific language.
Now, we can create individual files for each language. I’ll drop all three of them right here:
// locales/en.json
{
  "homePage": {
    "title": "Home",
    "description": "This is the home page description."
  },
  "aboutPage": {
    "title": "About",
    "description": "This is the about page description."
  },
  "selectLocale": {
    "label": "Select Locale"
  },
  "navbar": {
    "homeButton": "Home",
    "aboutButton": "About"
  }
}
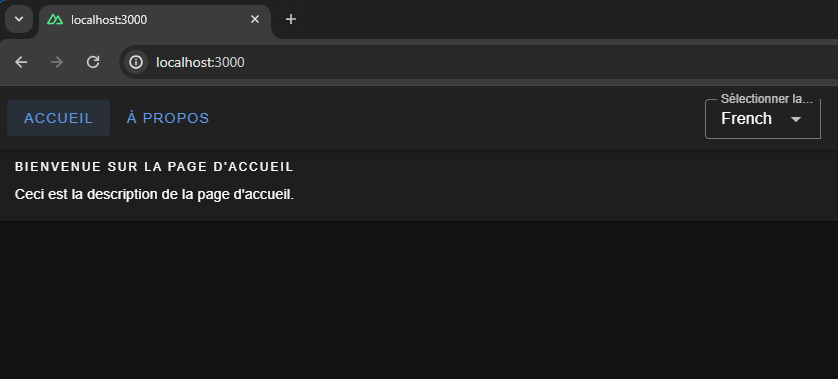
// locales/fr.json
{
  "homePage": {
    "title": "Bienvenue sur la page d'accueil",
    "description": "Ceci est la description de la page d'accueil."
  },
  "aboutPage": {
    "title": "À propos de nous",
    "description": "Ceci est la description de la page à propos de nous."
  },
  "selectLocale": {
    "label": "Sélectionner la langue"
  },
  "navbar": {
    "homeButton": "Accueil",
    "aboutButton": "À propos"
  }
}
// locales/es.json
{
  "homePage": {
    "title": "Bienvenido a la página de inicio",
    "description": "Esta es la descripción de la página de inicio."
  },
  "aboutPage": {
    "title": "Sobre nosotros",
    "description": "Esta es la descripción de la página sobre nosotros."
  },
  "selectLocale": {
    "label": "Seleccione el idioma"
  },
  "navbar": {
    "homeButton": "Inicio",
    "aboutButton": "Acerca de"
  }
}
We have set up lazy loading, added multiple languages to our application, and moved our locale messages to separate files. The user gets the right locale for the right message, and the locale messages are kept in a maintainable manner inside the code base.
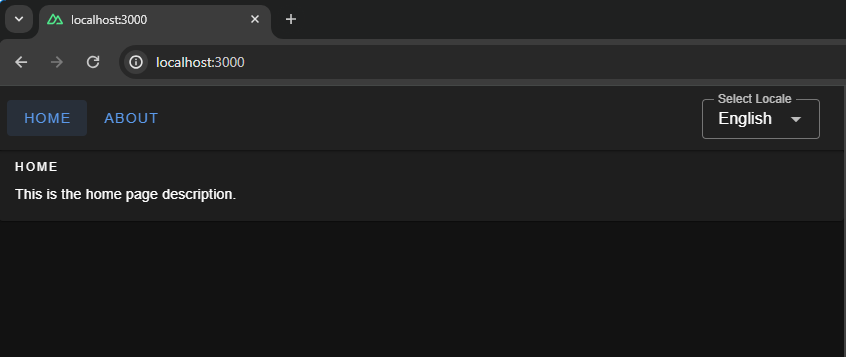
Switching Between Languages
We have different locales, but to see them in action, we will build a component that can be used to switch between the available locales.
<!-- components/select-locale.vue -->
<script setup>
const { locale, locales, setLocale } = useI18n();

const language = computed({
  get: () => locale.value,
  set: (value) => setLocale(value),
});
</script>

<template>
  <v-select
    :label="$t('selectLocale.label')"
    variant="outlined"
    color="primary"
    density="compact"
    :items="locales"
    item-title="name"
    item-value="code"
    v-model="language"
  ></v-select>
</template>
This component uses the useI18n hook provided by the Vue I18n library and a computed property language to get and set the global locale from a <select> input. To make this even more like a real-world website, we’ll include a small navigation bar that links up all of the website’s pages.
<!-- components/select-locale.vue -->
<template>
  <v-app-bar app :elevation="2" class="px-2">
    <div>
      <v-btn color="button" to="/">
        {{ $t("navbar.homeButton") }}
      </v-btn>
      <v-btn color="button" to="/about">
        {{ $t("navbar.aboutButton") }}
      </v-btn>
    </div>
    <v-spacer />
    <div class="mr-4 mt-6">
      <SelectLocale />
    </div>
  </v-app-bar>
</template>
That’s it! Now, we can switch between languages on the fly.
We have a basic layout, but I thought we’d take this a step further and build a playground page we can use to explore more i18n features that are pretty useful when building a multilingual website.
Interpolation and Pluralization
Interpolation and pluralization are internationalization techniques for handling dynamic content and grammatical variations across different languages. Interpolation allows developers to insert dynamic variables or expressions into translated strings. Pluralization addresses the complexities of plural forms in languages by selecting the appropriate grammatical form based on numeric values. With the help of interpolation and pluralization, we can create more natural and accurate translations.
To use pluralization in our Nuxt app, we’ll first add a configuration to the English locale file.
// locales/en.json
{
  // etc.
  "playgroundPage": {
    "pluralization": {
      "title": "Pluralization",
      "apple": "No Apple | One Apple | {count} Apples",
      "addApple": "Add"
    }
  }
  // etc.
}
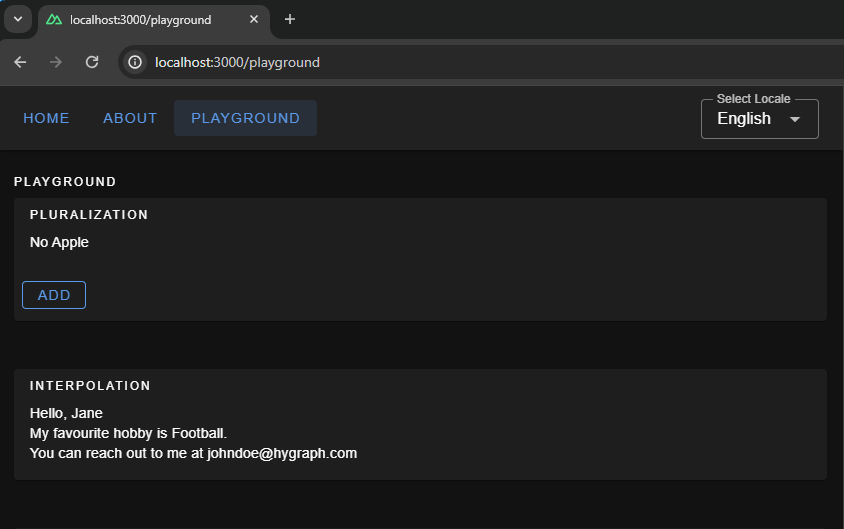
The pluralization configuration set up for the key apple defines an output — No Apple — if a count of 0 is passed to it, a second output — One Apple — if a count of 1 is passed, and a third — 2 Apples, 3 Apples, and so on — if the count passed in is greater than 1.
Here is how we can use it in your component: Whenever you click on the add button, you will see pluralization in action, changing the strings.
<!-- pages/playground.vue -->
<script setup>
let appleCount = ref(0);
const addApple = () => {
  appleCount.value += 1;
};
</script>
<template>
  <v-container fluid>
    <!-- PLURALIZATION EXAMPLE  -->
    <v-card color="cardBackground">
      <v-card-title class="text-overline">
        {{ $t("playgroundPage.pluralization.title") }}
      </v-card-title>

      <v-card-text>
        {{ $t("playgroundPage.pluralization.apple", { count: appleCount }) }}
      </v-card-text>
      <v-card-actions>
        <v-btn
          @click="addApple"
          color="primary"
          variant="outlined"
          density="comfortable"
          >{{ $t("playgroundPage.pluralization.addApple") }}</v-btn
        >
      </v-card-actions>
    </v-card>
  </v-container>
</template>
To use interpolation in our Nuxt app, first, add a configuration in the English locale file:
// locales/en.json
{
  ...
  "playgroundPage": {
    ...
    "interpolation": {
      "title": "Interpolation",
      "sayHello": "Hello, {name}",
      "hobby": "My favourite hobby is {0}.",
      "email": "You can reach out to me at {account}{'@'}{domain}.com"
    },
    // etc.
  }
  // etc.
}
The message for sayHello expects an object passed to it having a key name when invoked — a process known as named interpolation.
The message hobby expects an array to be passed to it and will pick up the 0th element, which is known as list interpolation.
The message email expects an object with keys account, and domain and joins both with a literal string "@". This is known as literal interpolation.
Below is an example of how to use it in the Vue components:
<!-- pages/playground.vue -->
<template>
  <v-container fluid>
    <!-- INTERPOLATION EXAMPLE  -->
    <v-card color="cardBackground">
      <v-card-title class="text-overline">
        {{ $t("playgroundPage.interpolation.title") }}
      </v-card-title>
      <v-card-text>
        <p>
          {{
            $t("playgroundPage.interpolation.sayHello", {
              name: "Jane",
            })
          }}
        </p>
        <p>
          {{
            $t("playgroundPage.interpolation.hobby", ["Football", "Cricket"])
          }}
        </p>
        <p>
          {{
            $t("playgroundPage.interpolation.email", {
              account: "johndoe",
              domain: "hygraph",
            })
          }}
        </p>
      </v-card-text>
    </v-card>
  </v-container>
</template>
Date & Time Translations
Translating dates and times involves translating date and time formats according to the conventions of different locales. We can use Vue I18n’s features for formatting date strings, handling time zones, and translating day and month names for managing date time translations. We can give the configuration for the same using the datetimeFormats key inside the vue-i18n config object.
// i18n.config.ts
export default defineI18nConfig(() => ({
  fallbackLocale: "en",
  datetimeFormats: {
    en: {
      short: {
        year: "numeric",
        month: "short",
        day: "numeric",
      },
      long: {
        year: "numeric",
        month: "short",
        day: "numeric",
        weekday: "short",
        hour: "numeric",
        minute: "numeric",
        hour12: false,
      },
    },
    fr: {
      short: {
        year: "numeric",
        month: "short",
        day: "numeric",
      },
      long: {
        year: "numeric",
        month: "short",
        day: "numeric",
        weekday: "long",
        hour: "numeric",
        minute: "numeric",
        hour12: true,
      },
    },
    es: {
      short: {
        year: "numeric",
        month: "short",
        day: "numeric",
      },
      long: {
        year: "2-digit",
        month: "short",
        day: "numeric",
        weekday: "long",
        hour: "numeric",
        minute: "numeric",
        hour12: true,
      },
    },
  },
}));
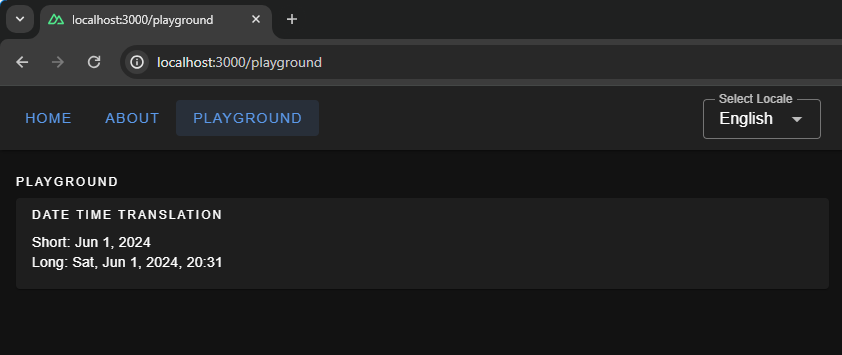
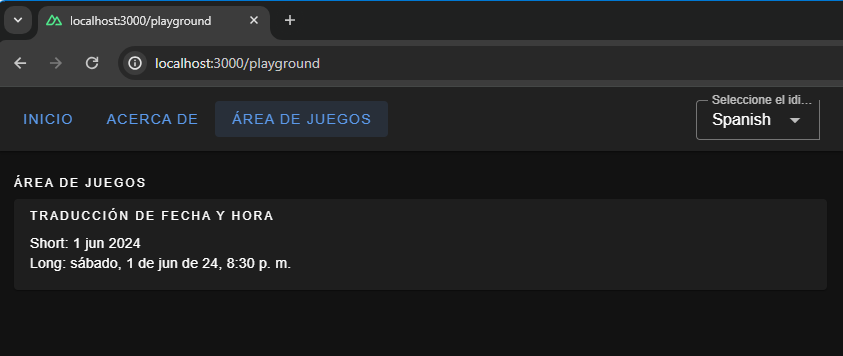
Here, we have set up short and long formats for all three languages. If you are coding along, you will be able to see available configurations for fields, like month and year, thanks to TypeScript and Intellisense features provided by your code editor. To display the translated dates and times in components, we should use the $d function and pass the format to it.
<!-- pages.playground.vue -->
<template>
  <v-container fluid>
    <!-- DATE TIME TRANSLATIONS EXAMPLE  -->
    <v-card color="cardBackground">
      <v-card-title class="text-overline">
        {{ $t("playgroundPage.dateTime.title") }}
      </v-card-title>
      <v-card-text>
        <p>Short: {{ (new Date(), $d(new Date(), "short")) }}</p>
        <p>Long: {{ (new Date(), $d(new Date(), "long")) }}</p>
      </v-card-text>
    </v-card>
  </v-container>
</template>
Localization On the Hygraph Side
We saw how to implement localization with static content. Now, we’ll attempt to understand how to fetch dynamic localized content in Nuxt.
We can build a blog page in our Nuxt App that fetches data from a server. The server API should accept a locale and return data in that specific locale.
Hygraph has a flexible localization API that allows you to publish and query localized content. If you haven’t created a free Hygraph account yet, you can do that on the Hygraph website to continue following along.
Go to Project Settings → Locales and add locales for the API.
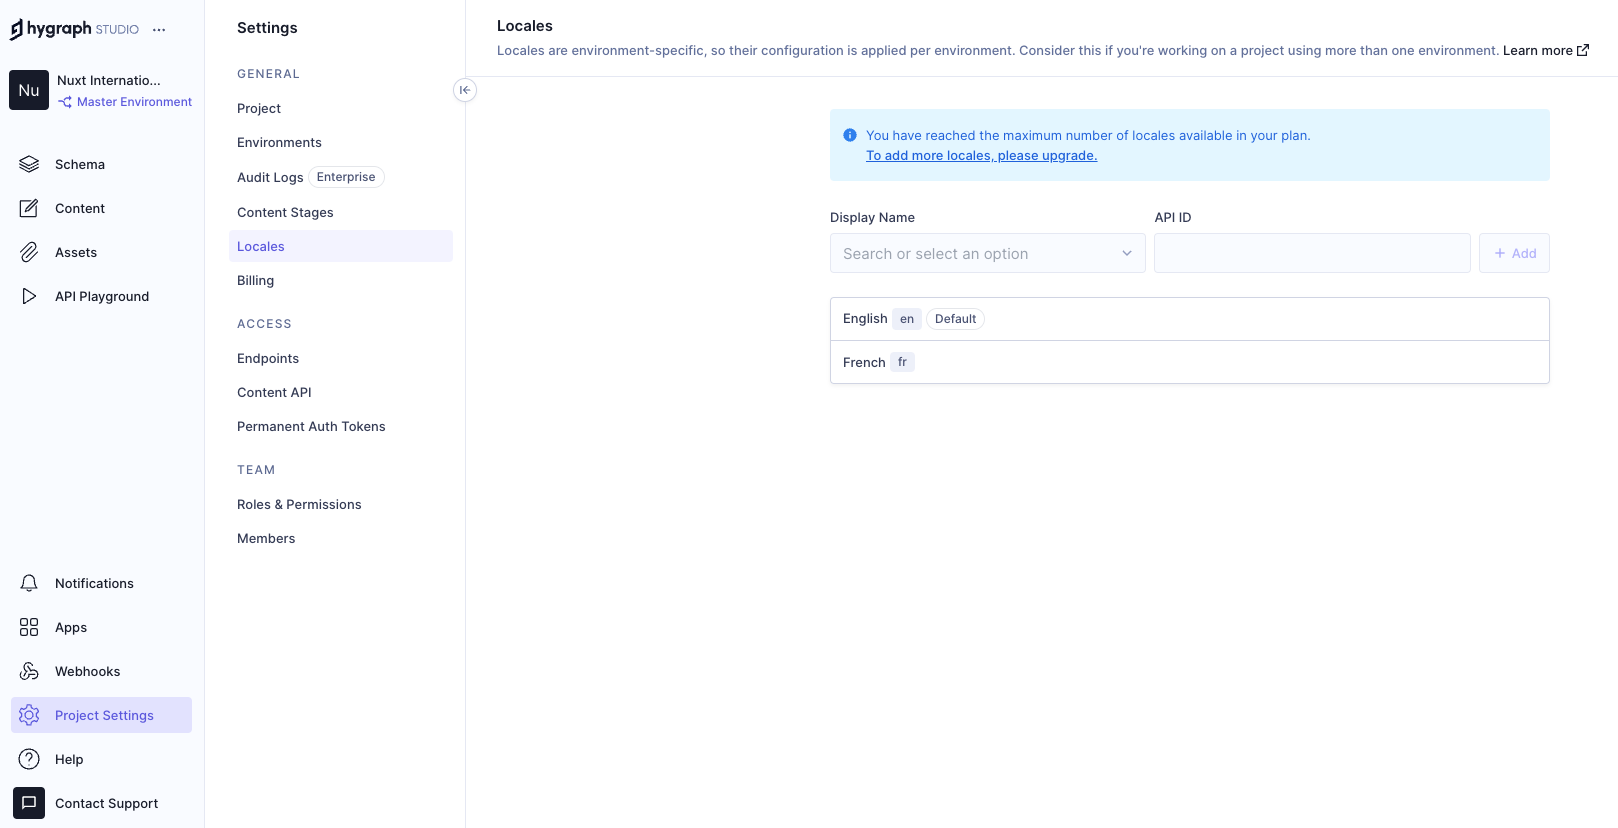
We have added two locales: English and French. Now we need aq localized_post model in our schema that only two fields: title and body. Ensure to make these “Localized” fields while creating them.

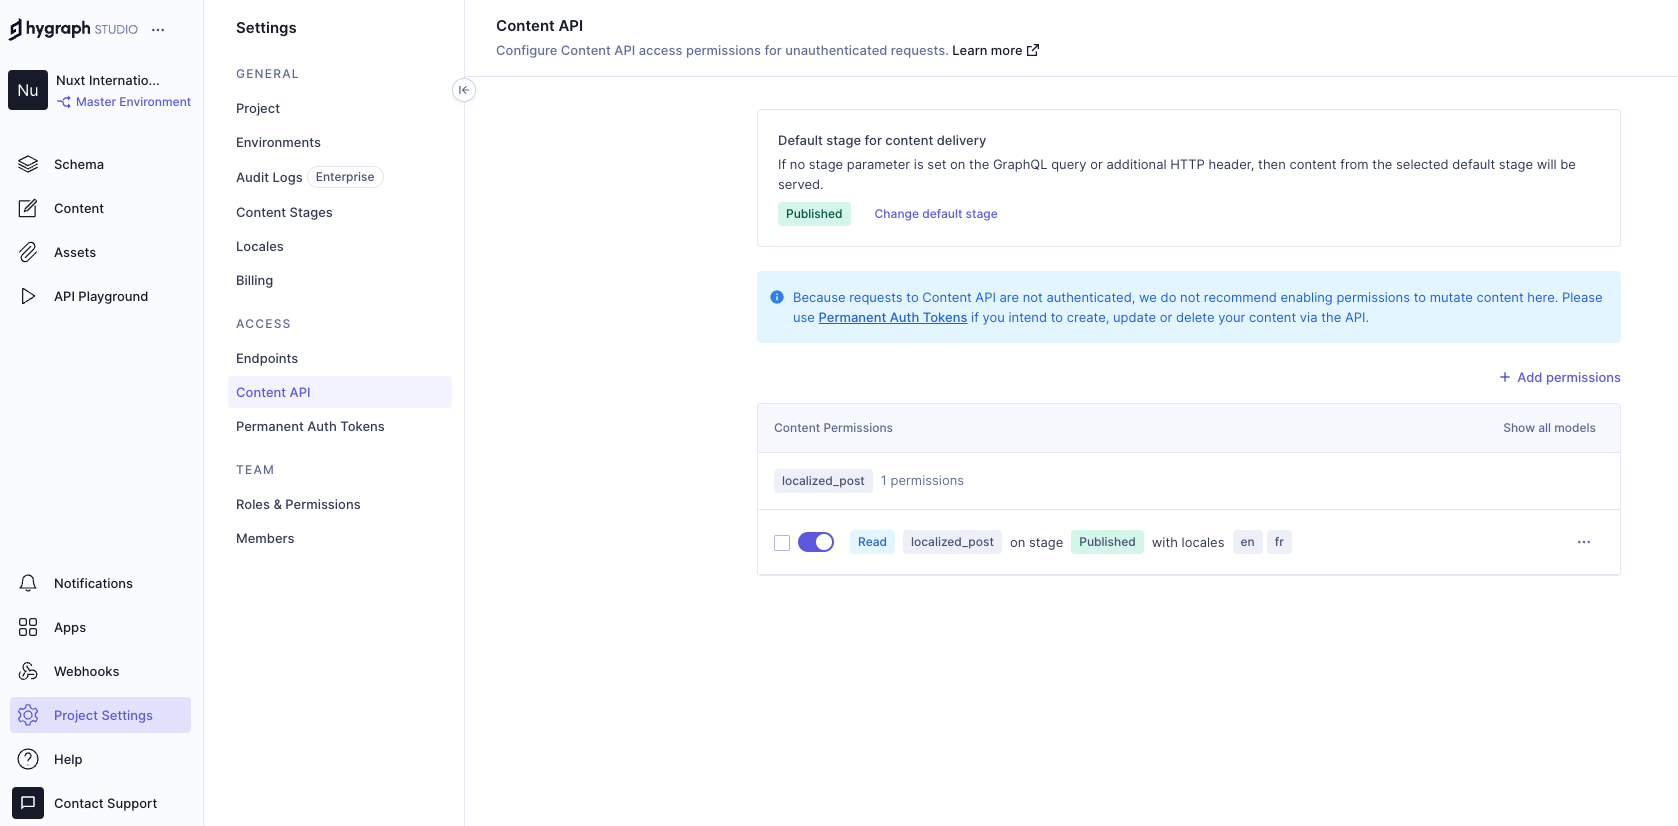
Add permissions to consume the localized content, go to Project settings → Access → API Access → Public Content API, and assign Read permissions to the localized_post model.
Now, we can go to the Hygrapgh API playground and add some localized data to the database with the help of GraphQL mutations. To limit the scope of this example, I am simply adding data from the Hygraph API playground. In an ideal world, a create/update mutation would be triggered from the front end after receiving user input.
Run this mutation in the Hygraph API playground:
mutation createLocalizedPost {
  createLocalizedPost(
    data: {
      title: "A Journey Through the Alps",
      body: "Exploring the majestic mountains of the Alps offers a thrilling experience. The stunning landscapes, diverse wildlife, and pristine environment make it a perfect destination for nature lovers.",
      localizations: {
        create: [
          {locale: fr, data: {title: "Un voyage à travers les Alpes", body: "Explorer les majestueuses montagnes des Alpes offre une expérience palpitante. Les paysages époustouflants, la faune diversifiée et l'environnement immaculé en font une destination parfaite pour les amoureux de la nature."}}
        ]
      }
    }
  ) {
    id
  }
}
The mutation above creates a post with the en locale and includes a fr version of the same post. Feel free to add more data to your model if you want to see things work from a broader set of data.
Putting Things Together
Now that we have Hygraph API content ready for consumption let’s take a moment to understand how it’s consumed inside the Nuxt app.
To do this, we’ll install nuxt-graphql-client to serve as the app’s GraphQL client. This is a minimal GraphQL client for performing GraphQL operations without having to worry about complex configurations, code generation, typing, and other setup tasks.
npx nuxi@latest module add graphql-client
// nuxt.config.ts
export default defineNuxtConfig({
  modules: [
    // ...
    "nuxt-graphql-client"
    // ...
  ],
  runtimeConfig: {
    public: {
      GQL_HOST: 'ADD_YOUR_GQL_HOST_URL_HERE_OR_IN_.env'
    }
  },
});
Next, let’s add our GraphQL queries in graphql/queries.graphql.
query getPosts($locale: [Locale!]!) {
  localizedPosts(locales: $locale) {
    title
    body
  }
}
The GraphQL client will automatically scan .graphql and .gql files and generate client-side code and typings in the .nuxt/gql folder. All we need to do is stop and restart the Nuxt application. After restarting the app, the GraphQL client will allow us to use a GqlGetPosts function to trigger the query.
Now, we will build the Blog page where by querying the Hygraph server and showing the dynamic data.
// pages/blog.vue
<script lang="ts" setup>
  import type { GetPostsQueryVariables } from "#gql";
  import type { PostItem, Locale } from "../types/types";

  const { locale } = useI18n();
  const posts = ref<PostItem[]>([]);
  const isLoading = ref(false);
  const isError = ref(false);

  const fetchPosts = async (localeValue: Locale) => {
    try {
      isLoading.value = true;
      const variables: GetPostsQueryVariables = {
        locale: [localeValue],
      };
      const data = await GqlGetPosts(variables);
      posts.value = data?.localizedPosts ?? [];
    } catch (err) {
      console.log("Fetch Error, Something went wrong", err);
      isError.value = true;
    } finally {
      isLoading.value = false;
    }
  };

  // Fetch posts on component mount
  onMounted(() => {
    fetchPosts(locale.value as Locale);
  });

  // Watch for locale changes
  watch(locale, (newLocale) => {
    fetchPosts(newLocale as Locale);
  });
</script>
This code fetches only the current locale from the useI18n hook and sends it to the fetchPosts function when the Vue component is mounted. The fetchPosts function will pass the locale to the GraphQL query as a variable and obtain localized data from the Hygraph server. We also have a watcher on the locale so that whenever the global locale is changed by the user we make an API call to the server again and fetch posts in that locale.
And, finally, let’s add markup for viewing our fetched data!
<!-- pages/blog.vue -->
<template>
  <v-container fluid>
    <v-card-title class="text-overline">Blogs</v-card-title>
    <div v-if="isLoading">
      <v-skeleton-loader type="card" v-for="n in 2" :key="n" class="mb-4" />
    </div>
    <div v-else-if="isError">
      <p>Something went wrong while getting blogs please check the logs.</p>
    </div>
    <div v-else>
      <div
        v-for="(post, index) in posts"
        :key="post.title || index"
        class="mb-4"
      >
        <v-card color="cardBackground">
          <v-card-title class="text-h6">{{ post.title }}</v-card-title>
          <v-card-text>{{ post.body }}</v-card-text>
        </v-card>
      </div>
    </div>
  </v-container>
</template>
Awesome! If all goes according to plan, then your app should look something like the one in the following video.
Wrapping Up
Check that out — we just made the functionality for translating content for a multilingual website! Now, a user can select a locale from a list of options, and the app fetches content for the selected locale and automatically updates the displayed content.
Did you think that translations would require more difficult steps? It’s pretty amazing that we’re able to cobble together a couple of libraries, hook them up to an API, and wire everything up to render on a page.
Of course, there are other libraries and resources for handling internationalization in a multilingual context. The exact tooling is less the point than it is seeing what pieces are needed to handle dynamic translations and how they come together.