Creating Elastic And Bounce Effects With Expressive Animator

Email Newsletter
Weekly tips on front-end & UX.
Trusted by 182,000+ folks.
This article has been kindly supported by our dear friends at Expressive, who create the next generation of intuitive design tools powered by Human Intelligence. Thank you!
In the world of modern web design, SVG images are used everywhere, from illustrations to icons to background effects, and are universally prized for their crispness and lightweight size. While static SVG images play an important role in web design, most of the time their true potential is unlocked only when they are combined with motion.
Few things add more life and personality to a website than a well-executed SVG animation. But not all animations have the same impact in terms of digital experience. For example, elastic and bounce effects have a unique appeal in motion design because they bring a sense of realism into movement, making animations more engaging and memorable.
However, anyone who has dived into animating SVGs knows the technical hurdles involved. Creating a convincing elastic or bounce effect traditionally requires handling complex CSS keyframes or wrestling with JavaScript animation libraries. Even when using an SVG animation editor, it will most likely require you to manually add the keyframes and adjust the easing functions between them, which can become a time-consuming process of trial and error, no matter the level of experience you have.
This is where Expressive Animator shines. It allows creators to apply elastic and bounce effects in seconds, bypassing the tedious work of manual keyframe editing. And the result is always exceptional: animations that feel alive, produced with a fraction of the effort.
Using Expressive Animator To Create An Elastic Effect
Creating an elastic effect in Expressive Animator is remarkably simple, fast, and intuitive, since the effect is built right into the software as an easing function. This means you only need two keyframes (start and end) to make the effect, and the software will automatically handle the springy motion in between. Even better, the elastic easing can be applied to any animatable property (e.g., position, scale, rotation, opacity, morph, etc.), giving you a consistent way to add it to your animations.
Before we dive into the tutorial, take a look at the video below to see what you will learn to create and the entire process from start to finish.
First things first, let’s set the scene. For this, we’ll create a new project by pressing Ctrl/Cmd + P and configuring it in the “Create New Project” dialog that pops up. For frame size, we’ll choose 1080×1080, for a duration of 00:01:30, and we’ll let the frame rate remain unchanged at 60 frames per second (fps).
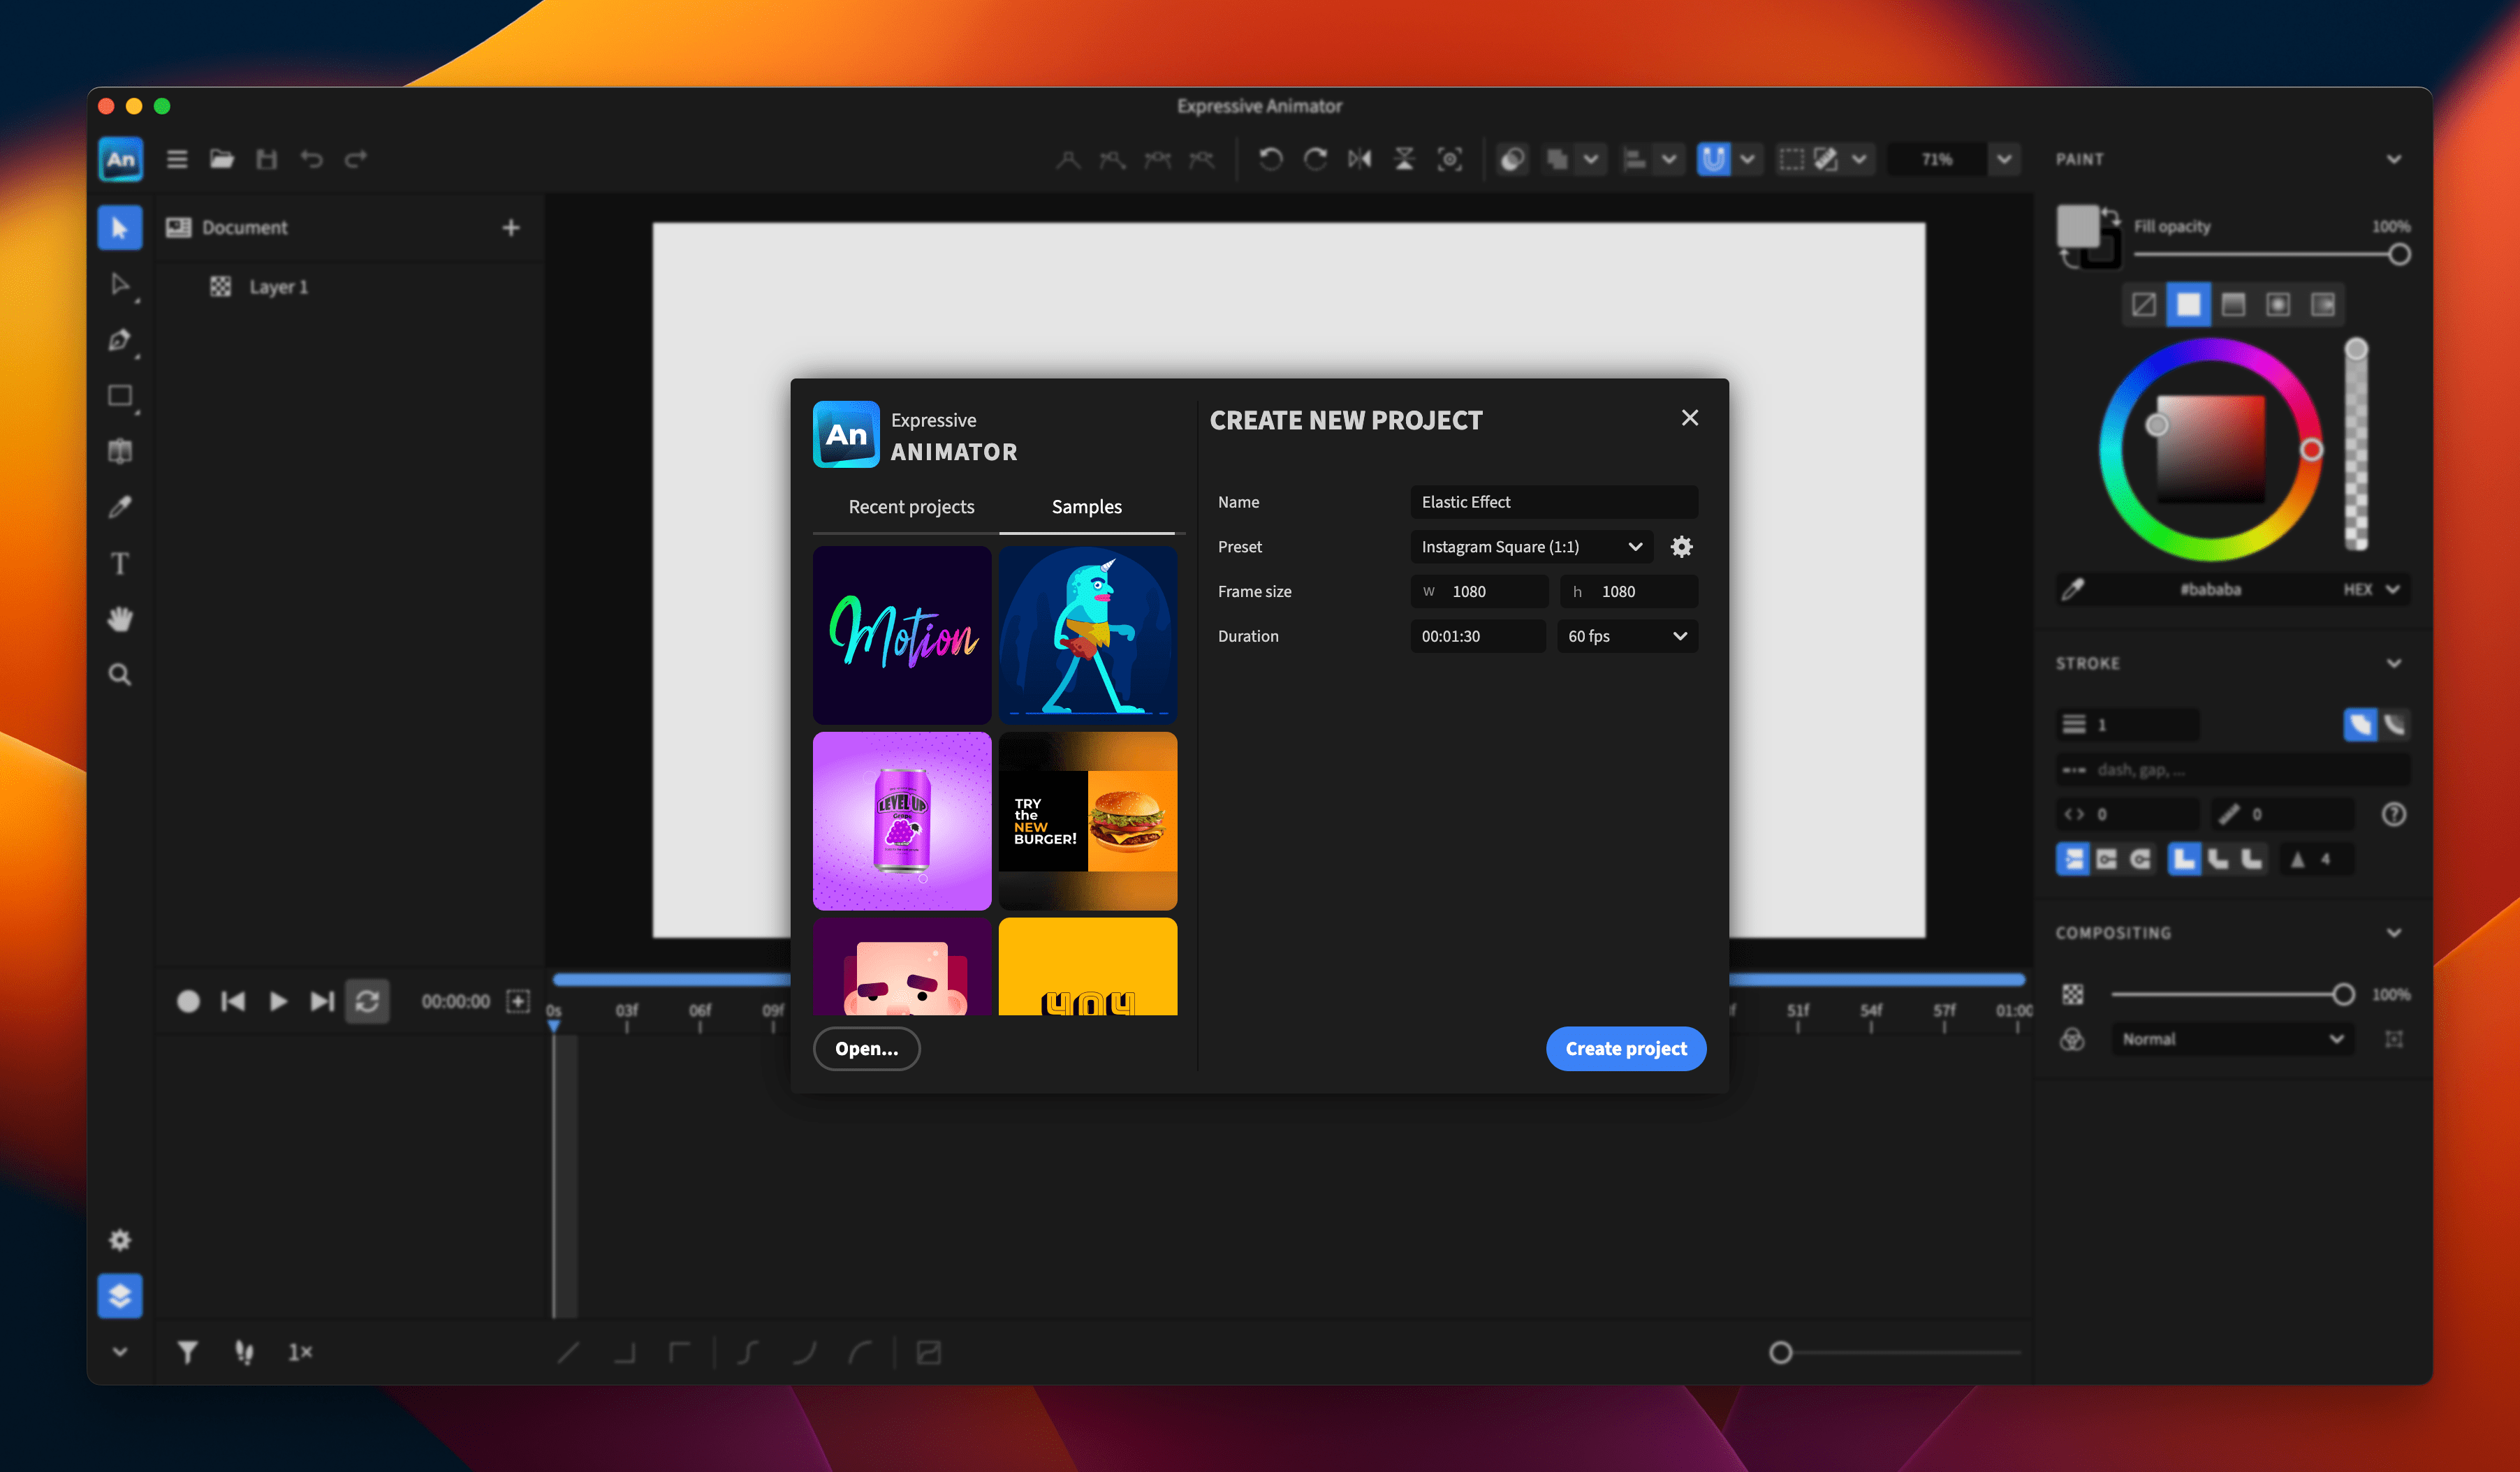
Once you hit the “Create project” button, you can use the Pen and Ellipse tools to create the artwork that will be animated, or you can simply copy and paste the artwork below.
See the Pen [Effects With Expressive Animator - Artwork for Animation](https://codepen.io/smashingmag/pen/pvjmwxv).
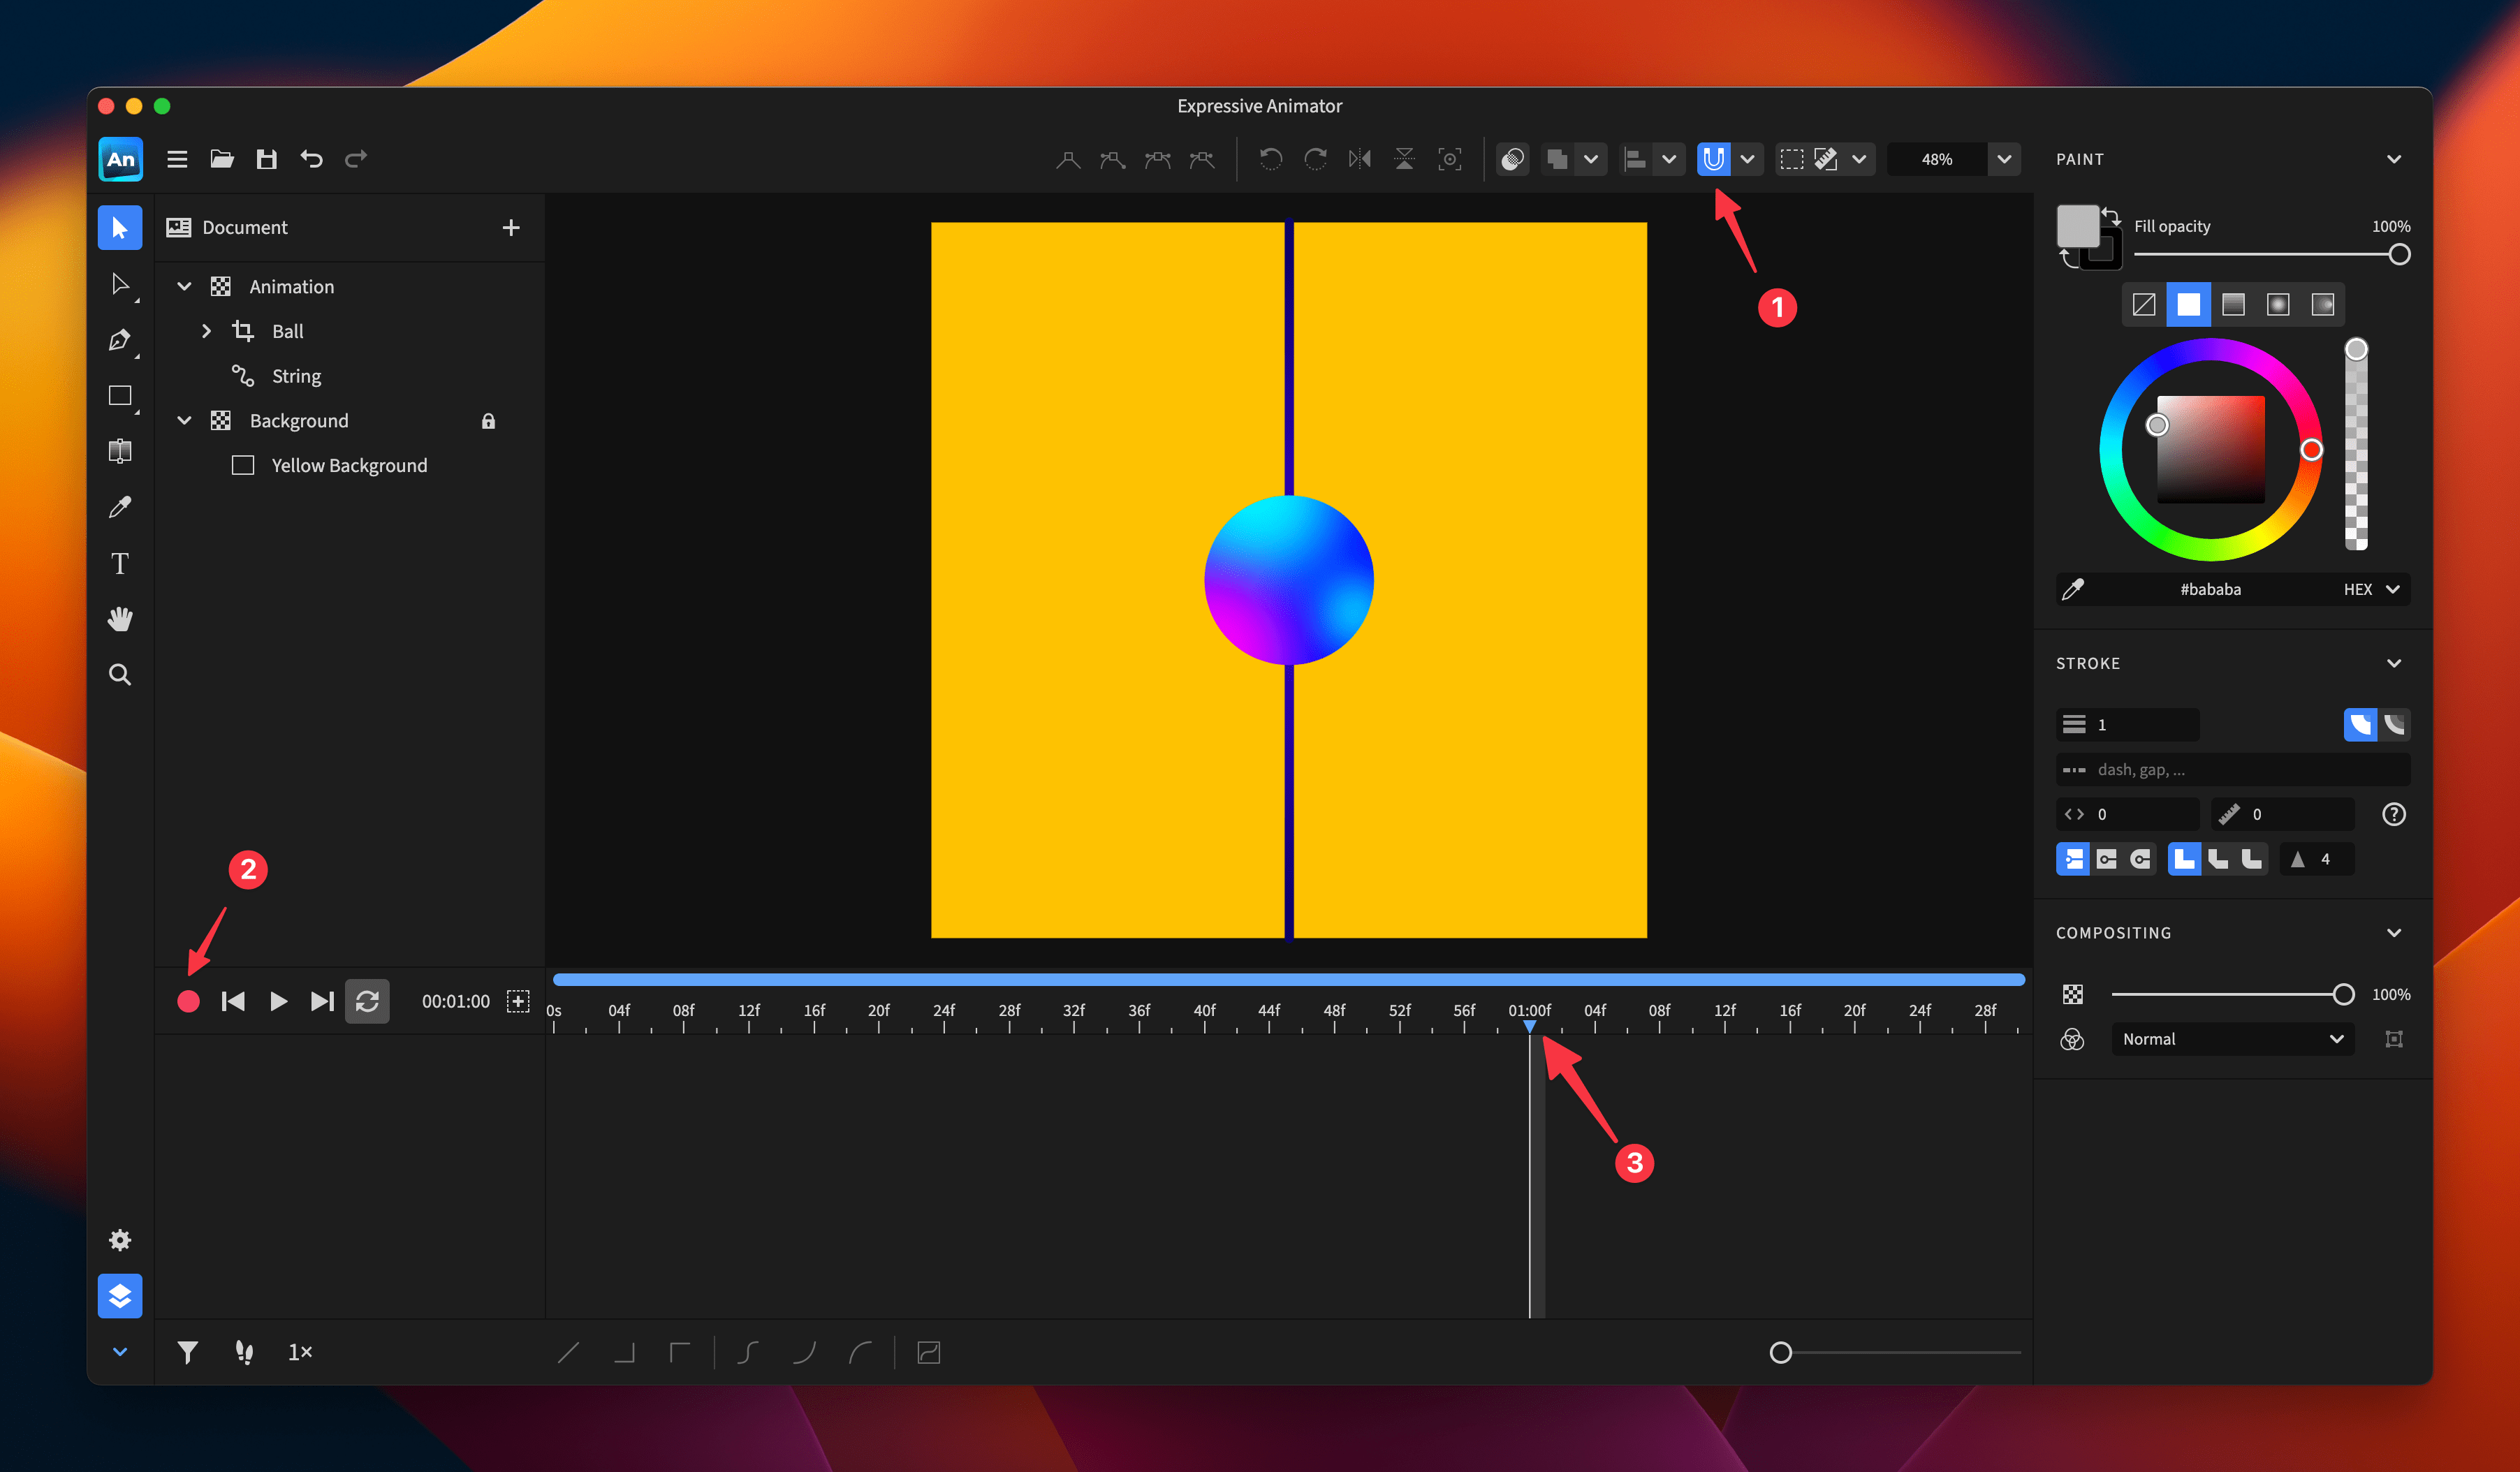
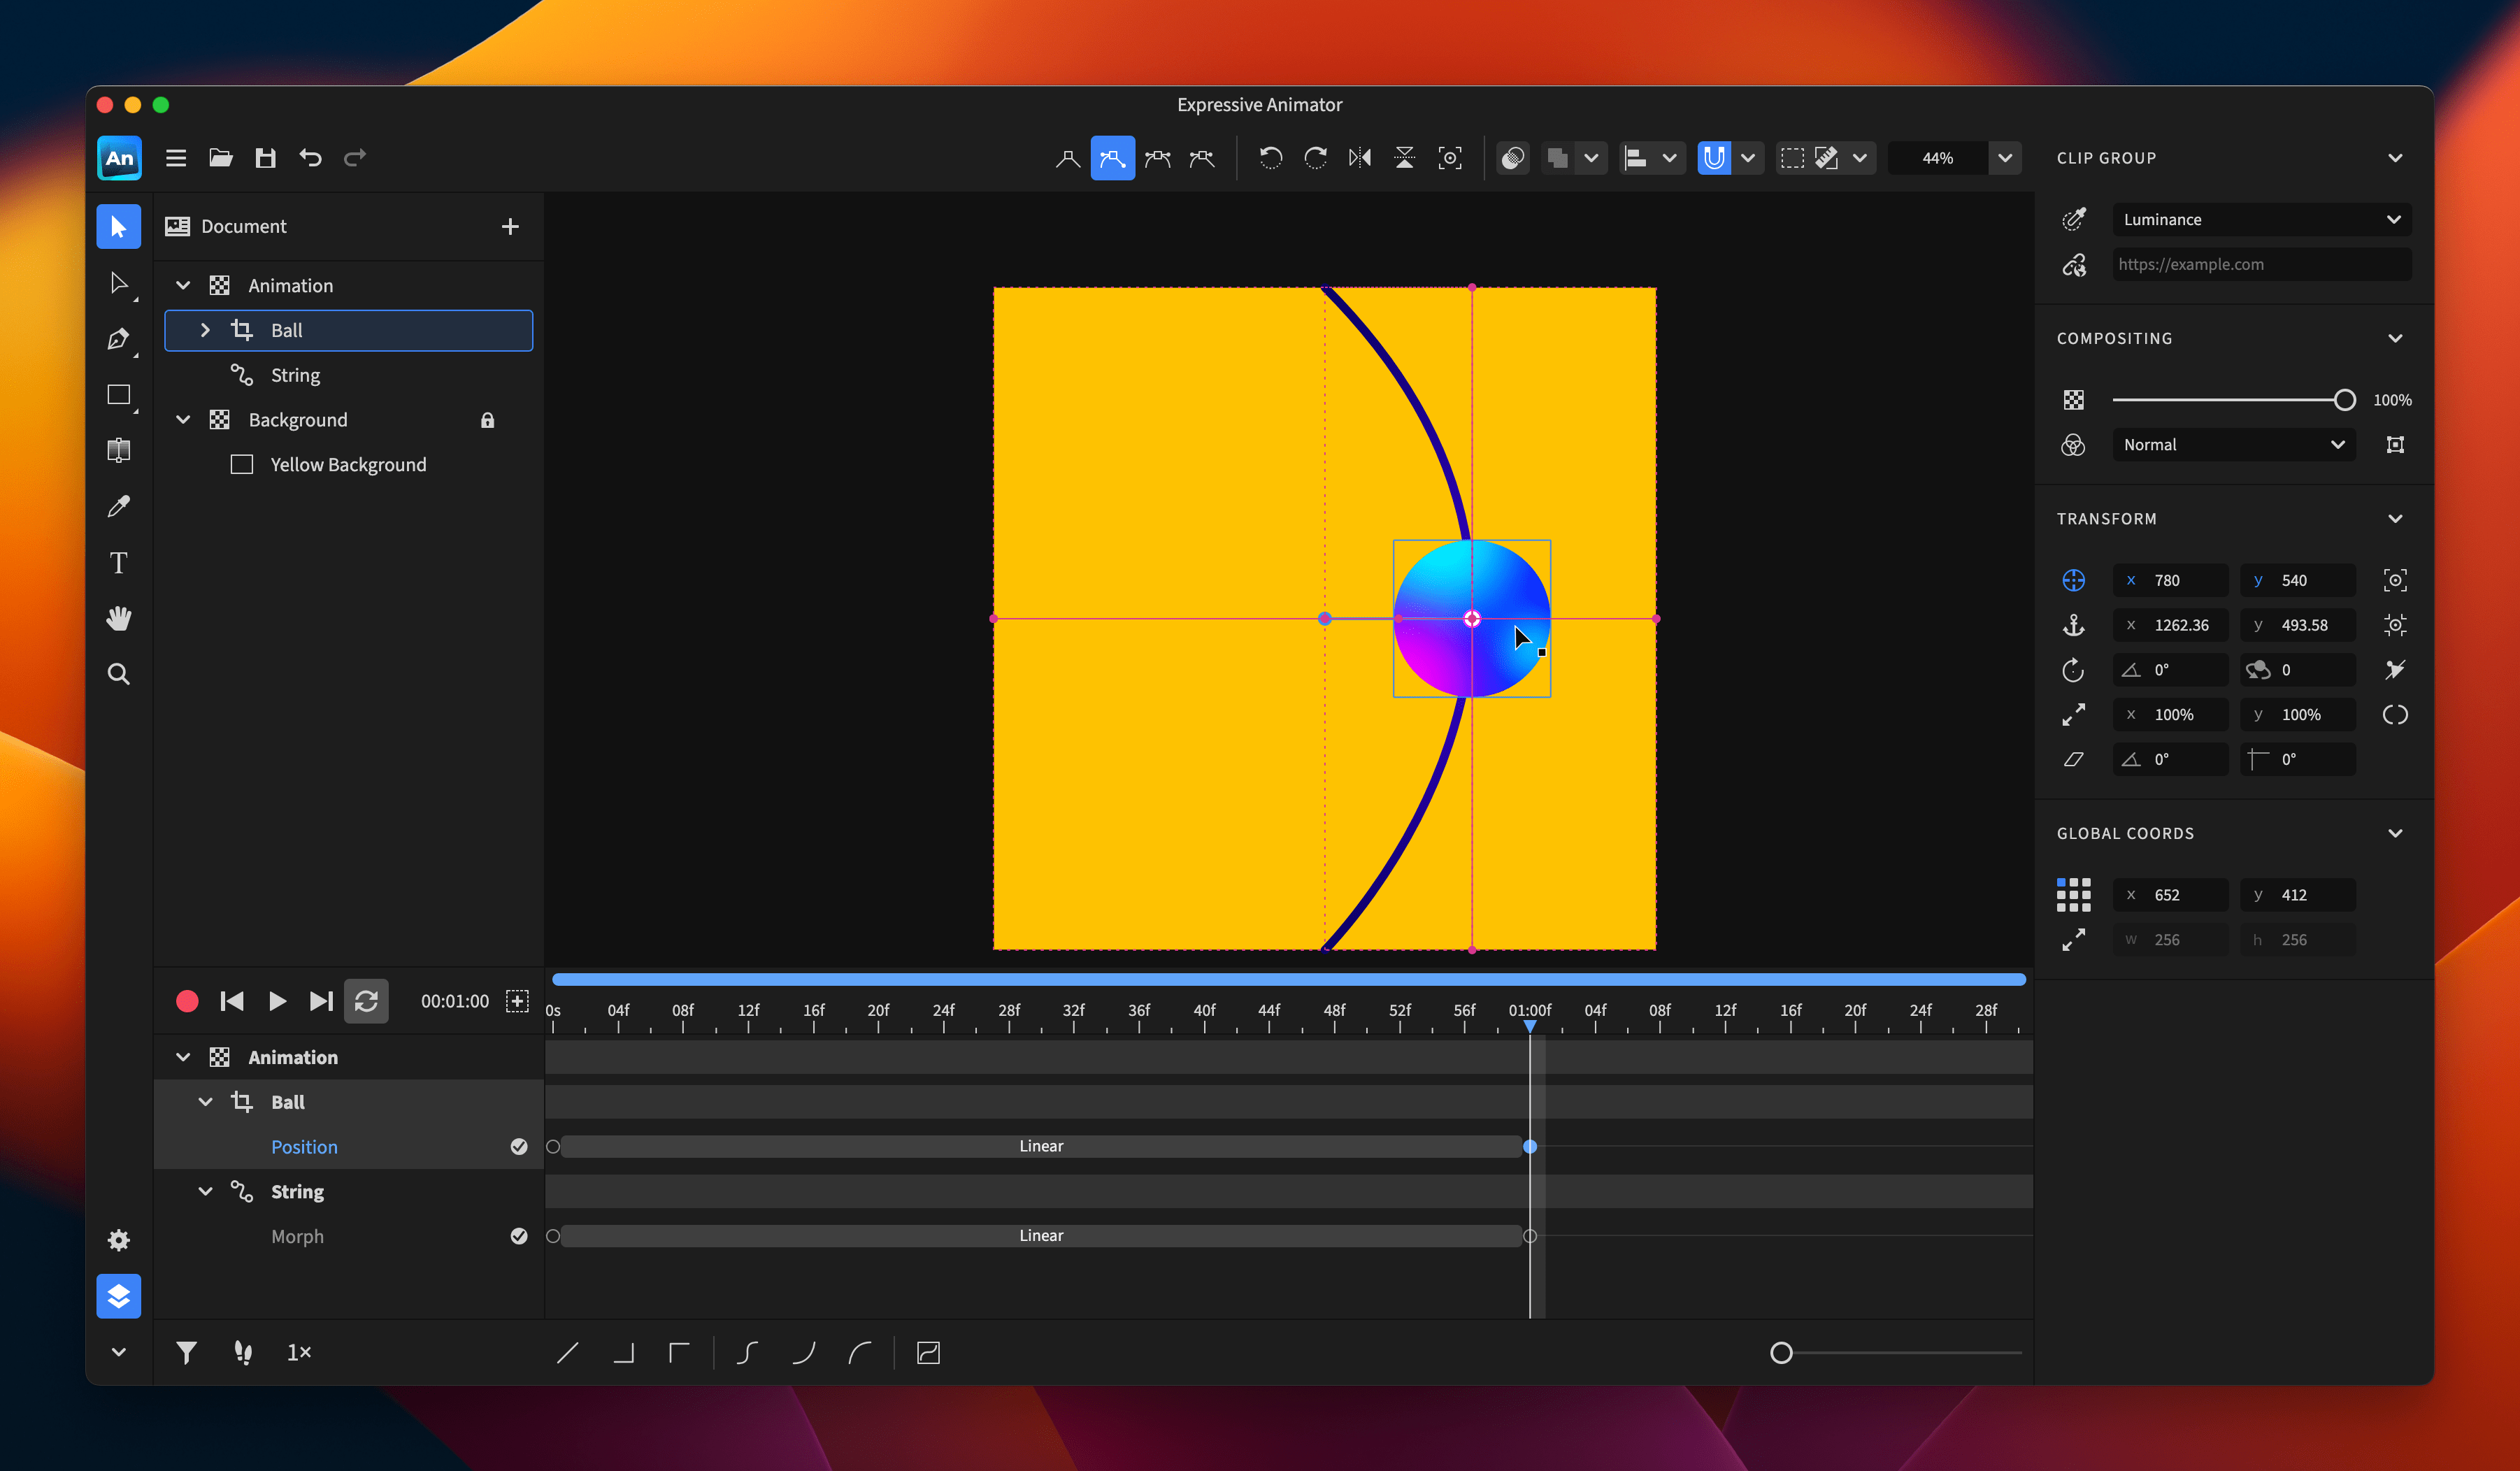
Now that everything has been set up, let’s create the animation. Make sure that snapping and auto-record are enabled, then move the playhead to 01:00f. By enabling snapping, you will be able to perfectly align nodes and graphic objects on the canvas. On the other hand, as the name suggests, auto-record tracks every change you make to the artwork and adds the appropriate keyframes on the timeline.
Press the A key on your keyboard to switch to the Node tool, then select the String object and move its handle to the center-right point of the artboard. Don’t worry about precision, as the snapping will do all the heavy lifting for you. This will bend the shape and add keyframes for the Morph animator.
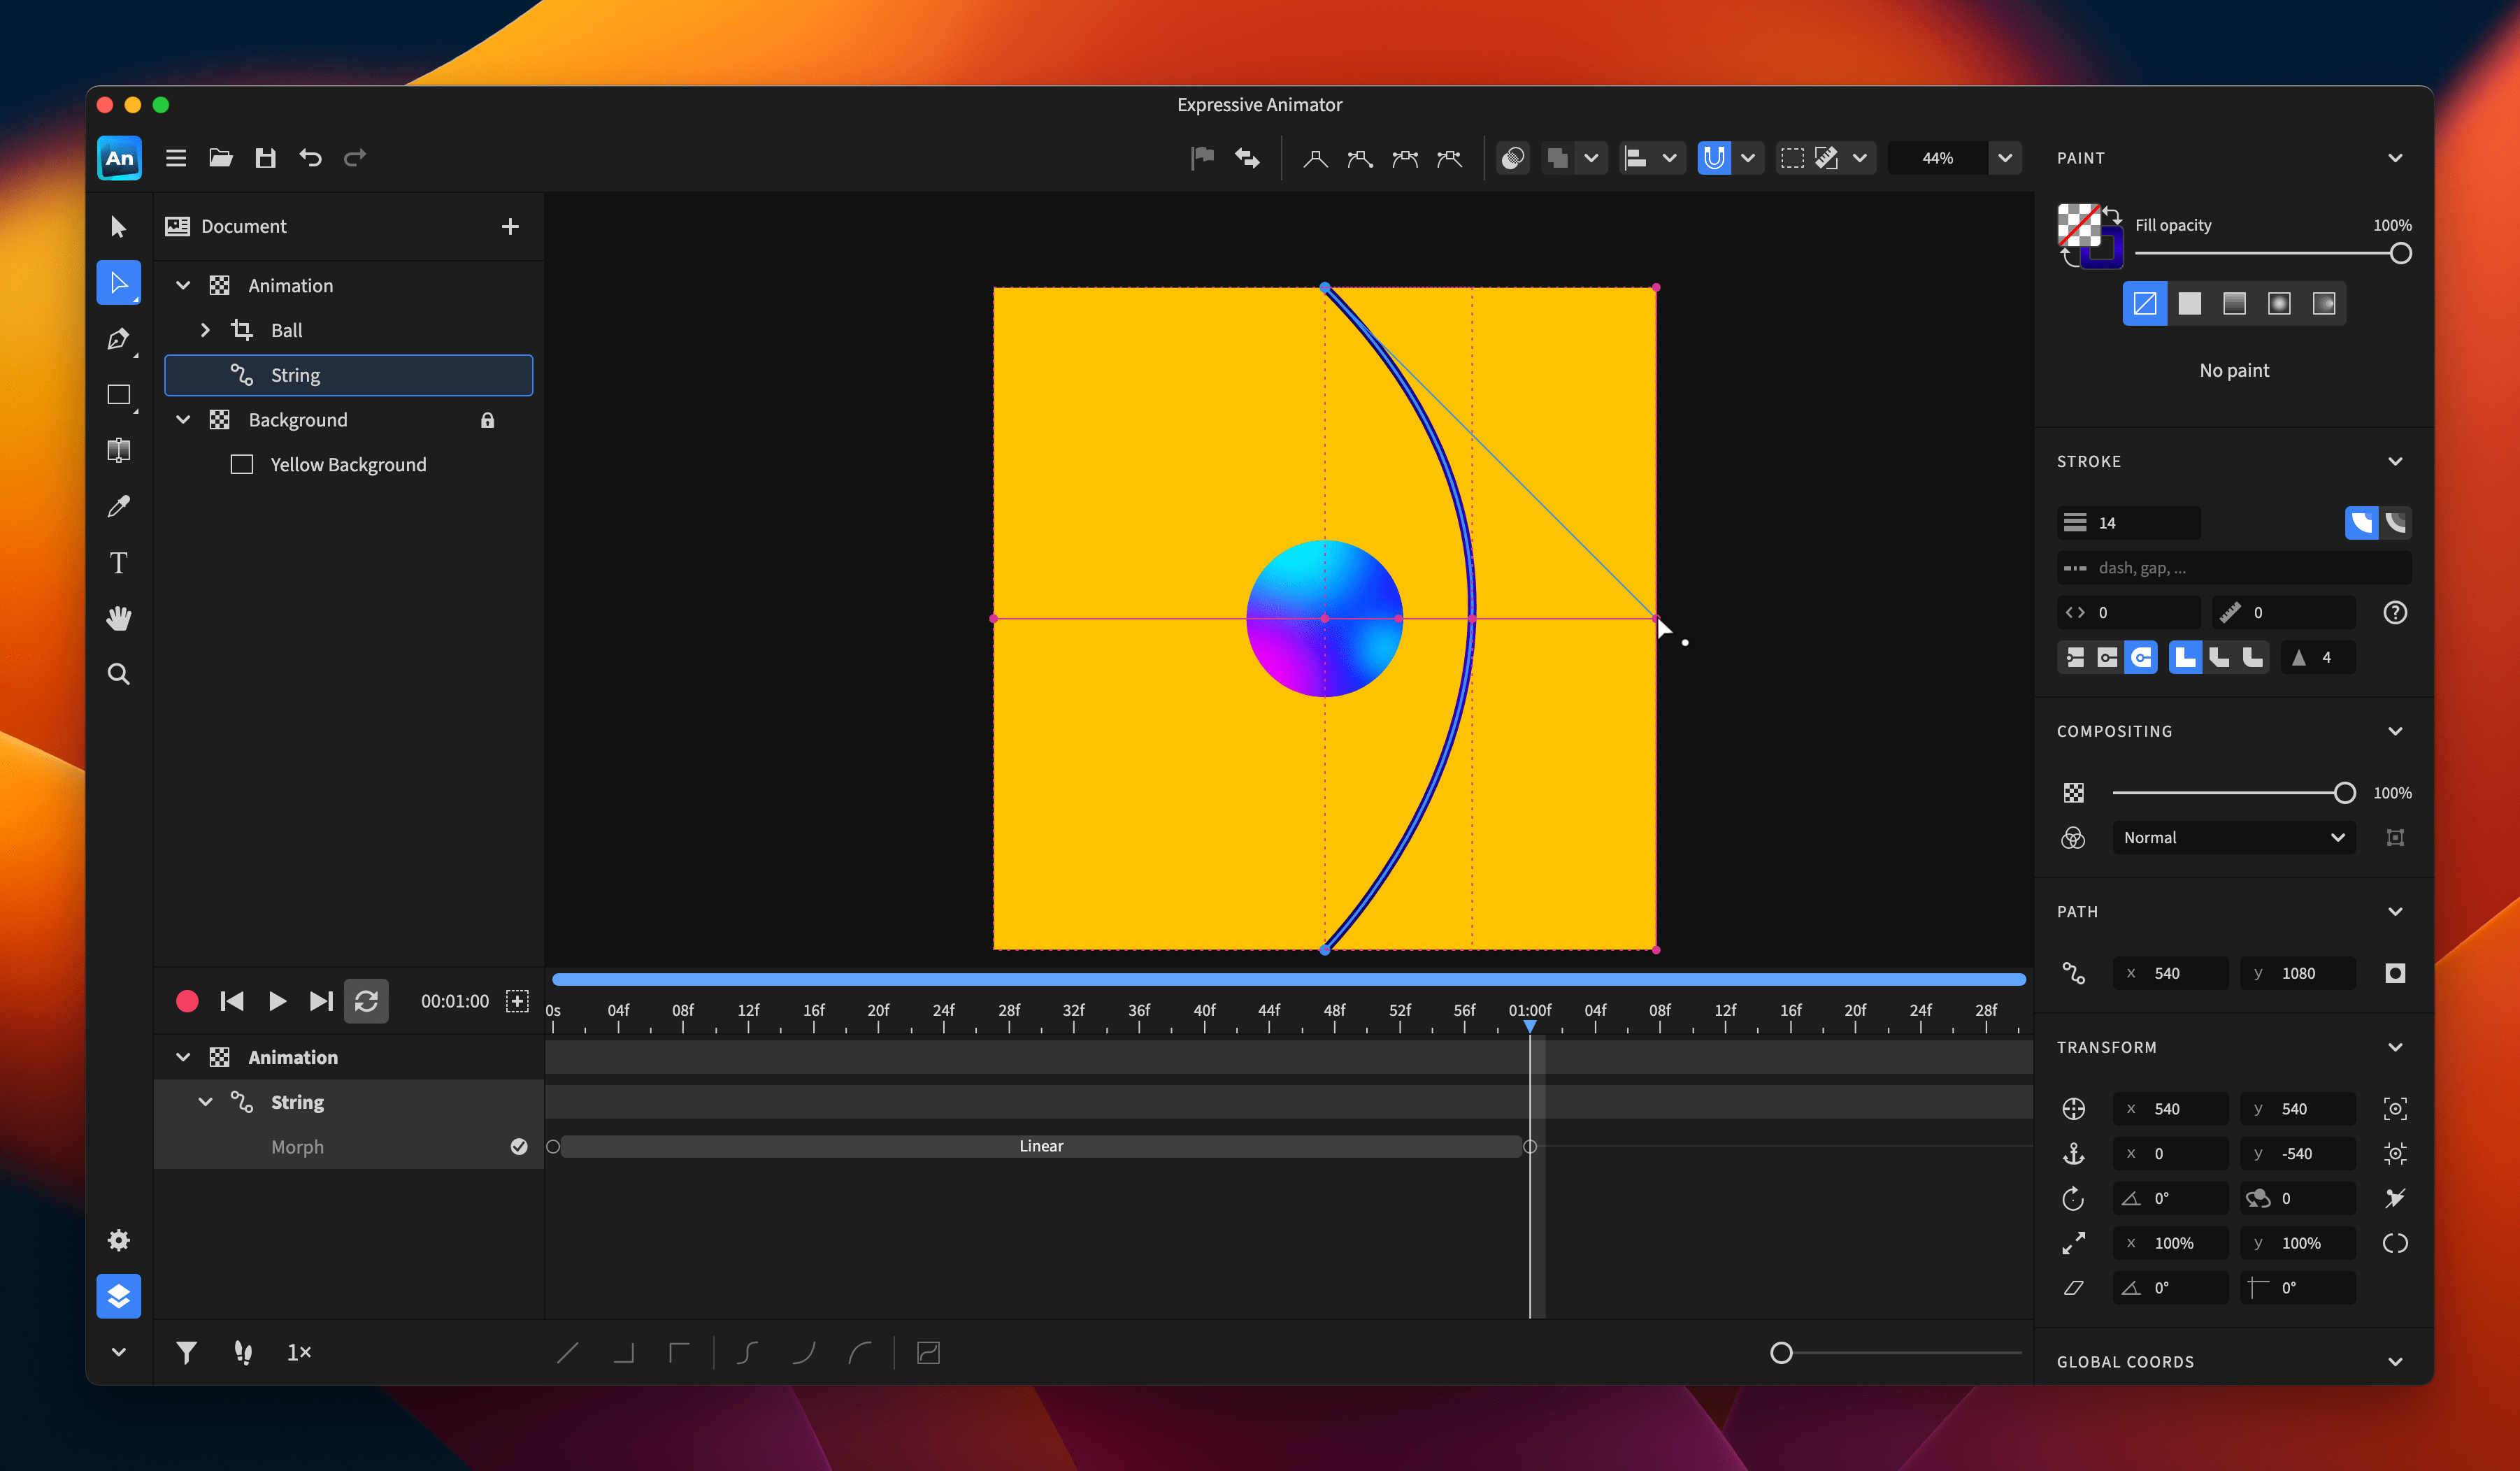
Next, press the V key on your keyboard to switch to the Selection tool. With this tool enabled, select the Ball, move it to the right, and place it in the middle of the string. Once again, snapping will do all the hard work, allowing you to position the ball exactly where you want to, while auto-recording automatically adds the appropriate keyframes.
You can now replay the animation and disable auto-recording by clicking on the Auto-Record button again.
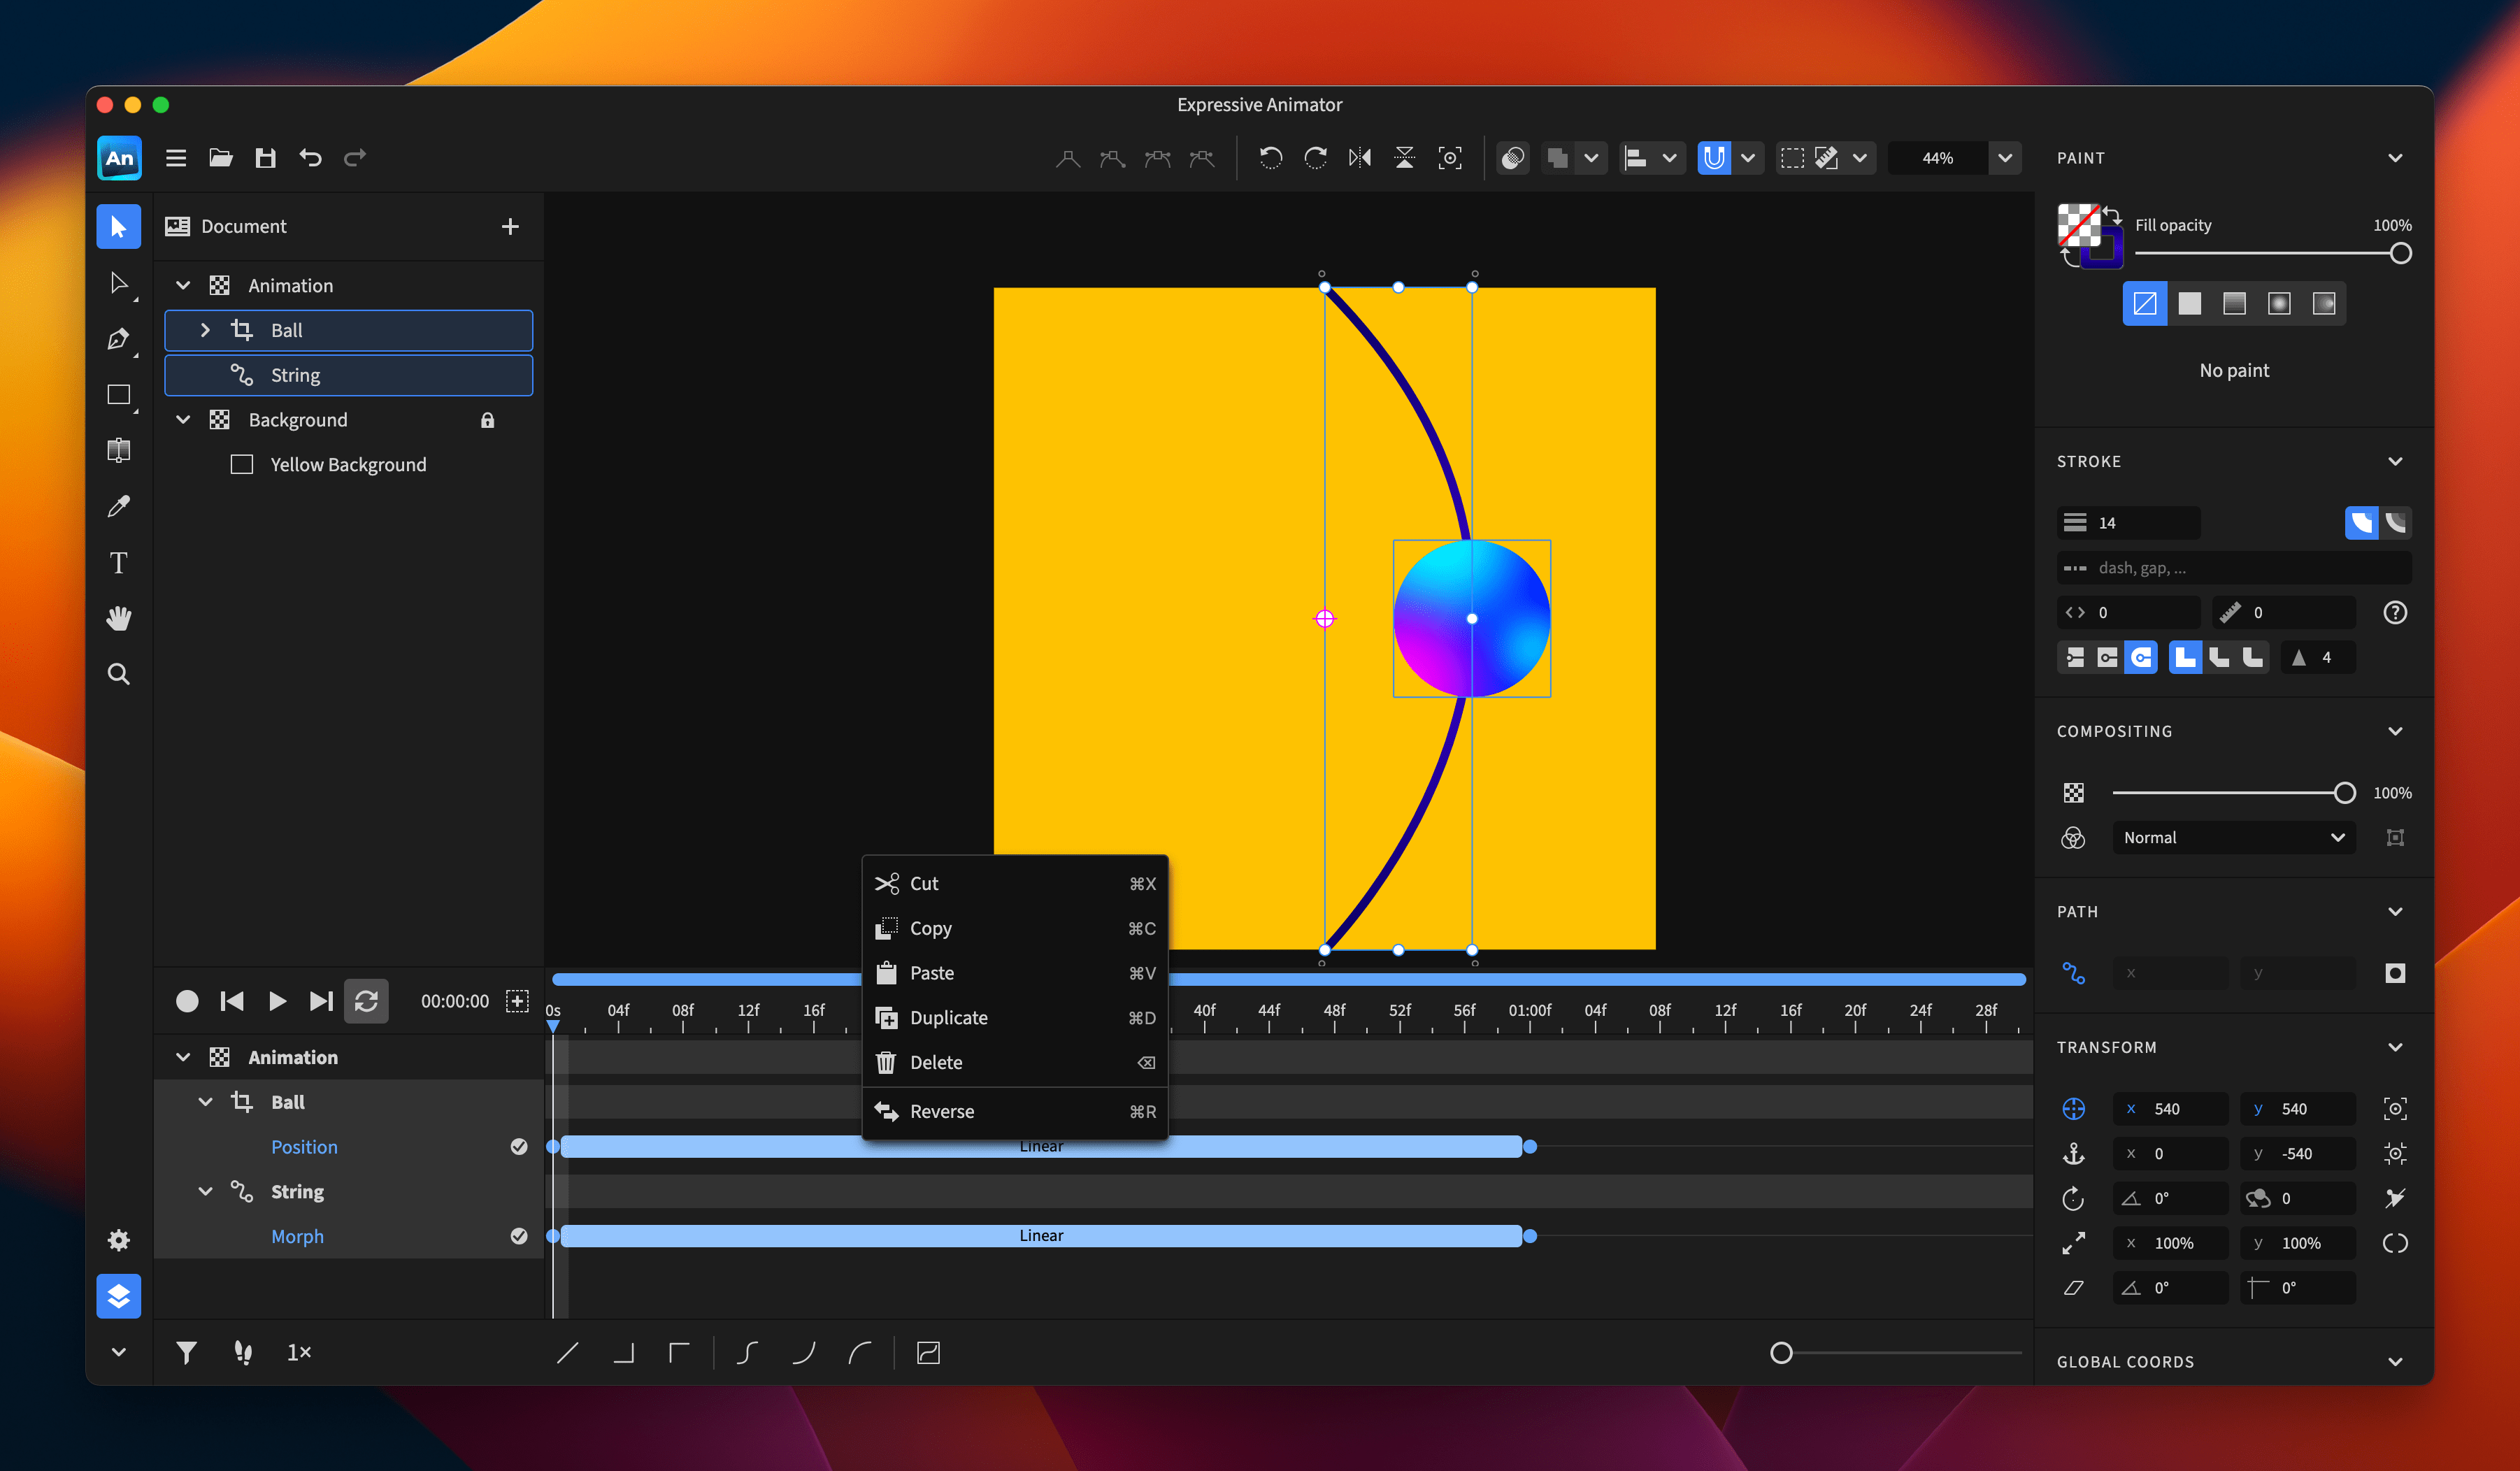
As you can see when replaying, the direction in which the String and Ball objects are moving is wrong. Fortunately, we can fix this extremely easily just by reversing the keyframes. To do this, select the keyframes in the timeline and right-click to open the context menu and choose Reverse. This will reverse the keyframes, and if you replay the animation, you will see that the direction is now correct.
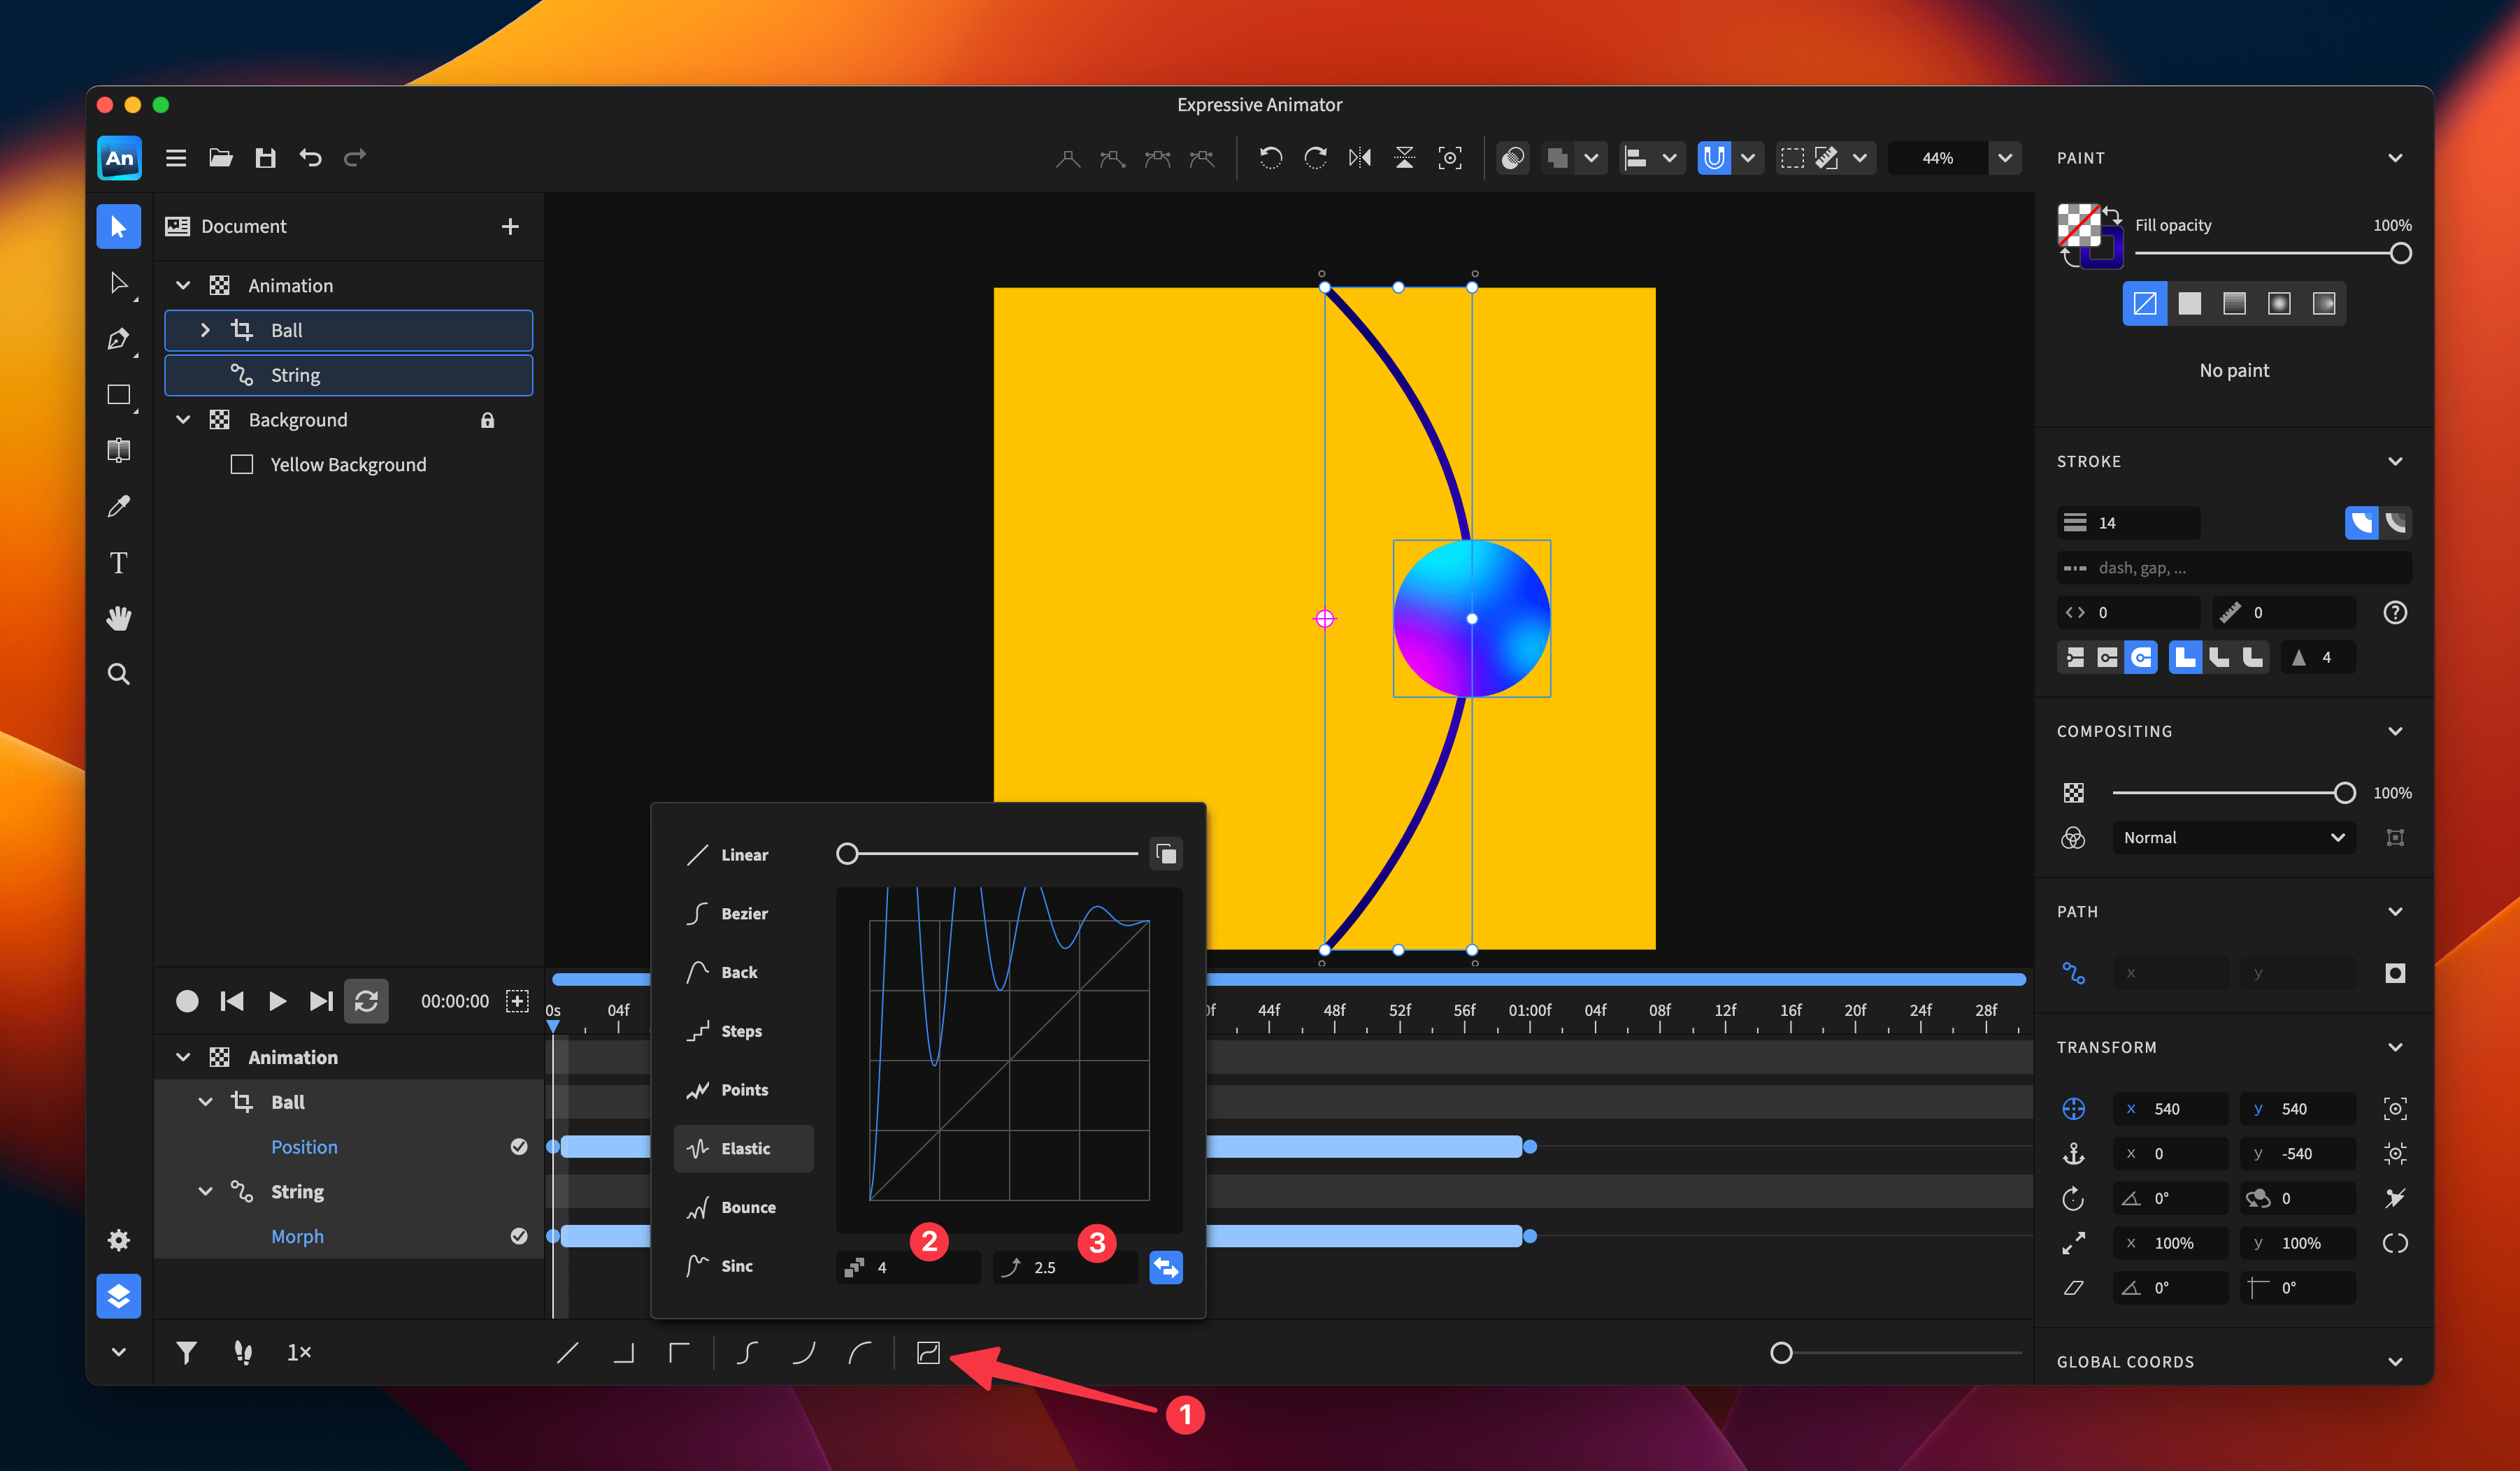
With this out of the way, we can finally add the elastic effect. Select all the keyframes in the timeline and click on the Custom easing button to open a dialog with easing options. From the dialog, choose Elastic and set the oscillations to 4 and the stiffness to 2.5.
That’s it! Click anywhere outside the easing dialog to close it and replay the animation to see the result.
The animation can be exported as well. Press Cmd/Ctrl + E on your keyboard to open the export dialog and choose from various export options, ranging from vectorized formats, such as SVG and Lottie, to rasterized formats, such as GIF and video.
For this specific animation, we’re going to choose the SVG export format. Expressive Animator allows you to choose between three different types of SVG, depending on the technology used for animation: SMIL, CSS, or JavaScript.
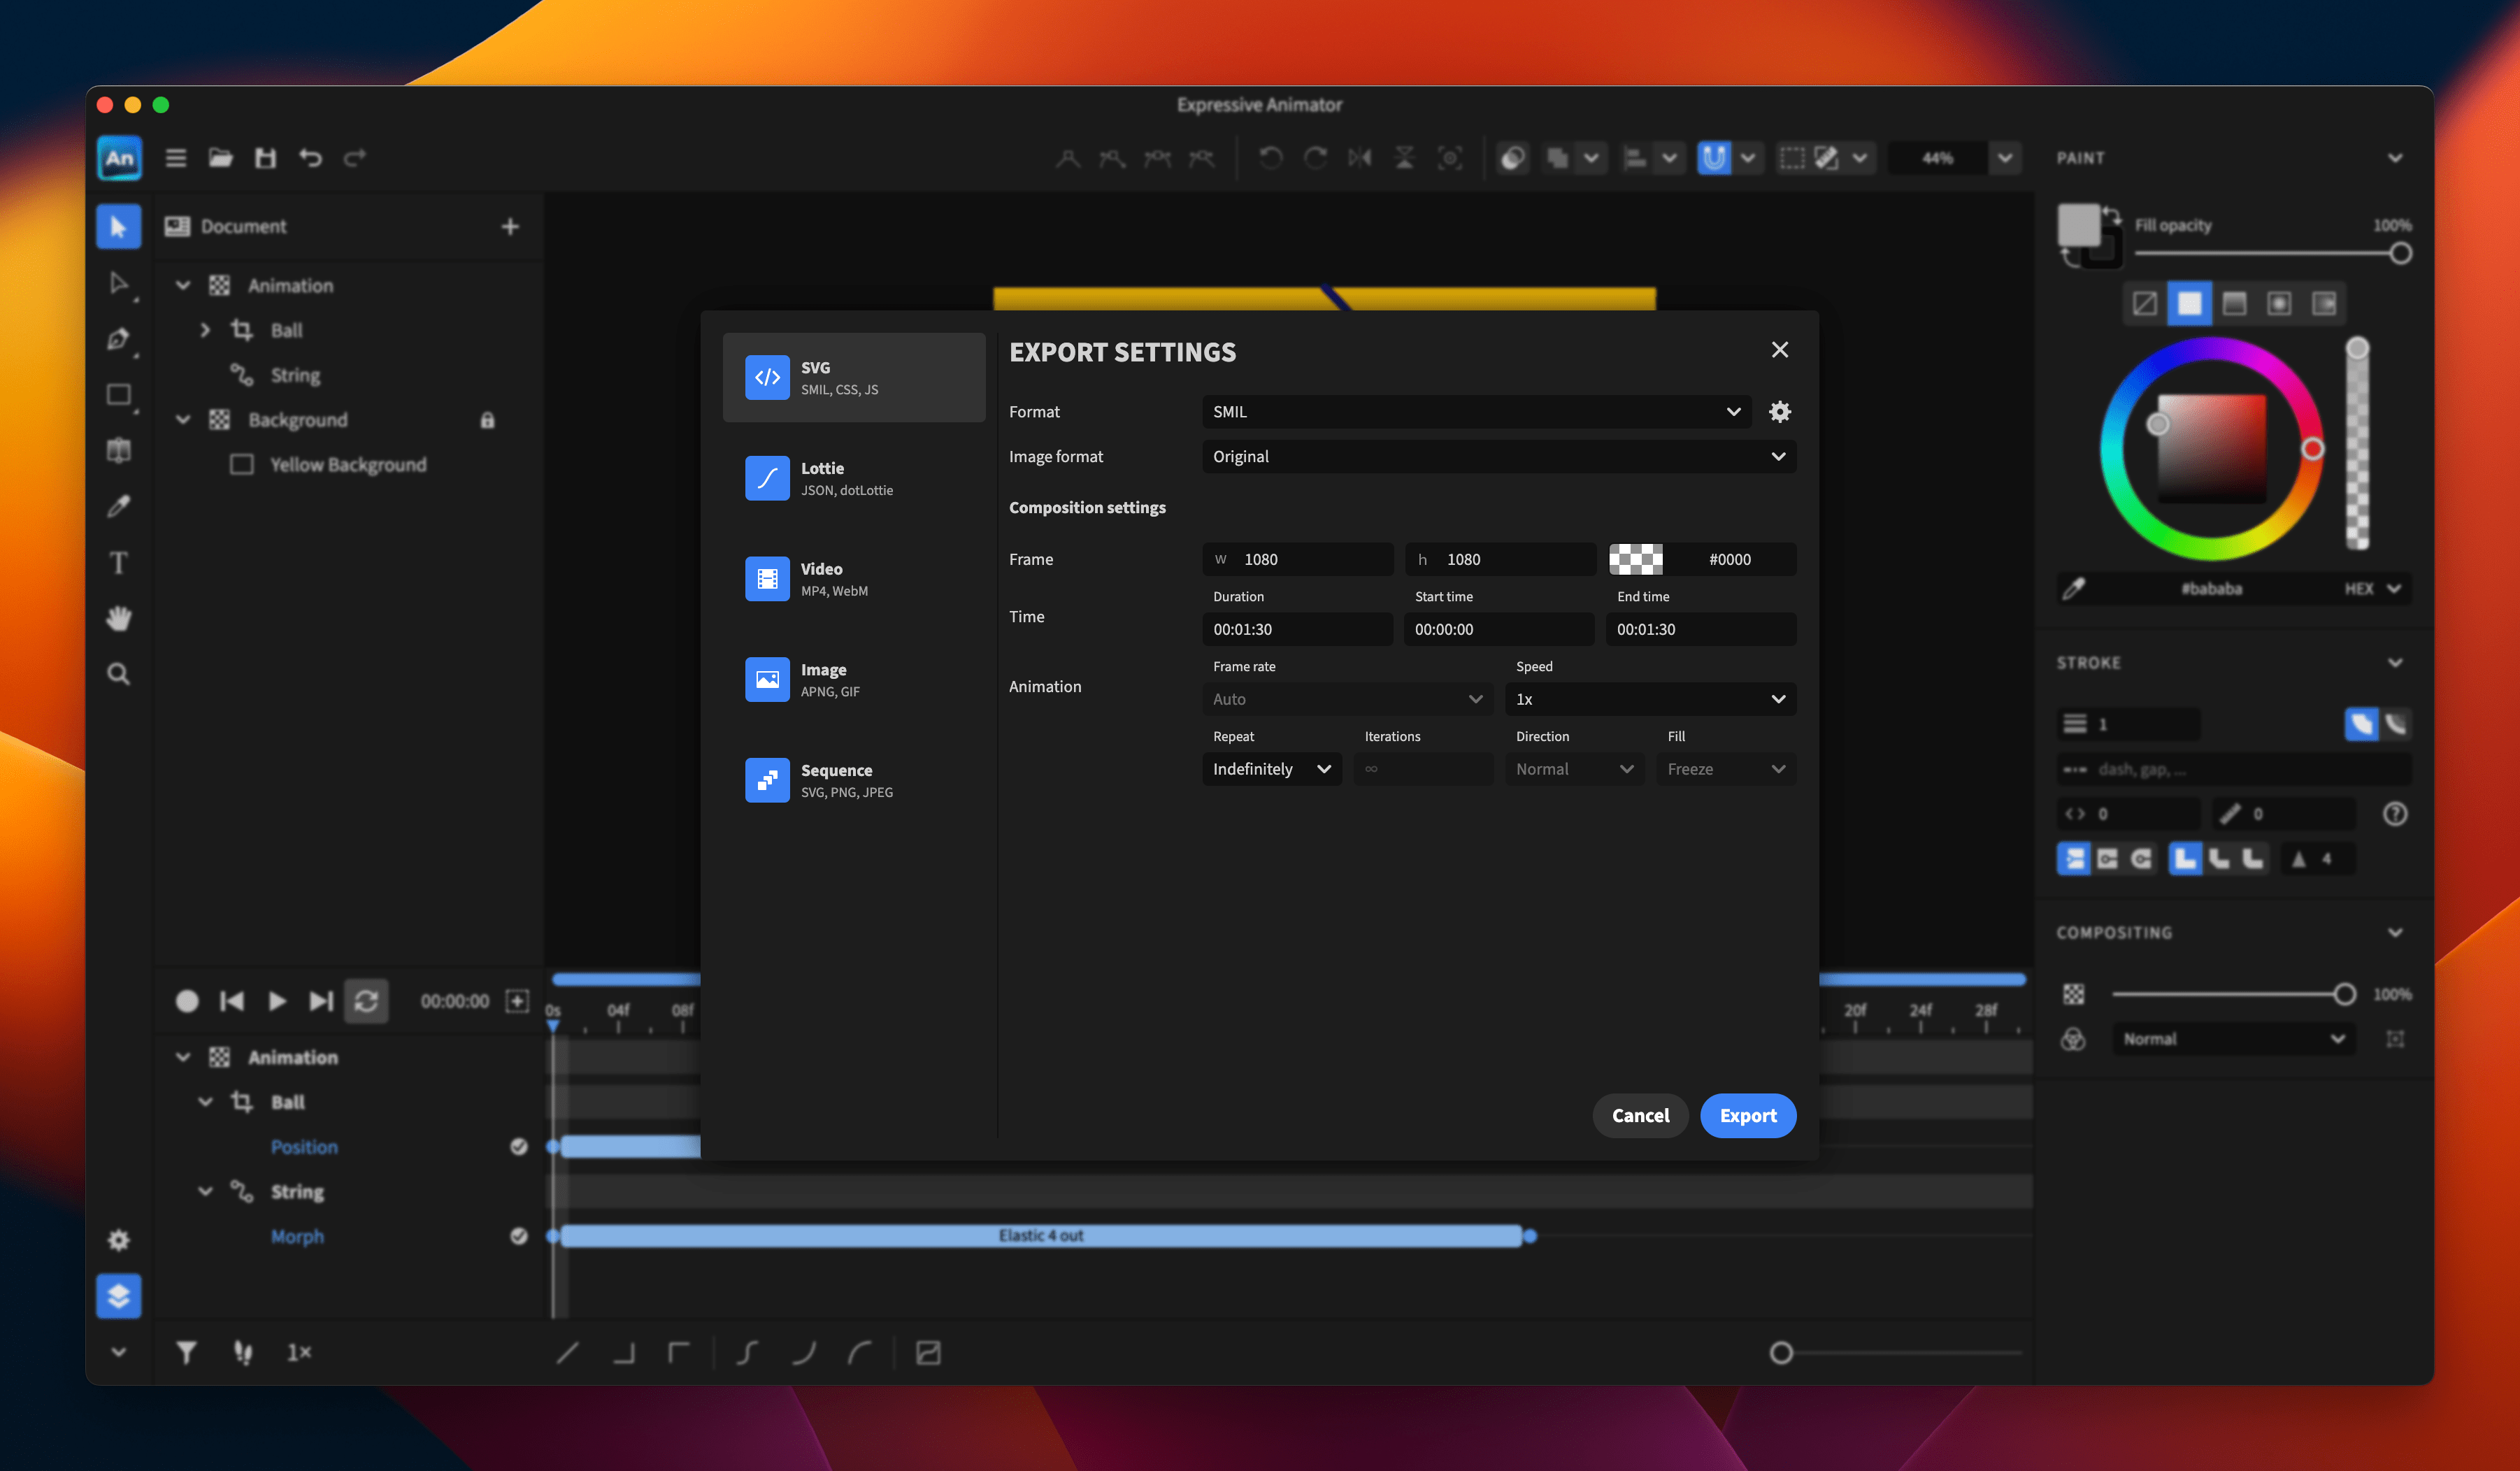
Each of these technologies has different strengths and weaknesses, but for this tutorial, we are going to choose SMIL. This is because SMIL-based animations are widely supported, even on Safari browsers, and can be used as background images or embedded in HTML pages using the <img> tag. In fact, Andy Clarke recently wrote all about SMIL animations here at Smashing Magazine if you want a full explanation of how it works.
You can visualize the exported SVG in the following CodePen demo:
See the Pen [Expressive Animator - Exported SVG](https://codepen.io/smashingmag/pen/GgpaEyG).
Expressive Animator For Bounce And Other Effects
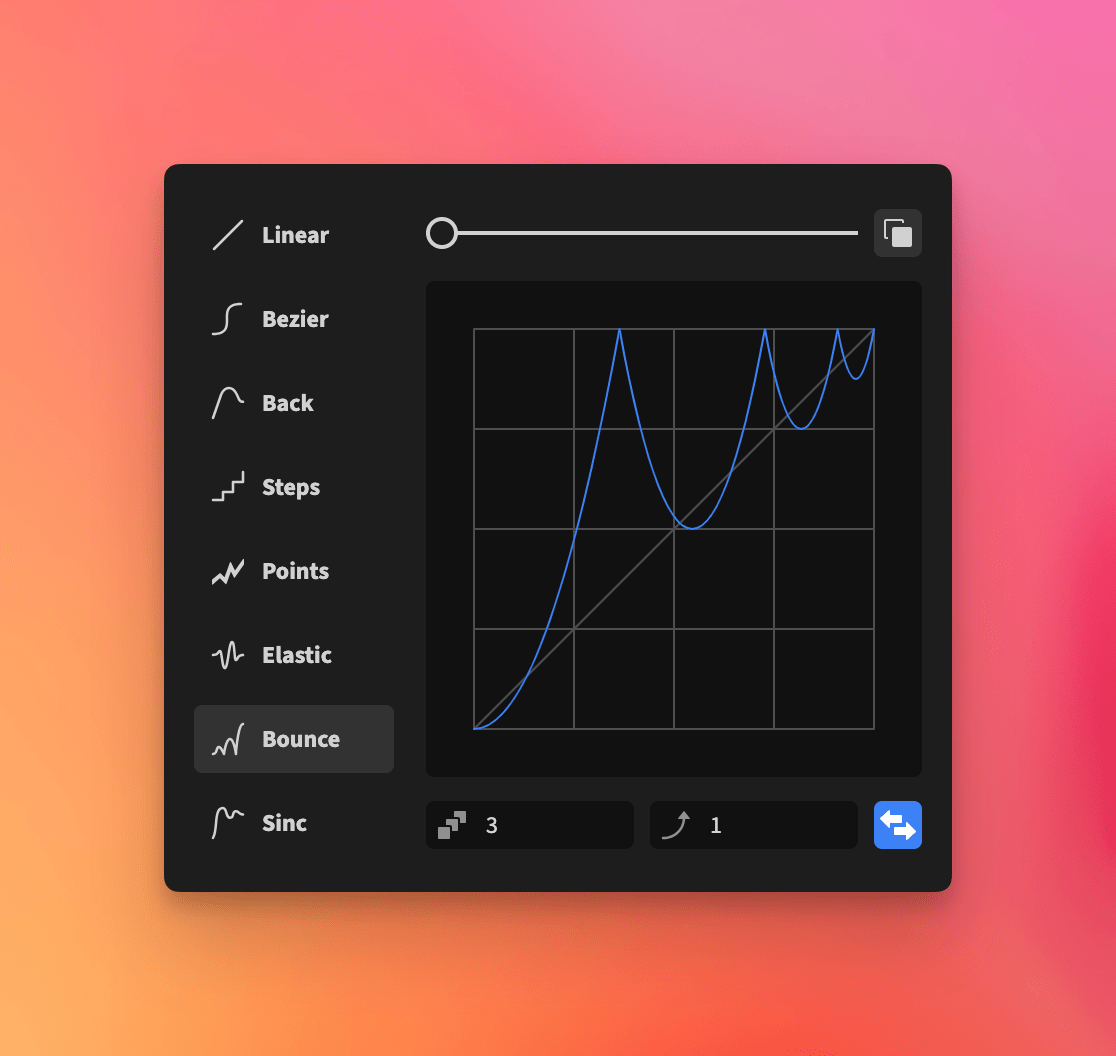
Adding a bounce effect to an animation is very similar to the process we just covered for creating an elastic effect, since both are built into Expressive Animator as easing functions. Just like elastic, bounce easing can be applied to any animatable property, giving you quick ways to create realistic motion.
Beyond these two effects, Expressive Animator also offers other easing options that can shape the personality of your animation, like Back, Steps, Sinc, just to name a few.
Conclusion
Elastic and bounce effects have long been among the most desirable but time-consuming techniques in motion design. By integrating them directly into its easing functions, Expressive Animator removes the complexity of manual keyframe manipulation and transforms what used to be a technical challenge into a creative opportunity.
The best part is that getting started with Expressive Animator comes with zero risk. The software offers a full 7–day free trial without requiring an account, so you can download it instantly and begin experimenting with your own designs right away. After the trial ends, you can buy Expressive Animator with a one-time payment, no subscription required. This will give you a perpetual license covering both Windows and macOS.
To help you get started even faster, I’ve prepared some extra resources for you. You’ll find the source files for the animations created in this tutorial, along with a curated list of useful links that will guide you further in exploring Expressive Animator and SVG animation. These materials are meant to give you a solid starting point so you can learn, experiment, and build on your own with confidence.
- Grumpy Egg: The
.eafsource file for the sample animation presented at the beginning of this article. - Elastic Effect: Another
.eaffile, this time for the animation we made in this tutorial. - Get started with Expressive Animator
- Expressive Animator Documentation