An Introduction To Automated Testing Of WordPress Plugins With PHPUnit
WordPress is a popular content management system for building websites because it is easy to get started with and a ton of themes and plugins are available to extend its feature set. The main reason WordPress has a lot of plugins and themes is because it's easy for developers of any level to start building one. Most of its developers are not experienced, and they do not write tests for their work, perhaps because of the following reasons:
- There aren't many discussions going on about unit testing, so they might not know that testing is even possible.
- They do not believe in the value of writing tests for their code, or they think it will slow them down.
- They believe that testing to see whether their plugin or theme works in the browser is enough.
In this tutorial, we will learn what automated testing is and its importance, get to know PHPUnit and WP-CLI, learn how to write a test and, finally, set up continuous automated testing with Travis CI.
We are opting to use Travis CI because it offers seamless integration with GitHub; you don't have to go to your repository and set up any connection between them. And it is free for public repositories. Unlike its competitors, such as Semaphore CI, GitLab CI and CircleCI, Travis CI does not offer a free private repository plan. However, none of its competitors offer seamless integration with GitHub as it does.
What Is Automated Testing?
According to Wikipedia, automated testing, or test automation, is the use of special software (separate from the software being tested) to control the execution of tests and the comparison of actual outcomes with predicted outcomes. Test automation can automate some repetitive but necessary tasks in a formalized testing process already in place, or perform additional testing that would be difficult to do manually.
There are several types of testing. Of all, unit testing is the most popular. Unit tests verify that a block of code, function or class method does what it is intended to do. We'll be doing unit testing in this tutorial.
Automated testing helps to detect bugs so that they don't make their way to production. No doubt, a plugin coded and tested would take longer to complete than one that is not tested. However, the resulting plugin would contain fewer or no bugs.
Let’s see a simple real-world example of how unit tests are invaluable and what we can use them for.
My WordPress lead-generation plugin has an OptinThemesRepository class, with an add() method for adding new opt-in form templates, and a get() method for the retrieval of an opt-in form template.
To ensure both add() and get() work as intended now and in the future, I wrote the test below.
public function testAddGetMethods()
{
    $kick_optin_form = array(
        'name' => 'Kick',
        'optin_class' => 'kick',
        'optin_type' => 'kick',
        'screenshot' => MAILOPTIN_ASSETS_URL . 'img/kick.png'
    );

    // add kick optin theme
    OptinThemesRepository::add($kick_optin_form);

    $result = OptinThemesRepository::get('kick');

    $this->assertEquals($kick_optin_form, $result);
}
If, in future, this test started to fail, I would know there is a problem and would know the exact function, class method or spot in my plugin where it is occurring.
Benefits Of Automated Testing
Now that we know what automated testing is, let's see more benefits.
Early Bug Detection
While developing software, you can easily find bugs with automated testing tools. This can save a lot of time and effort in tracking down bugs.
Higher Software Quality
A tester with many years of experience can make mistakes when they have to prepare the same boring manual test scripts over and over again. Automated testing not only yields accurate results, but also saves time.
Easy And Robust Reporting
Automated testing tools can track each and every test script. The execution of each test script can be seen in visual logs. The visual log, or report, typically displays the number of test scripts executed and their status (for example, passed, failed or skipped), their reported bugs and hints on how to fix the bugs.
Before we go over how to set up and write tests, let's create a simple plugin to use as a case study.
Building A WordPress Plugin
We are going to build a simple plugin that displays Google and Bing webmaster verification meta tags in the header of WordPress’ front end. The plugin is hosted in my GitHub account.
The code for this plugin below will go in the wp-meta-verify.php file.
<?php

class WP_Meta_Verify
{
    public function __construct()
    {
        add_action('wp_head', \[$this, 'header_code']);
    }

    public function header_code()
    {
        $google_code = get_option('wpmv_google_code');
        $bing_code = get_option('wpmv_google_code');

        echo $this->google_site_verification($google_code);
        echo $this->bing_site_verification($bing_code);
    }

    public function google_site_verification($code)
    {
        return "<meta name=\"google-site-verification\" content=\"$code\">";
    }

    public function bing_site_verification($code)
    {
        return "<meta name=\"msvalidate.01\" content=\"$code\">";
    }
}

new WP_Meta_Verify();
You might notice that we didn't include a settings page in the plugin, where you would typically save the Google and Bing verification code to. I did this on purpose to keep this simple and to focus our attention on what matters most. However, get_option('wpmv_google_code') and get_option('wpmv_bing_code') assume that there is a settings page, and they retrieve the verification codes from there.
Unit Testing A WordPress Plugin
PHPUnit is the de facto testing tool for PHP, whereas WP-CLI is the official command line interface for WordPress.
Prior to WP-CLI, setting up PHPUnit testing for WordPress plugins was a pain. WP-CLI has a great guide on setting it up; however, we will still go over the steps here.
Install PHPUnit
To install PHPUnit, run the following commands.
composer global require phpunit/phpunit:5.*Note: We are explicitly installing 5.x because that's what WordPress supports when you’re running PHP 7 or above, which I have on my machine. Install PHPUnit 4.8 if you are running PHP version 5.
Run phpunit --version to confirm it's been installed.
Install WP-CLI
To install WP-CLI, run the following commands.
curl -O https://raw.githubusercontent.com/wp-cli/builds/gh-pages/phar/wp-cli.phar

chmod +x wp-cli.phar

sudo mv wp-cli.phar /usr/local/bin/wp
Run wp --info to confirm its installation.
Having installed PHPUnit and WP-CLI, we will use the latter to set up the unit test for the plugin.
Set Up Plugin Unit Test
Change your terminal’s directory to the root of your WordPress installation, and run the command below to generate the plugin test files.
wp scaffold plugin-tests wp-meta-verifyBelow is what the structure of the plugin will look like after the command above generates the test files.
|-bin/
|----install-wp-tests.sh
|-tests/
|----bootstrap.php
|----test-sample.php
|-.travis.yml
|-phpcs.xml.dist
|-phpunit.xml.dist
|-wp-meta-verify.php
Note: By default, the wp scaffold plugin-tests command generates a Travis CI configuration file. You can specify a --ci flag to generate a configuration file for the CI service you use, like so: wp scaffold plugin-tests --c gitlab. As at the time of writing, only Travis CI, CircleCI and GitLab CI are supported.
Change your terminal’s directory to your plugin’s directory, and run the installation script:
cd path-to-wordpress-pluginbin/install-wp-tests.sh wordpress_test root '' localhost latestIf you’re like me, then your MySQL username is not root, and the password is not empty. For example, suppose the username is homestead and the password is secret. You would run the installation script like so:
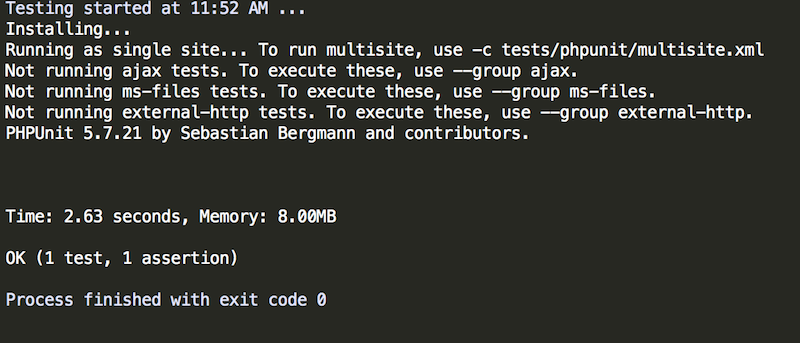
bin/install-wp-tests.sh wordpress_test homestead 'secret' localhost latestRun the phpunit command to run the default test in tests/test-sample.php.

Write Our Plugin Tests
Create a test-wp-meta-verify.php file in the tests folder. It will contain our plugin tests with the following setUp class.
<?php

class WP_Meta_VerifyTest extends WP_UnitTestCase
{
    public function setUp()
    {
        parent::setUp();

        $this->class_instance = new WP_Meta_Verify();
    }

    public function test_google_site_verification()
    {

    }

    public function test_bing_site_verification()
    {

    }
}
It is worth noting that in order for a method to be considered a unit test, it must be prefixed with test. A best practice is to add a Test suffix to every test class, although it is not required. See WP_Meta_VerifyTest.
Confused about what setUp() does? Just know that PHPUnit runs it once before each test method (and on fresh instances) of the test case class. There is also tearDown(), but it is run after each test method. There are also setUpBeforeClass() and tearDownAfterClass(), which run before and after each test case, respectively. A test case is basically a class that contains a number of test methods. See the WordPress Handbook and the PHPUnit documentation for more information.
From the class above, it is pretty obvious we are going to be writing tests for the google_site_verification and bing_site_verification methods of our plugin class.
public function test_google_site_verification()
{
    $meta_tag = $this->class_instance->google_site_verification('B6wFaCRbzWE42SyxSvKUOyyPxZfJCb5g');
    $expected = '<meta name="google-site-verification" content="B6wFaCRbzWE42SyxSvKUOyyPxZfJCb5g">';

    $this->assertEquals($expected, $meta_tag);
}
public function test_bing_site_verification()
{
$meta_tag = $this->class_instance->bing_site_verification('B6wFaCRbzWE42SyxSvKUOyyPxZfJCb5g');
$expected = '<meta name="msvalidate.01" content="B6wFaCRbzWE42SyxSvKUOyyPxZfJCb5g">';
$this->assertEquals($expected, $meta_tag);
}Basically, the tests will ensure that both methods return the correct meta tag when Google and Bing webmaster verification codes are passed to them as arguments.
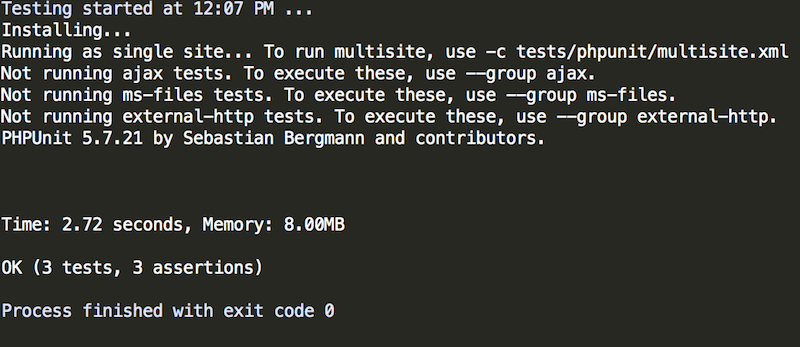
Run phpunit, and you should see an output similar to the screenshot below.

Continuous Automated Testing With Travis CI
Travis CI is a hosted, distributed continuous integration service used to build and test software projects hosted on GitHub.
To use Travis CI, therefore, we have to publish our plugin on GitHub. Go ahead and do that now. Feel free to refer to mine.
Thanks to WP-CLI, we already have it set up in our plugin, courtesy of the .travis.yml file.
I would like to mention that I adhere not to WordPress coding standards, but rather to PHP Standards Recommendations, and my plugins require at least PHP 5.4. In order for my builds not to fail, I had to replace their matrix with the following in .travis.yml file.
matrix:
    include:
        - php: 7.1
        env: WP_VERSION=latest
        - php: 7.0
        env: WP_VERSION=latest
        - php: 5.6
        env: WP_VERSION=latest
        - php: 5.6
        env: WP_VERSION=trunk
        - php: 5.5
        env: WP_VERSION=latest
        - php: 5.4
        env: WP_VERSION=latest
Head over to Travis CI and sign in with your GitHub account. Follow the on-screen guide to add your GitHub repository.
After account synchronization with GitHub, scroll to your plugin’s repository and activate.

The next time you make a code change and push to GitHub, a build will be triggered on Travis CI.

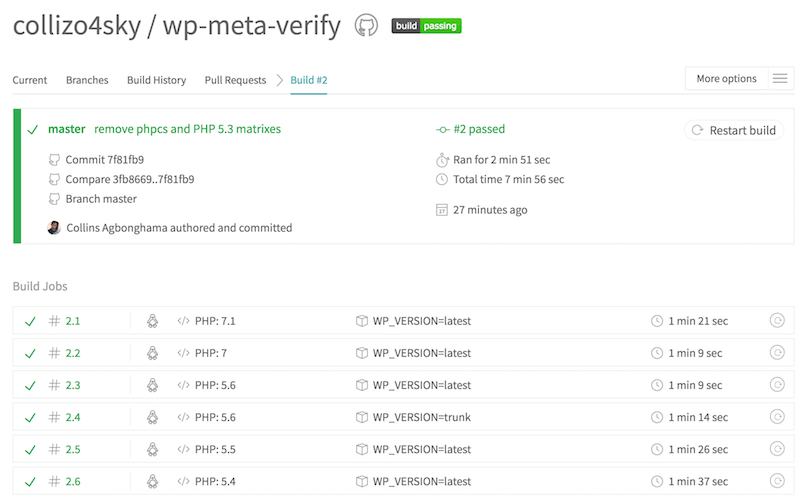
I’ve made available a successful build result for your viewing pleasure.
Wrapping Up
It's no secret that a lot of developers, not just WordPress ones, do not write tests for their projects because they don't know about them. Even some of the experienced and advanced among us don't apparently because they consider it a waste of time.
Granted, setting up automated testing can be boring and time-consuming. Nevertheless, it's an investment that will ensure that few or no bugs creep into your software, thereby saving you the time and resources (including financial) that bugs in your software would have cost you.
Always write a test before implementing a feature, so that you don't forget or feel lazy to do it after the feature has been implemented.
I hope you now recognize the importance of writing tests and how to start writing one for your own WordPress plugin.
If you have any questions or comments, please let me know in the comments section.
Further Reading
- WordPress Playground: From 5-Minute Install To Instant Spin-Up
- How To Host A WordPress Site On Amazon Lightsail
- Creating A Public/Private Multi-Monorepo For PHP Projects
- Useful DevTools Tips and Tricks


 JavaScript Form Builder — Create JSON-driven forms without coding.
 Get a Free Trial
 How To Measure UX and Design Impact, 8h video + UX training
 Devs love Storyblok - Learn why!
 Register For Free

