Using Google’s Flutter For Truly Cross-Platform Mobile Development
Flutter is an open-source, cross-platform mobile development framework from Google. It allows high-performance, beautiful applications to be built for iOS and Android from a single code base. It is also the development platform for Google’s upcoming Fuchsia operating system. Additionally, it is architected in a way that it can be brought to other platforms, via custom Flutter engine embedders.
Why Flutter Was Created And Why You Should Use It
Cross-platform toolkits have historically taken one of two approaches:
- They wrap a web view in a native app and build the application as if it were a website.
- They wrap native platform controls and provide some cross-platform abstraction over them.
Flutter takes a different approach in an attempt to make mobile development better. It provides a framework application developers work against and an engine with a portable runtime to host applications. The framework builds upon the Skia graphics library, providing widgets that are actually rendered, as opposed to being just wrappers on native controls.
This approach gives the flexibility to build a cross-platform application in a completely custom manner like the web wrapper option provides, but at the same time offering smooth performance. Meanwhile, the rich widget library that comes with Flutter, along with a wealth of open-source widgets, makes it a very feature-rich platform to work with. Put simply, Flutter is the closest thing mobile developers have had for cross-platform development with little to no compromise.
Dart
Flutter applications are written in Dart, which is a programming language originally developed by Google. Dart is an object-oriented language that supports both ahead-of-time and just-in-time compilation, making it well suited for building native applications, while providing for efficient development workflow with Flutter’s hot reloading. Flutter recently moved to Dart version 2.0 as well.
The Dart language offers many of the features seen in other languages including garbage collection, async-await, strong typing, generics, as well as a rich standard library.
Dart offers an intersection of features that should be familiar to developers coming from a variety of languages, such as C#, JavaScript, F#, Swift, and Java. Additionally, Dart can compile to Javascript. Combined with Flutter, this allows code to be shared across web and mobile platforms.
Historical Timeline Of Events
- April 2015
Flutter (originally codenamed Sky) shown at Dart Developer Summit - November 2015
Sky renamed to Flutter - February 2018
Flutter beta 1 announced at Mobile World Congress 2018 - April 2018
Flutter beta 2 announced - May 2018
Flutter beta 3 announced at Google I/O. Google announces Flutter is ready for production apps
Comparison To Other Development Platforms
Apple/Android Native
Native applications offer the least friction in adopting new features. They tend to have user experiences more in tune with the given platform since the applications are built using controls from the platforms vendors themselves (Apple or Google) and often follow design guidelines set out by these vendors. In most cases, native applications will perform better than those built with cross-platform offerings, although the difference can be negligible in many cases depending on the underlying cross-platform technology.
One big advantage native applications have is they can adopt brand new technologies Apple and Google create in beta immediately if desired, without having to wait for any third-party integration. The main disadvantage to building native applications is the lack of code reuse across platforms, which can make development expensive if targeting iOS and Android.
React Native
React Native allows native applications to be built using JavaScript. The actual controls the application uses are native platform controls, so the end user gets the feel of a native app. For apps that require customization beyond what React Native’s abstraction provides, native development could still be needed. In cases where the amount of customization required is substantial, the benefit of working within React Native’s abstraction layer lessens to the point where in some cases developing the app natively would be more beneficial.
Xamarin
When discussing Xamarin, there are two different approaches that need to be evaluated. For their most cross-platform approach, there is Xamarin.Forms. Although the technology is very different to React Native, conceptually it offers a similar approach in that it abstracts native controls. Likewise, it has similar downsides with regard to customization.
Second, there is what many term Xamarin-classic. This approach uses Xamarin’s iOS and Android products independently to build platform-specific features, just like when directly using Apple/Android native, only using C# or F# in the Xamarin case. The benefit with Xamarin is that non-platform specific code, things like networking, data access, web services, etc. could be shared.
Unlike these alternatives, Flutter attempts to give developers a more complete cross-platform solution, with code reuse, high-performance, fluid user interfaces, and excellent tooling.
Overview Of A Flutter App
Creating An App
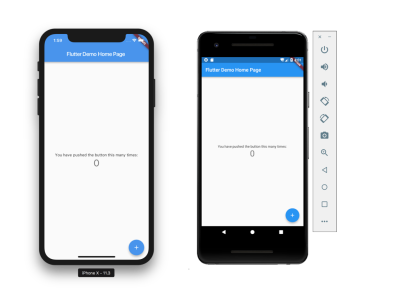
After installing Flutter, creating an app with Flutter is as simple as either opening a command line and entering flutter create [app_name], selecting the “Flutter: New Project” command in VS Code, or selecting “Start a new Flutter Project” in Android Studio or IntelliJ.
Regardless of whether you choose to use an IDE or the command line along with your preferred editor, the new Flutter application template gives you a good starting point for an application.
The application brings in the flutter/material.dart package to offer some basic scaffolding for the app, such as a title bar, material icons and theming. It also sets up a stateful widget to demonstrate how to update the user interface when application state changes.
Tooling Options
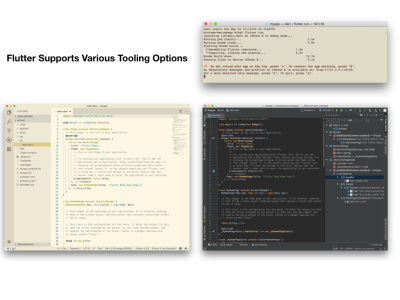
Flutter offers incredible flexibility with regard to tooling. Applications can just as easily be developed from the command line along with any editor, as they can be from a supported IDE like VS Code, Android Studio, or IntelliJ. The approach to take depends largely on developer preference.
Android Studio offers the most features, such as a Flutter Inspector to analyze the widgets of a running application and well as monitor application performance. It also offers several refactorings that are convenient when developing a widget hierarchy.
VS Code offers a lighter development experience in that it tends to start faster than Android Studio/IntelliJ. Each IDE offers built-in editing helpers, such as code completion, allowing exploration of various APIs as well as good debugging support.
The command line is also well supported through the flutter command, which makes it easy to create, update and launch an application without any other tooling dependency beyond an editor.
Hot Reloading
Regardless of tooling, Flutter maintains excellent support for hot reloading of an application. This allows a running application to be modified in many cases, maintaining state, without having to stop the app, rebuild and redeploy.
Hot reload dramatically increases development efficiency by allowing quicker iteration. It really makes the platform a pleasure to work with.
Testing
Flutter includes a WidgetTester utility to interact with widgets from a test. The new application template includes a sample test to demonstrate how to use it when authoring a test, as shown below:
// Test included with the new Flutter application template

import 'package:flutter/material.dart';
import 'package:flutter_test/flutter_test.dart';

import 'package:myapp/main.dart';

void main() {
  testWidgets('Counter increments smoke test', (WidgetTester tester) async {
    // Build our app and trigger a frame.
    await tester.pumpWidget(new MyApp());

    // Verify that our counter starts at 0.
    expect(find.text('0'), findsOneWidget);
    expect(find.text('1'), findsNothing);

    // Tap the '+' icon and trigger a frame.
    await tester.tap(find.byIcon(Icons.add));
    await tester.pump();

    // Verify that our counter has incremented.
    expect(find.text('0'), findsNothing);
    expect(find.text('1'), findsOneWidget);
  });
}
Using Packages And Plugins
Flutter is just beginning, but there is already a rich developer ecosystem: A plethora of packages and plugins are already available for developers.
To add a package or plugin, simply include the dependency in the pubspec.yaml file at the application’s root directory. Then run flutter packages get either from the command line or through the IDE, and Flutter’s tooling will bring in all the required dependencies.
For example, to use the popular image picker plugin for Flutter, the pubspec.yaml need only list it as a dependency like so:
dependencies:
  image_picker: "^0.4.1"
Then running flutter packages get brings in everything you need to make use of it, after which it can be imported and used in Dart:
import 'package:image_picker/image_picker.dart';
Widgets
Everything in Flutter is a widget. This includes user interface elements, such as ListView, TextBox, and Image, as well as other portions of the framework, including layout, animation, gesture recognition, and themes, to name just a few.
By having everything be a widget, the entire application, which incidentally is also a widget, can be represented within the widget hierarchy. Having an architecture where everything is a widget makes it clear where certain attributes and behavior applied to a portion of an app are coming from. This is different from most other application frameworks, which associate properties and behavior inconsistently, sometimes attaching them from other components in a hierarchy and other times on the control itself.
Simple UI Widget Example
The entry point to a Flutter application is the main function. To put a widget for a user interface element on the screen, in main() call runApp() and pass it the widget that will serve as the root of the widget hierarchy.
import 'package:flutter/material.dart';

void main() {
  runApp(
    Container(color: Colors.lightBlue)
  );
}
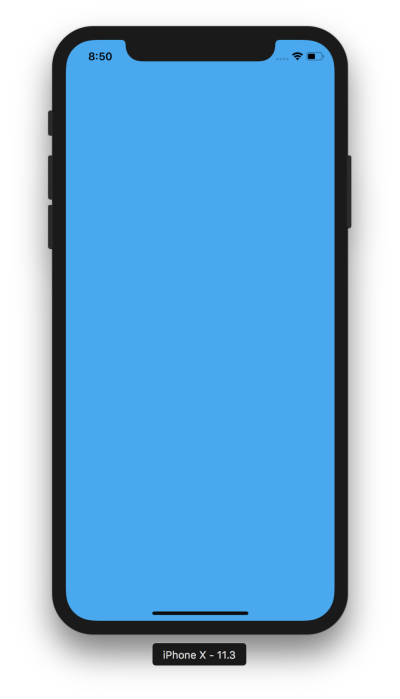
This results a light blue Container widget that fills the screen:
Stateless Vs. Stateful Widgets
Widgets come in two flavors: stateless and stateful. Stateless widgets don’t change their content after they are created and initialized, whereas stateful widgets maintain some state that can change while running the application, e.g. in response to user interaction.
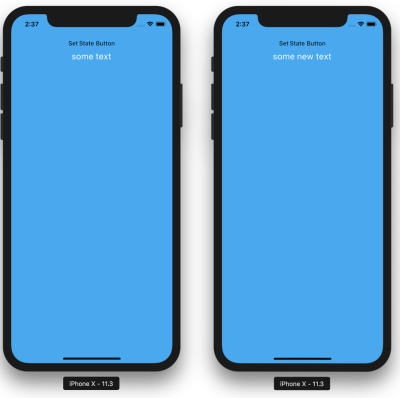
In this example, a FlatButton widget and Text widget are drawn to the screen. The Text widget starts out with some default String for its state. Pressing the button results in a state change that will cause the Text widget to be updated, displaying a new String.
To encapsulate a widget create a class that derives from either StatelessWidget or StatefulWidget. For example, the light blue Container could be written as follows:
class MyWidget extends StatelessWidget {
  @override
  Widget build(BuildContext context) {
    return Container(color: Colors.lightBlue);
  }
}
Flutter will call the widget’s build method when it is inserted into the widget tree so this portion of the UI can be rendered.
For a stateful widget, derive from StatefulWidget:
class MyStatefulWidget extends StatefulWidget {

  MyStatefulWidget();

  @override
  State createState() {
    return MyWidgetState();
  }
}
Stateful widgets return a State class that is responsible for building the widget tree for a given state. When the state changes, the associated portion of the widget tree is rebuilt.
In the following code, the State class updates a String when a button is clicked:
class MyWidgetState extends State {
  String text = "some text";

  @override
  Widget build(BuildContext context) {
    return Container(
      color: Colors.lightBlue,
      child: Padding(
        padding: const EdgeInsets.all(50.0),
        child: Directionality(
          textDirection: TextDirection.ltr,
          child: Column(
            children: [
              FlatButton(
                child: Text('Set State'),
                onPressed: () {
                  setState(() {
                    text = "some new text";
                  });
                },
              ),
               Text(
                text,
                style: TextStyle(fontSize: 20.0)),
            ],
          )
        )
      )
    );
  }
}
The state is updated in a function that is passed to setState(). When setState() is called, this function can set any internal state, such as the string in this example. Then, the build method will be called, updating the stateful widget’s tree.
Also note the use of the Directionality widget to set the text direction for any widgets in its subtree that require it, such as the Text widgets. The examples here are building code from scratch, so Directionality is needed somewhere up the widget hierarchy. However, using the MaterialApp widget, such as with the default application template, sets up the text direction implicitly.
Layout
The runApp function inflates the widget to fill the screen by default. To control the widget layout, Flutter offers a variety of layout widgets. There are widgets to perform layouts that align child widgets vertically or horizontally, expand widgets to fill a particular space, limit widgets to a certain area, center them on the screen, and allow widgets to overlap each other.
Two commonly used widgets are Row and Column. These widgets perform layouts to display their child widgets horizontally (Row) or vertically (Column).
Using these layout widgets simply involves wrapping them around a list of child widgets. The mainAxisAlignment controls how the widgets are positioned along the layout axis, either centered, at the start, end, or with various spacing options.
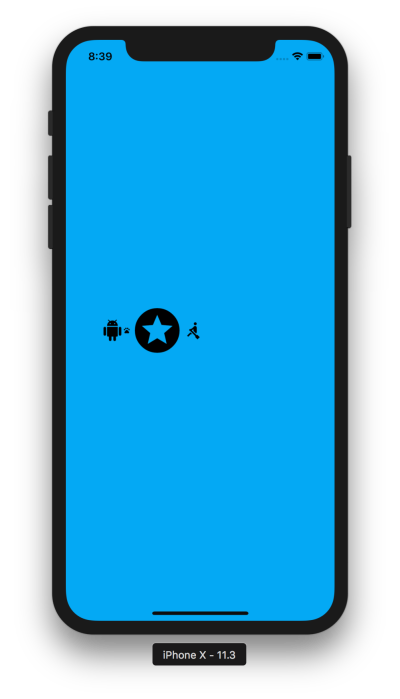
The following code shows how to align several child widgets in a Row or Column:
class MyStatelessWidget extends StatelessWidget {
  @override
  Widget build(BuildContext context) {
    return Row( //change to Column for vertical layout
      mainAxisAlignment: MainAxisAlignment.center,
      children: [
        Icon(Icons.android, size: 30.0),
        Icon(Icons.pets, size: 10.0),
        Icon(Icons.stars, size: 75.0),
        Icon(Icons.rowing, size: 25.0),
      ],
    );
  }
}
Responding To Touch
Touch interaction is handled with gestures, which are encapsulated in the GestureDetector class. Since it is also a widget, adding gesture recognition is as easy as wrapping child widgets in a GestureDetector.
For example, to add touch handling to an Icon, make it a child of a GestureDetector and set the detector’s handlers for the desired gestures to capture.
class MyStatelessWidget extends StatelessWidget {
  @override
  Widget build(BuildContext context) {
    return GestureDetector(
      onTap: () => print('you tapped the star'),
      onDoubleTap: () => print('you double tapped the star'),
      onLongPress: () => print('you long pressed the star'),
      child: Icon(Icons.stars, size: 200.0),
    );
  }
}
In this case, when a tap, double-tap, or long-press is performed on the icon, the associated text is printed:
🔥  To hot reload your app on the fly, press "r". To restart the app entirely, press "R".
An Observatory debugger and profiler on iPhone X is available at: https://127.0.0.1:8100/
For a more detailed help message, press "h". To quit, press "q".
flutter: you tapped the star
flutter: you double tapped the star
flutter: you long pressed the star
In addition to simple tap gestures, there a wealth of recognizers, for everything from panning and scaling, to dragging. These make it very easy to build interactive applications.
Painting
Flutter also offers a variety of widgets to paint with including ones that modify opacity, set clipping paths, and apply decorations. It even supports custom painting through the CustomPaint widget, and the associated CustomPainter and Canvas classes.
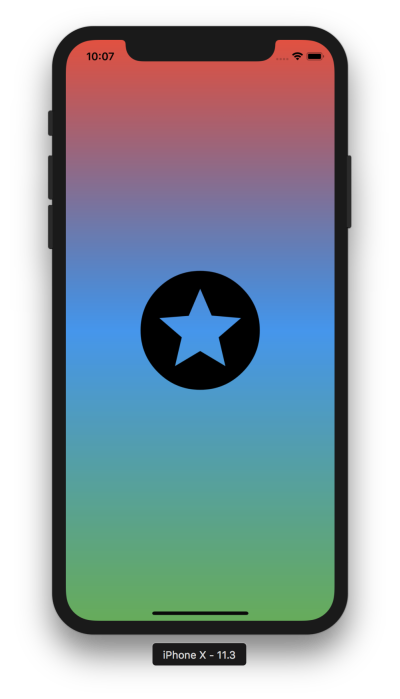
One example of a painting widget is the DecoratedBox, which can paint a BoxDecoration to the screen. The following example shows how to use this to fill the screen with a gradient fill:
class MyStatelessWidget extends StatelessWidget {
  @override
  Widget build(BuildContext context) {
    return new DecoratedBox(
      child: Icon(Icons.stars, size: 200.0),
      decoration: new BoxDecoration(
        gradient: LinearGradient(
          begin: Alignment.topCenter,
          end: Alignment.bottomCenter,
          colors: [Colors.red, Colors.blue, Colors.green],
          tileMode: TileMode.mirror
        ),
      ),
    );
  }
}
Animation
Flutter includes an AnimationController class that controls animation playback over time, including starting and stopping an animation, as well as varying the values to an animation. Additionally, there is an AnimatedBuilder widget that allows constructing an animation in conjunction with an AnimationController.
Any widget, such as the decorated star shown earlier, can have its properties animated. For example, refactoring the code to a StatefulWidget, since animating is a state change, and passing an AnimationController to the State class allows the animated value to be used as the widget is built.
class StarWidget extends StatefulWidget {
  @override
  State createState() {
    return StarState();
  }
}

class StarState extends State with SingleTickerProviderStateMixin {
  AnimationController _ac;
  final double _starSize = 300.0;

   @override
  void initState() {
    super.initState();

    _ac = new AnimationController(
      duration: Duration(milliseconds: 750),
      vsync: this,
    );
    _ac.forward();
  }

  @override
  Widget build(BuildContext context) {

    return new AnimatedBuilder(
      animation: _ac,
      builder: (BuildContext context, Widget child) {
        return DecoratedBox(
          child: Icon(Icons.stars, size: _ac.value * _starSize),
          decoration: BoxDecoration(
            gradient: LinearGradient(
              begin: Alignment.topCenter,
              end: Alignment.bottomCenter,
              colors: [Colors.red, Colors.blue, Colors.green],
              tileMode: TileMode.mirror
            ),
          ),
        );
      }
   );
  }
}
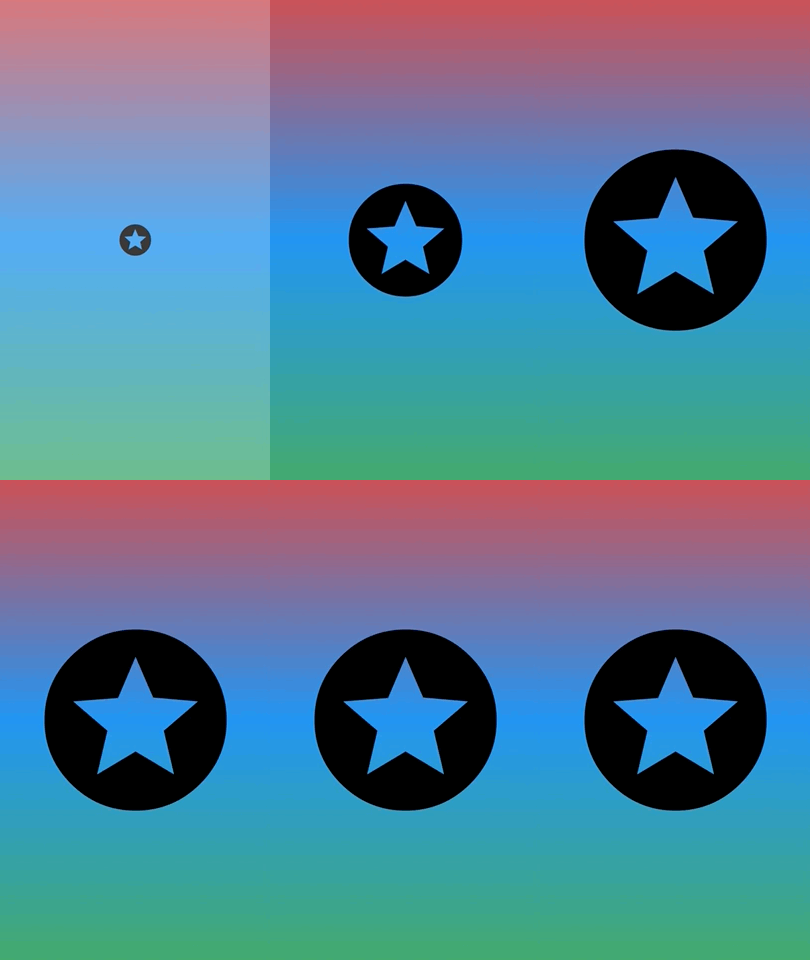
In this case, the value is used to vary the size of the widget. The builder function is called whenever the animated value changes, causing the size of the star to vary over 750 ms, creating a scale in effect:
Using Native Features
Platform Channels
In order to provide access to native platform APIs on Android and iOS, a Flutter application can use platform channels. These allow Flutter Dart code to send messages to the hosting iOS or Android application. Many of the open-source plugins that are available are built using messaging over platform channels. To learn how to work with platform channels, the Flutter documentation includes a good document that demonstrates accessing native battery APIs.
Conclusion
Even in beta, Flutter offers a great solution for building cross-platform applications. With its excellent tooling and hot reloading, it brings a very pleasant development experience. The wealth of open-source packages and excellent documentation make it easy to get started with. Looking forward, Flutter developers will be able to target Fuchsia in addition to iOS and Android. Considering the extensibility of the engine’s architecture, it wouldn’t surprise me to see Flutter land on a variety of other platforms as well. With a growing community, it’s a great time to jump in.
Next Steps
Further Reading
- Using CSCS Scripting Language For Cross-Platform Development
- The End Of My Gatsby Journey
- An Introduction To React With Ionic
- Solving Common Cross-Platform Issues When Working With Flutter


 Devs love Storyblok - Learn why!
 How To Measure UX and Design Impact, 8h video + UX training
 Register For Free
 Get a Free Trial
 JavaScript Form Builder — Create JSON-driven forms without coding.

